SpringBoot+webSocket+Vue设置后台向前端推送消息
应用场景介绍:
在页面的数据需要实时刷新的时候,或者在页面需要接收后台的消息时候,如果采用前端轮询会造成资源占用较大,并且数据刷新也是不及时的,比如当我后台在监听MQ的消息时候,当从MQ监听到消息后我需要将MQ消息推送到前端实时展示,这时候就需要用到webSocket了。
1.首先搭建一个SpringBoot的项目,这里我就不重复了,然后引入jar包
<!-- WebSocket --><dependency><groupId>org.springframework.boot</groupId><artifactId>spring-boot-starter-websocket</artifactId><version>2.1.0.RELEASE</version></dependency>
2、编写websocketConfig配置类
import org.springframework.context.annotation.Bean;import org.springframework.context.annotation.Configuration;import org.springframework.web.socket.server.standard.ServerEndpointExporter;/*** @Author dingchengxiang* @Description //TODO WebSocket配置类* @Date 15:53 2019/11/11* @Param* @return**/@Configurationpublic class WebSocketConfig {@Beanpublic ServerEndpointExporter serverEndpointExporter(){return new ServerEndpointExporter();}}
3.websocket的实现类
import lombok.extern.slf4j.Slf4j;import org.springframework.stereotype.Component;import javax.websocket.*;import javax.websocket.server.PathParam;import javax.websocket.server.ServerEndpoint;import java.io.IOException;import java.util.concurrent.CopyOnWriteArraySet;@Component@ServerEndpoint("/push/websocket")@Slf4jpublic class WebSocketServer {//静态变量,用来记录当前在线连接数。应该把它设计成线程安全的。private static int onlineCount = 0;//concurrent包的线程安全Set,用来存放每个客户端对应的MyWebSocket对象。private static CopyOnWriteArraySet<WebSocketServer> webSocketSet = new CopyOnWriteArraySet<WebSocketServer>();//与某个客户端的连接会话,需要通过它来给客户端发送数据private Session session;//接收sidprivate String sid="";/*** 连接建立成功调用的方法*/@OnOpenpublic void onOpen(Session session,@PathParam("sid") String sid) {this.session = session;webSocketSet.add(this); //加入set中addOnlineCount(); //在线数加1log.info("有新窗口开始监听:"+sid+",当前在线人数为" + getOnlineCount());this.sid=sid;/*try {sendMessage(JSON.toJSONString(RestResponse.success()));} catch (IOException e) {log.error("websocket IO异常");}*/}/*** 连接关闭调用的方法*/@OnClosepublic void onClose() {webSocketSet.remove(this); //从set中删除subOnlineCount(); //在线数减1log.info("有一连接关闭!当前在线人数为" + getOnlineCount());}/*** 收到客户端消息后调用的方法** @param message 客户端发送过来的消息*/@OnMessagepublic void onMessage(String message, Session session) {//log.info("收到来自窗口"+sid+"的信息:"+message);if("heart".equals(message)){try {sendMessage("heartOk");} catch (IOException e) {e.printStackTrace();}}}/**** @param session* @param error*/@OnErrorpublic void onError(Session session, Throwable error) {log.error("发生错误");error.printStackTrace();}/*** 实现服务器主动推送*/public void sendMessage(String message) throws IOException {this.session.getBasicRemote().sendText(message);}/*** 群发自定义消息* */public static void sendInfo(String message) throws IOException {for (WebSocketServer item : webSocketSet) {try {//这里可以设定只推送给这个sid的,为null则全部推送// if(sid==null) {item.sendMessage(message);log.info("推送消息到窗口"+item.sid+",推送内容:"+message);// }else if(item.sid.equals(sid)){// item.sendMessage(message);// }} catch (IOException e) {continue;}}}public static synchronized int getOnlineCount() {return onlineCount;}public static synchronized void addOnlineCount() {WebSocketServer.onlineCount++;}public static synchronized void subOnlineCount() {WebSocketServer.onlineCount--;}}
4、新增一个控制层接口作为测试接口能够调用的
/*** @Author dingchengxiang* @Description //TODO 测试websocket发送消息* @Date 14:41 2019/11/12* @Param []* @return java.lang.String**/@PostMapping("/sendAllWebSocket")public String test() {String text="你们好!这是websocket群体发送!";try {webSocketServer.sendInfo(text);}catch (IOException e){e.printStackTrace();}return text;}
此处需要注意一下,后台可能与拦截需要将接口放开,本人是在shiroConfig中进行设置

5、编写前端vue的代码
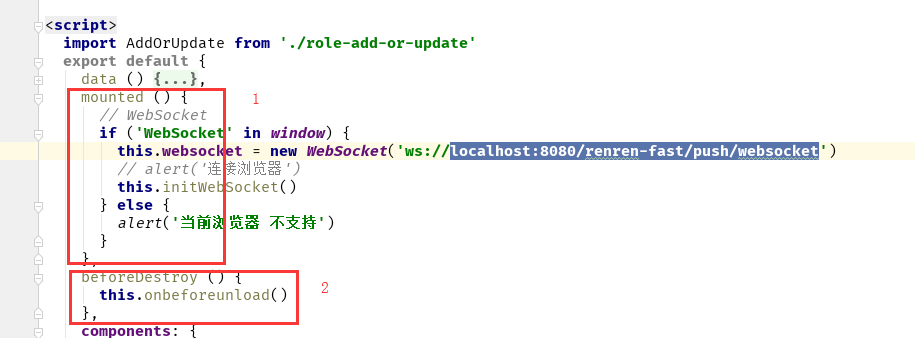
先在这两处添加,
mounted () {// WebSocketif ('WebSocket' in window) {this.websocket = new WebSocket('ws://localhost:8080/自己的项目地址/push/websocket')// alert('连接浏览器')this.initWebSocket()} else {alert('当前浏览器 不支持')}},beforeDestroy () {this.onbeforeunload()},
然后在方法中编写具体实现
methods: {initWebSocket () {// 连接错误this.websocket.onerror = this.setErrorMessage// 连接成功this.websocket.onopen = this.setOnopenMessage// 收到消息的回调this.websocket.onmessage = this.setOnmessageMessage// 连接关闭的回调this.websocket.onclose = this.setOncloseMessage// 监听窗口关闭事件,当窗口关闭时,主动去关闭websocket连接,防止连接还没断开就关闭窗口,server端会抛异常。window.onbeforeunload = this.onbeforeunload},setErrorMessage () {console.log('WebSocket连接发生错误 状态码:' + this.websocket.readyState)},setOnopenMessage () {console.log('WebSocket连接成功 状态码:' + this.websocket.readyState)},setOnmessageMessage (event) {// 根据服务器推送的消息做自己的业务处理console.log('服务端返回:' + event.data)},setOncloseMessage () {console.log('WebSocket连接关闭 状态码:' + this.websocket.readyState)},onbeforeunload () {this.closeWebSocket()},closeWebSocket () {this.websocket.close()}}
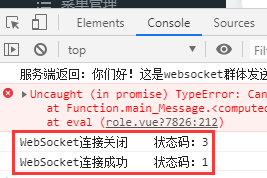
这个时候启动我们就可以看到效果了,页面控制台打印的值
后台控制台打印的值

到这一步基本的就已经实现了,但是我们现在要加入中间件MQ监听到消息后进行消息返回,那么还需要下面几步,
6、MQ我在这个demo中没有集成,我就用一个定时任务来模拟MQ监听到消息以后的处理步骤。
新建一个Task类
/*** @Author dingchengxiang* @Description //TODO 消息定时器,通知websocket* @Date 14:56 2019/11/12* @Param* @return**/@Componentpublic class Task {@Autowiredprivate WebSocketServer webSocketServer;/*** @throws Exception*/@Scheduled(cron="0/5 * * * * ? ")public void JqcaseSearch() {try {System.out.println("这是心跳");webSocketServer.sendInfo("主动推送消息");} catch (Exception e) {e.printStackTrace();}}}
这么设置,每隔五秒,就会模拟MQ监听到一条消息,然后调用WebSocket服务的发送消息,此时我们需要在启动类上面加一个定时器注解
@SpringBootApplication@EnableSchedulingpublic class Application {public static void main(String[] args) {SpringApplication.run(RenrenApplication.class, args);}}
加上@EnableScheduling注解后定时器才会有效果
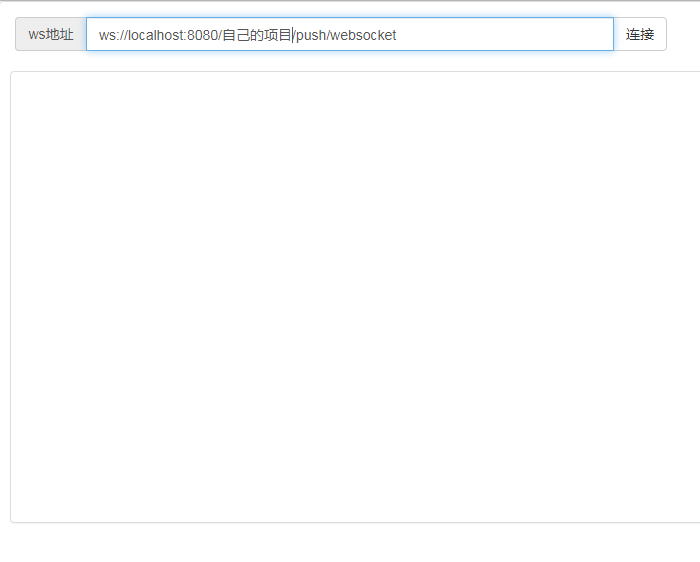
这时候我们再编写个简单的html页面来帮助我们观察
<!DOCTYPE html><html lang="en"><head><meta charset="utf-8"><meta http-equiv="X-UA-Compatible" content="IE=edge"><meta name="viewport" content="width=device-width,initial-scale=1.0"><!-- 最新版本的 Bootstrap 核心 CSS 文件 --><link rel="stylesheet" href="https://cdn.jsdelivr.net/npm/bootstrap@3.3.7/dist/css/bootstrap.min.css"integrity="sha384-BVYiiSIFeK1dGmJRAkycuHAHRg32OmUcww7on3RYdg4Va+PmSTsz/K68vbdEjh4u" crossorigin="anonymous"><title>websocket测试页面</title></head><body><div class="panel panel-default"><div class="panel-body"><div class="row"><div class="col-md-6"><div class="input-group"><span class="input-group-addon">ws地址</span><input type="text" id="address" class="form-control" placeholder="ws地址"aria-describedby="basic-addon1" value="ws://localhost:8080/自己的项目/push/websocket"><div class="input-group-btn"><button class="btn btn-default" type="submit" id="connect">连接</button></div></div></div></div><div class="row" style="margin-top: 10px;display: none;" id="msg-panel"><div class="col-md-6"><div class="input-group"><span class="input-group-addon">消息</span><input type="text" id="msg" class="form-control" placeholder="消息内容" aria-describedby="basic-addon1"><div class="input-group-btn"><button class="btn btn-default" type="submit" id="send">发送</button></div></div></div></div><div class="row" style="margin-top: 10px; padding: 10px;"><div class="panel panel-default"><div class="panel-body" id="log" style="height: 450px;overflow-y: auto;"></div></div></div></div></div><script src="https://cdn.jsdelivr.net/npm/jquery@1.12.4/dist/jquery.min.js"></script><script src="https://cdn.jsdelivr.net/npm/bootstrap@3.3.7/dist/js/bootstrap.min.js"integrity="sha384-Tc5IQib027qvyjSMfHjOMaLkfuWVxZxUPnCJA7l2mCWNIpG9mGCD8wGNIcPD7Txa"crossorigin="anonymous"></script><script type="text/javascript">$(function () {var _socket;$("#connect").click(function () {_socket = new _websocket($("#address").val());_socket.init();});$("#send").click(function () {var _msg = $("#msg").val();output("发送消息:" + _msg);_socket.client.send(_msg);});});function output(e) {var _text = $("#log").html();$("#log").html(_text + "<br>" + e);}function _websocket(address) {this.address = address;this.client;this.init = function () {if (!window.WebSocket) {this.websocket = null;return;}var _this = this;var _client = new window.WebSocket(_this.address);_client.onopen = function () {output("websocket打开");$("#msg-panel").show();};_client.onclose = function () {_this.client = null;output("websocket关闭");$("#msg-panel").hide();};_client.onmessage = function (evt) {output(evt.data);};_this.client = _client;};return this;}</script></body></html>
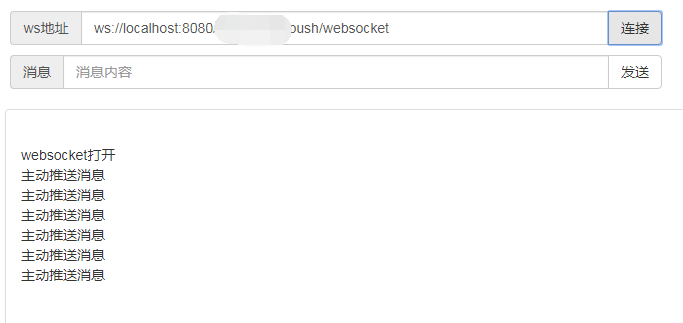
这时候启动SpringBoot,再运行html,
此时连接后我们会发现,后台会一直向页面推送消息
同时在VUE的控制台也会发现
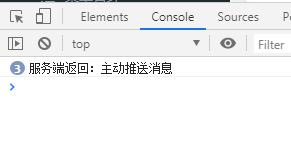
有消息产生,到此demo就结束了,我们可以利用返回的消息做数据刷新,做消息推送等。
2019年11月13日补充:
需要对列表进行推送刷新的话,有两种将数据推送的方式
1、修改发送的消息为Object类型
/*** 实现服务器主动推送*/public void sendMessage(Object message) throws Exception {this.session.getBasicRemote().sendObject(message);}
但是修改之后发现会报错

提示我没有编码类。
之后查阅一下,发现需要编码类,比较麻烦,就没有才用了
2、采用json字符串的方式发送到前端,FastJsonUtils是我自己编写的json工具类
public void JqcaseSearch() {Map<String, Object> params = new HashMap<>();params.put("t","1573630630476");params.put("page","1");params.put("limit","10");PageUtils page = sysRoleService.queryPage(params);JSONObject jsonObject = FastJsonUtils.toJsonObject(R.ok().put("page", page));try {webSocketServer.sendData(jsonObject);} catch (Exception e) {e.printStackTrace();}}
再编写调用类
/*** 自定义刷新数据* */public static void sendData(JSONObject object) throws Exception {for (WebSocketServer item : webSocketSet) {try {item.sendMessage(object.toJSONString());log.info("推送消息到窗口,推送内容:"+object);} catch (IOException e) {continue;}}
再调用主动推送的方法
/*** 实现服务器主动推送*/public void sendMessage(String message) throws Exception {/* this.session.getBasicRemote().sendObject(message);*/this.session.getBasicRemote().sendText(message);}
最后到页面将字符串转化为jsondata
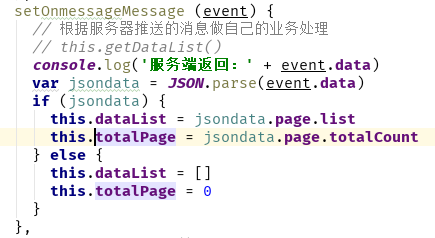
最后再根据自己的实际页面将jsondata里的数据放到到页面上去


")

、正则re.sub()")


还没有评论,来说两句吧...