使用VirtualBox在Windows PC上测试Linux
Curious about a new distribution of Linux but not wanting to do a full install or use a Live CD/DVD just to try it out? Now you can enjoy all that Linux goodness by running it “Live CD” style inside of VirtualBox.
对Linux的新发行版感到好奇,但又不想完整安装或仅使用Live CD / DVD来尝试一下? 现在,您可以通过在VirtualBox中运行“ Live CD”样式来享受Linux的所有好处。
This can be very useful to get a good look at a Linux distribution without a lot of hassle. It will also allow you to quickly and easily access your regular programs that you use on a daily basis without having to shut down/restart your computer (as opposed to using an iso file burned to a CD or DVD).
这对于在没有太多麻烦的情况下很好地了解Linux发行版非常有用。 它还使您可以快速,轻松地访问每天使用的常规程序,而不必关闭/重新启动计算机(与使用刻录到CD或DVD的iso文件相反)。
This has been set up into three sections with screenshots for each step in the process. It may look like a lot to do at first glance, but the process only takes a few minutes and then you can start having fun.
这已分为三部分,并为该过程中的每个步骤提供了屏幕截图。 乍一看可能要做很多事情,但是过程只需要几分钟,然后您就可以开始玩乐了。
Note: The Linux distribution used in our example is Dream Linux 3.5 (Gnome Desktop) and the version of VirtualBox shown in this article is 3.0.0.49051 Beta 2 running on Vista SP2. All links are provided at the bottom of the article.
注意:本示例中使用的Linux发行版是Dream Linux 3.5(Gnome桌面),本文中显示的VirtualBox的版本是在Vista SP2上运行的3.0.0.49051 Beta 2。 所有链接均在文章底部提供。
Getting Started
入门
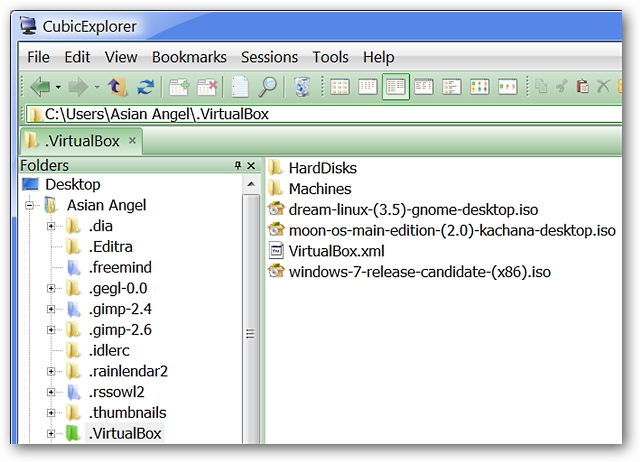
Now that you have the iso file for the Linux distribution you want to try downloaded, a good location to place it in is in the “.VirtualBox” folder. As you can see, the home folders for your HardDisks and Machines are located here. You may also choose to use a different “home folder” to store your iso files in.
现在,您已经具有要下载的Linux发行版的iso文件,可以将其放置在“ .VirtualBox”文件夹中。 如您所见,硬盘和计算机的主文件夹位于此处。 您也可以选择使用其他“主文件夹”来存储iso文件。
Note: When you are setting up your Linux distro for testing, keep in mind that any system resources (i.e. RAM) that you allocate for your virtual operating system will be taken from your actual system’s resources while you are running it in VirtualBox.
注意:设置Linux发行版进行测试时,请记住,在VirtualBox中运行时,分配给虚拟操作系统的所有系统资源(即RAM)都将从实际系统的资源中获取。
Once you have the iso file all settled in, start VirtualBox up and click on the “New” button in the main window.
将iso文件全部放入后,启动VirtualBox并单击主窗口中的“新建”按钮。

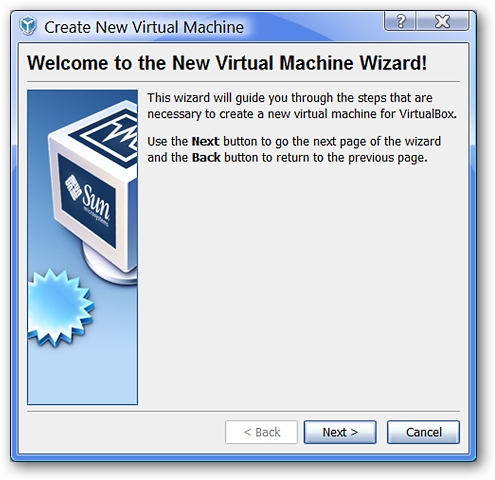
This is the first window you will see when you start the process of setting up a new Virtual Machine. Click “Next”.
这是开始设置新虚拟机过程中将看到的第一个窗口。 点击下一步”。
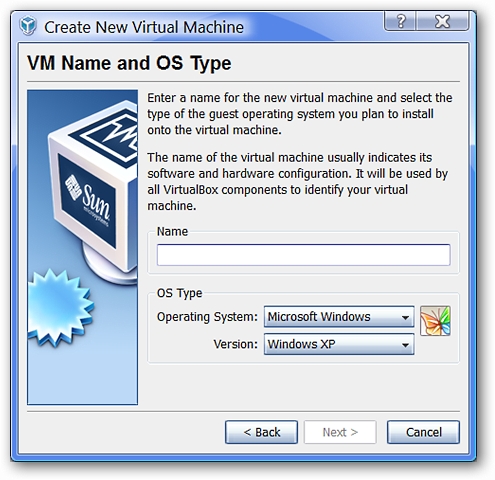
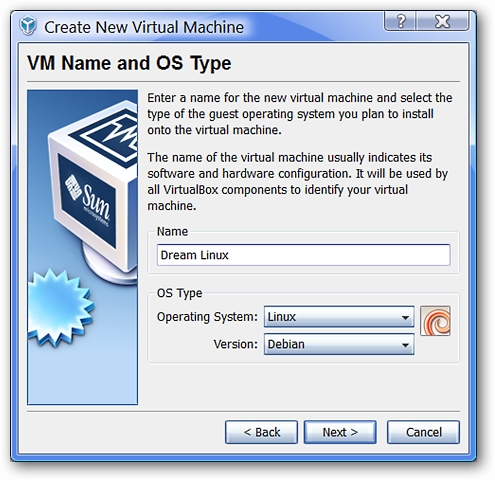
As you can see, the default settings displayed are “Microsoft Windows” and “Windows XP”.
如您所见,显示的默认设置为“ Microsoft Windows”和“ Windows XP”。
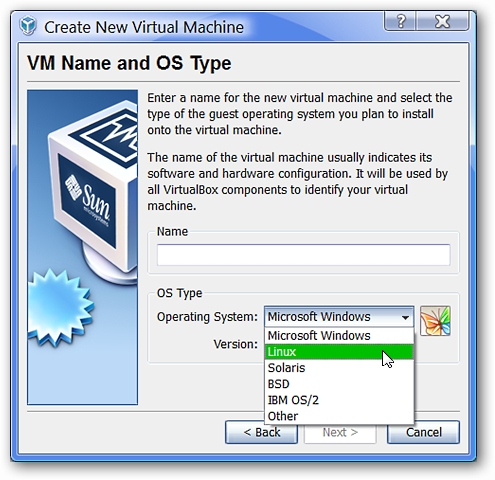
The first thing to do is select the type of “Operating System” that you want to set up. Since we are setting up a Linux distribution in our example, “Linux” has been selected. Notice the variety of choices available.
首先要做的是选择要设置的“操作系统”的类型。 由于我们在示例中设置了Linux发行版,因此选择了“ Linux”。 请注意可用的各种选择。
Once you have selected “Linux”, you will notice that there is a good selection to choose from for “Version”. Since Dream Linux is based on Debian, that has been chosen.
选择“ Linux”后,您会注意到“ Version”有一个不错的选择。 由于Dream Linux基于Debian,因此已被选择。
Note: You may also choose to list your particular Linux distribution version as “Other”.
注意:您也可以选择将特定的Linux发行版本列为“其他”。

Next you can be as creative as you want in naming your Virtual Machine. Choose what works best for you. Here we have chosen to name ours “Dream Linux”. Click “Next”.
接下来,您可以在命名虚拟机时发挥自己的创造力。 选择最适合您的产品。 在这里,我们选择命名为“ Dream Linux”。 点击下一步”。
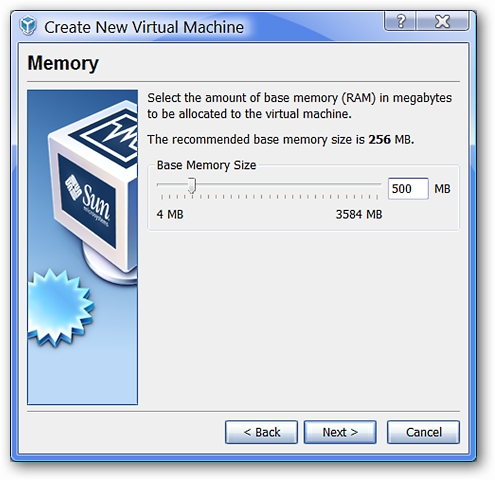
In this window you will be asked to choose the amount of RAM you want to allocate for your Linux distribution. The default is 256 MB for Linux, but here it has been raised to 500 MB. You are free to leave it set as the default of 256 MB or adjust to suit your preferences. Click “Next”.
在此窗口中,将要求您选择要为Linux发行版分配的RAM数量。 对于Linux,默认值为256 MB,但在此已提高到500 MB。 您可以随意将其设置为默认值256 MB,也可以根据自己的喜好进行调整。 点击下一步”。
In this window, you will not need to make any changes to the default selections shown. Click “Next”.
在此窗口中,您无需对显示的默认选择进行任何更改。 点击下一步”。
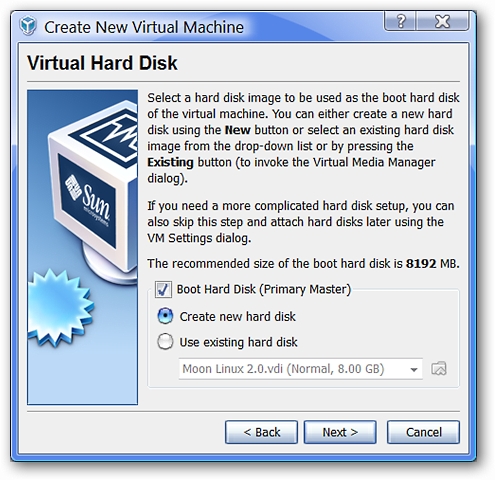
Once you reach this window, you will start the process of setting up a new Virtual Hard Disk for your Linux system. Click “Next”.
到达此窗口后,将开始为Linux系统设置新的虚拟硬盘的过程。 点击下一步”。
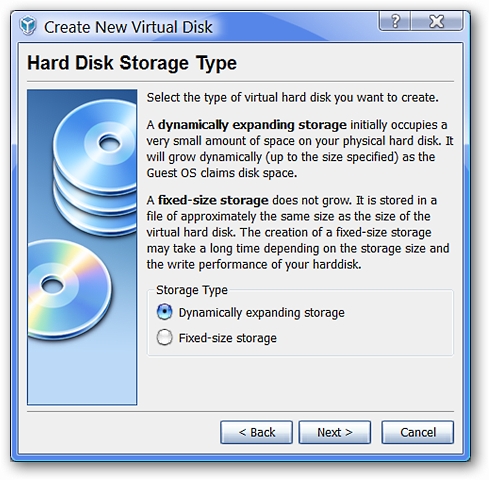
Here you can see the two choices available for Hard Disk type. The default is “Dynamically expanding storage” and this is the one that you want to use. Click “Next”.
在这里,您可以看到硬盘类型的两个选择。 默认值为“动态扩展存储”,这是您要使用的存储。 点击下一步”。
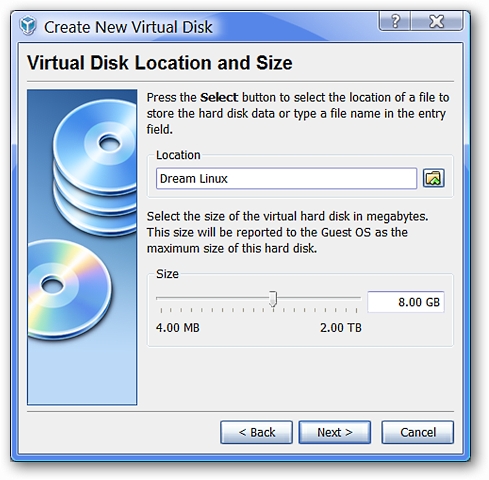
Here you may adjust the maximum size that you want to allow for your Virtual Hard Disk. The default is “8 GB” and has not been altered for our example. Click “Next”.
在这里,您可以调整要允许虚拟硬盘使用的最大大小。 默认值为“ 8 GB”,在我们的示例中未更改。 点击下一步”。
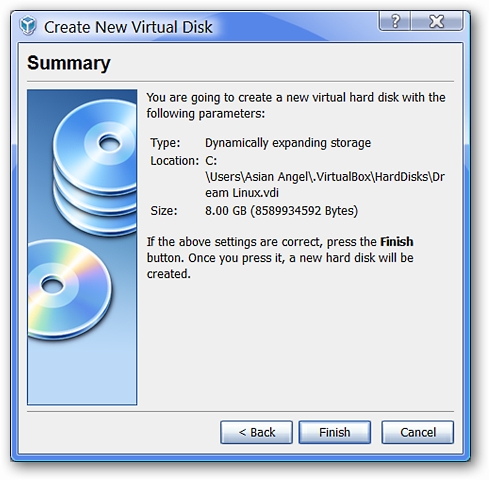
The final summary window for the Virtual Hard Disk that you have just created. Click “Finish”.
您刚刚创建的虚拟硬盘的最终摘要窗口。 点击“完成”。
Followed by the final summary window for the Virtual Machine that you have created for your Linux system.
随后是为Linux系统创建的虚拟机的最终摘要窗口。
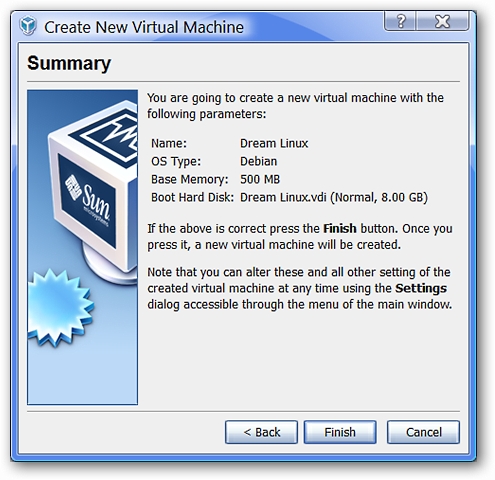
That has your new Virtual Machine and Virtual Hard Disk set up. Clicking on “Finish” will return you to the Main Window.
这样就设置了新的虚拟机和虚拟硬盘。 单击“完成”将返回到主窗口。
Adjusting the Settings
调整设定
Now you can see Dream Linux listed in the O.S. selection portion of the Main Window. Notice that you can see the settings already displaying on the right side. But there are a few settings that still need to be adjusted.
现在,您可以在主窗口的OS选择部分中看到列出的Dream Linux。 请注意,您可以看到已经在右侧显示的设置。 但是有些设置仍然需要调整。
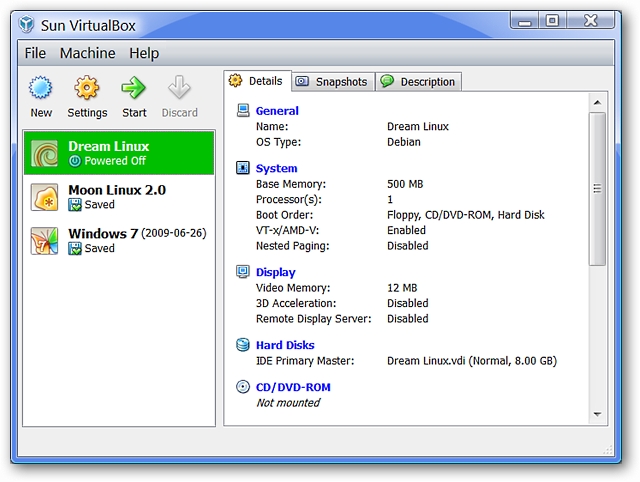
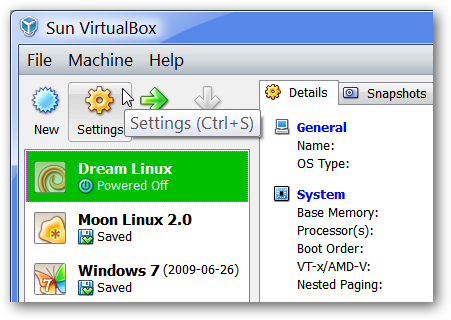
Click on the name of your new Linux system in the left side of the Main Window to select it and then click on the “Settings” button at the top.
在主窗口左侧单击新Linux系统的名称以将其选中,然后单击顶部的“设置”按钮。
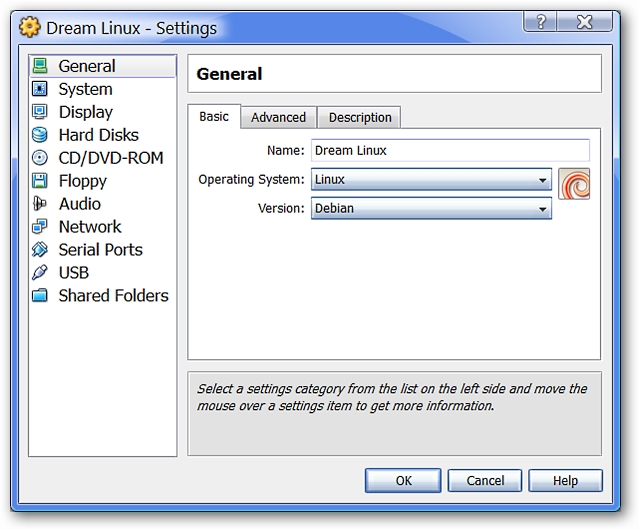
Now that you have the Settings Window open, it is time to make a few changes. Here you can see basic information about your Linux system.
现在您已打开“设置”窗口,是时候进行一些更改了。 在这里,您可以查看有关Linux系统的基本信息。
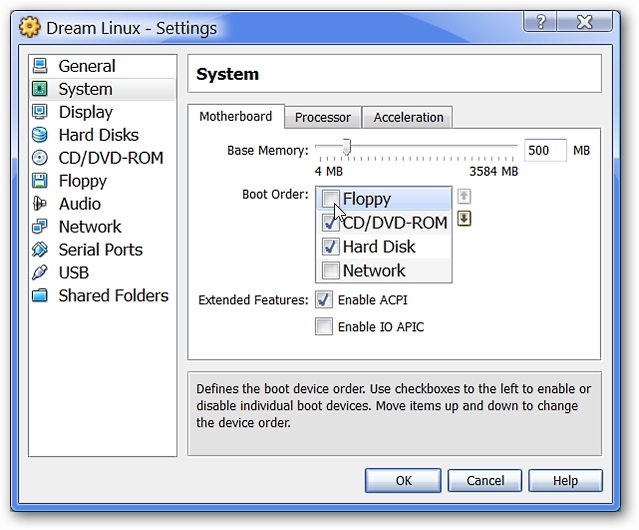
Select the “System” category. Since it is unlikely that you will be using a Floppy Drive, go ahead and deselect it so that it is not included in the Boot Process.
选择“系统”类别。 由于您不太可能使用软盘驱动器,因此请继续对其进行取消选择,以使其不包含在引导过程中。
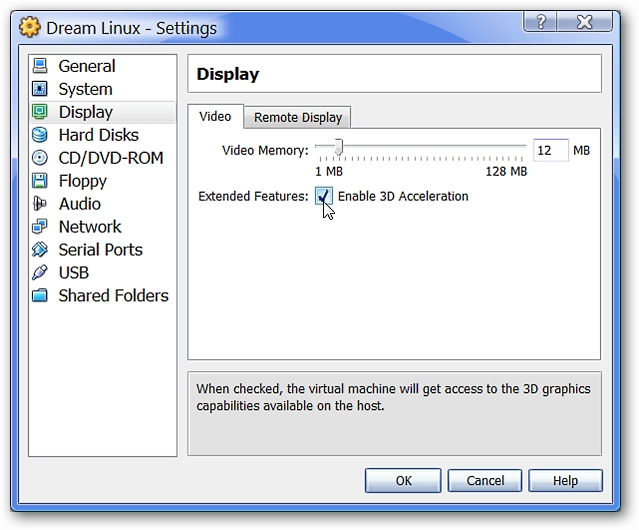
Select the “Display” category. For our example, “Enable 3D Acceleration” has been selected. You may also adjust the amount of “Video Memory” allocated for your Linux system to use while running. The default is “12 MB” and has not been changed here.
选择“显示”类别。 对于我们的示例,已选择“启用3D加速”。 您还可以调整分配给Linux系统在运行时使用的“视频内存”量。 默认值为“ 12 MB”,此处未更改。
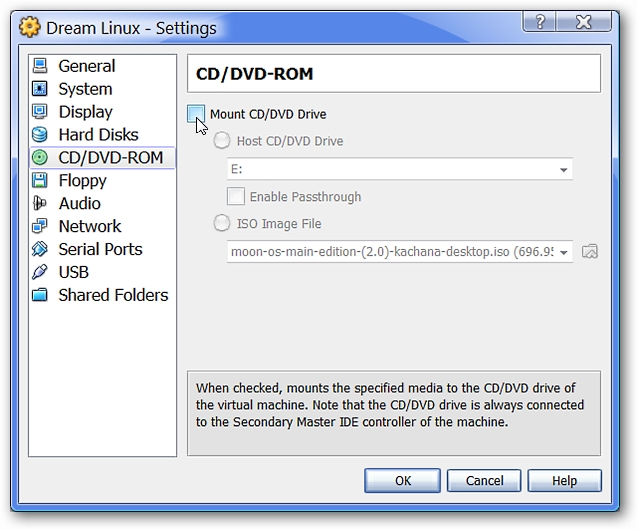
Since you will be running the iso file as a “Live CD”, select the “CD/DVD-ROM” category. Select “Mount CD/DVD Drive”.
由于您将iso文件作为“ Live CD”运行,因此请选择“ CD / DVD-ROM”类别。 选择“安装CD / DVD驱动器”。
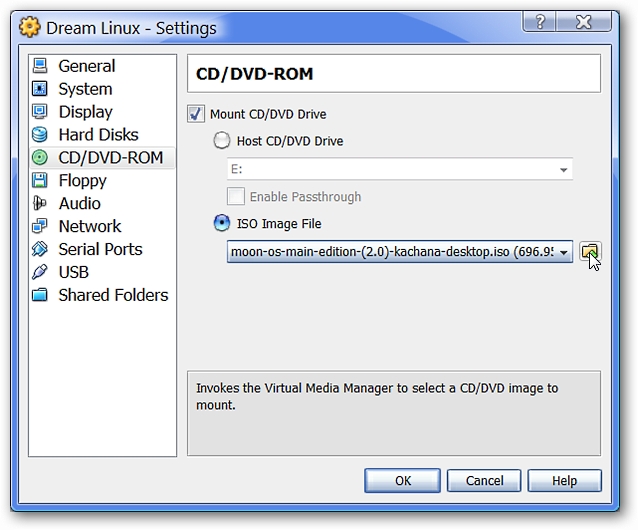
Once you have that selected, make certain to select “ISO Image File” and then click on the folder icon on the right side. This will allow you to browse for the Linux iso file you are wanting to use.
选择之后,确定选择“ ISO Image File”,然后单击右侧的文件夹图标。 这将允许您浏览要使用的Linux iso文件。
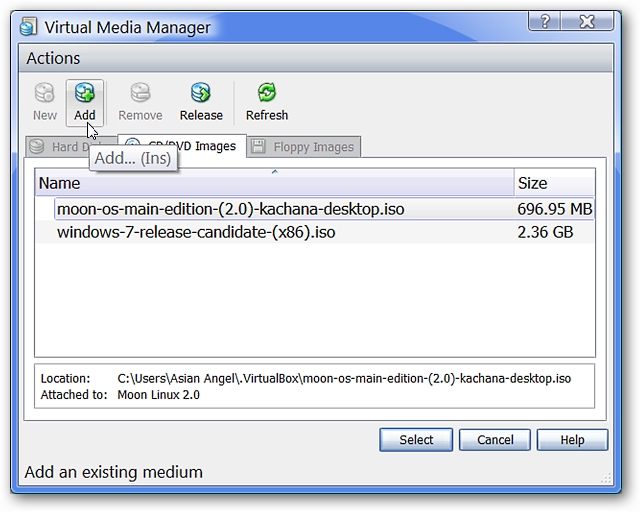
Clicking on the folder icon shown above will open the Virtual Media Manager Window. Here only the two previously set up/used iso files are showing in our example, so the new Linux iso file will need to be added to the list. Click on “Add” to open a browsing window.
单击上面显示的文件夹图标将打开“虚拟媒体管理器”窗口。 在此示例中,这里仅显示两个先前设置/使用的iso文件,因此需要将新的Linux iso文件添加到列表中。 单击“添加”以打开浏览窗口。
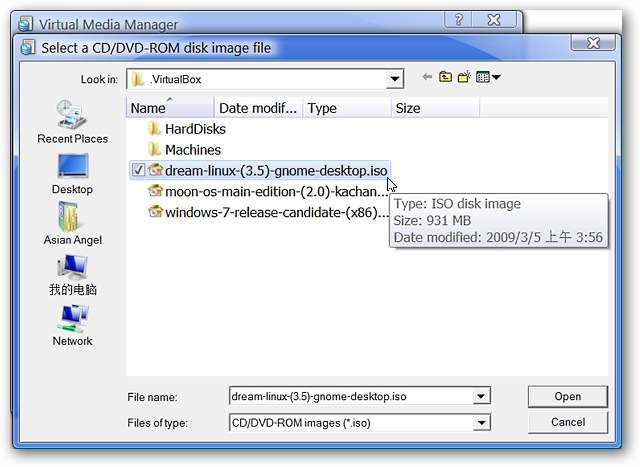
Browse to the home folder that you are using to store your iso files in (in our example the .VirtualBox folder). Select the iso file that you want to use and click “Open”.
浏览到用于存储ISO文件的主文件夹(在我们的示例中为.VirtualBox文件夹)。 选择您要使用的iso文件,然后单击“打开”。
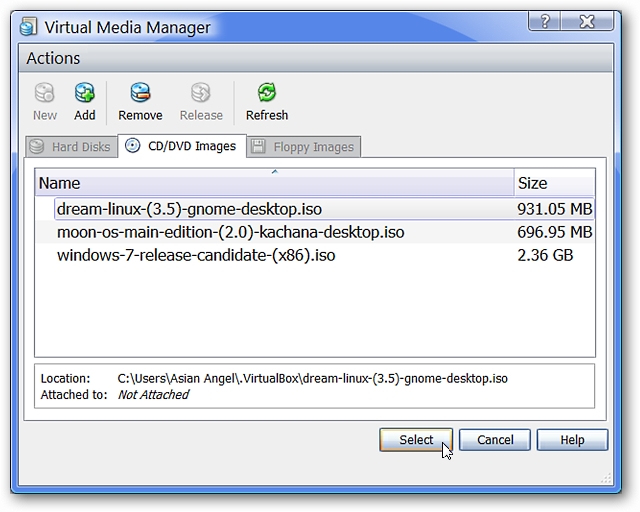
Now the new Linux iso file is in our list. Click on the iso file you need and click “Select”.
现在,新的Linux iso文件在我们的列表中。 单击所需的iso文件,然后单击“选择”。
Now the proper iso file is displaying in our Settings Window.
现在正确的iso文件将显示在“设置”窗口中。

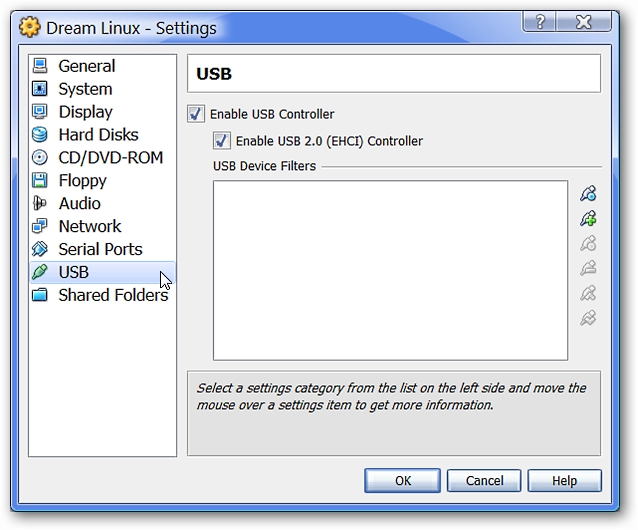
Almost finished now! If you would like to use USB/Flash Drives, select the “USB” category and make certain that “Enable USB Controller” and “Enable USB 2.0 (EHCI) Controller” are selected.
现在快完成了! 如果要使用USB /闪存驱动器,请选择“ USB”类别,并确保已选择“启用USB控制器”和“启用USB 2.0(EHCI)控制器”。
Now that all of that is sorted, click “OK” to finish the process.
现在所有这些都已排序,单击“确定”完成该过程。
Note: Since this is a way to test a Linux distribution, “Network” and “Shared Folders” settings have not been altered/setup.
注意:由于这是测试Linux发行版的一种方法,因此“网络”和“共享文件夹”设置尚未更改/设置。
Start Your Systems
启动系统
Looking at the Main Window you can see the effect of any changes you have made to the Settings for your new Linux system.
在主窗口中,您可以看到对新Linux系统的“设置”所做的任何更改的影响。
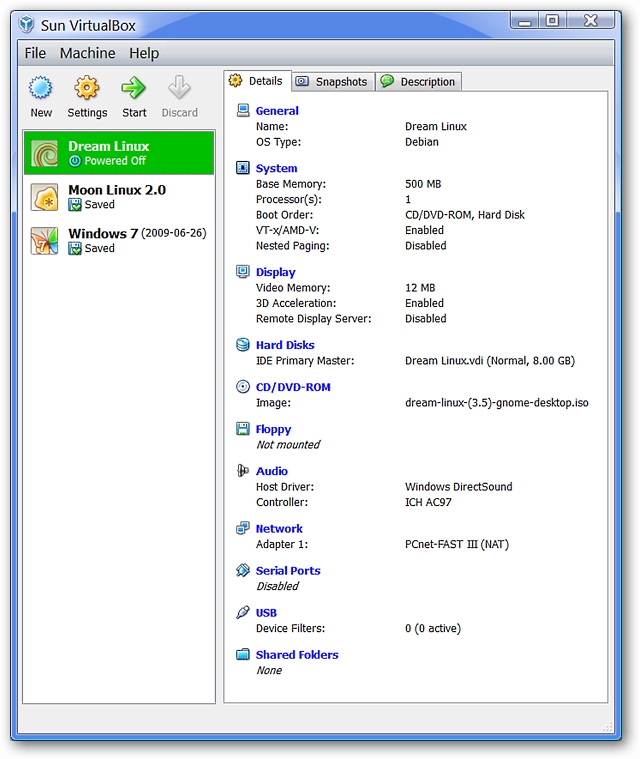
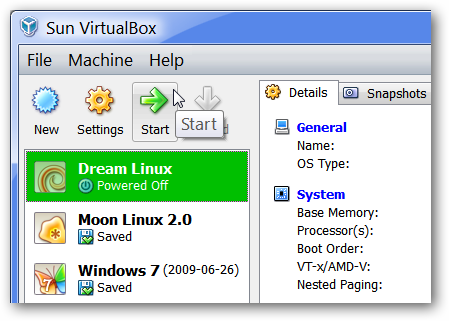
Now comes the fun part! Select your new Linux system on the left side and click “Start”.
有趣的来了! 在左侧选择新的Linux系统,然后单击“开始”。
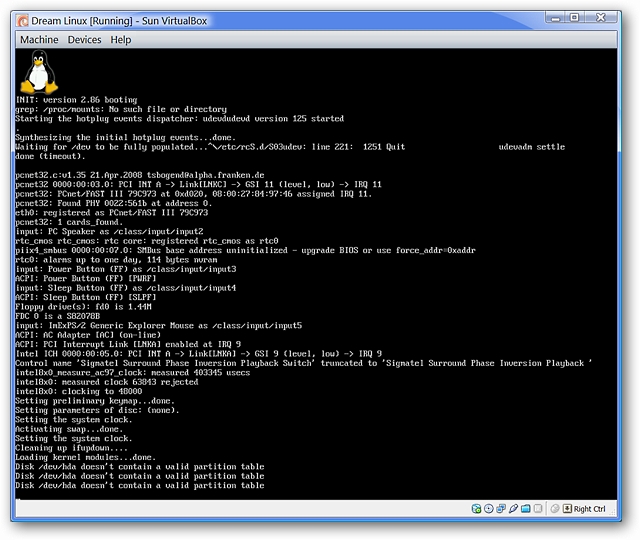
Start up time for each Linux distribution will vary depending on which one you are using. Here you can see the start up process for our example.
每个Linux发行版的启动时间将根据所使用的发行版而有所不同。 在这里,您可以看到我们示例的启动过程。
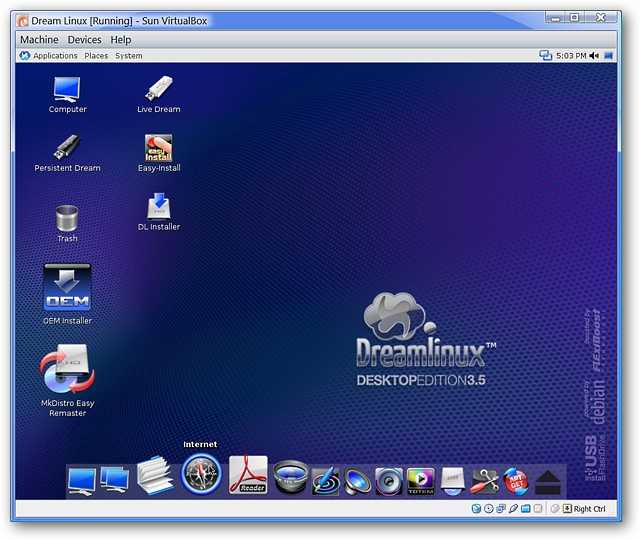
And there it is! Now you can really start trying out your new Linux system by checking for updates, making changes, installing/uninstalling programs or whatever your heart desires.
在那里! 现在,您可以通过检查更新,进行更改,安装/卸载程序或任何您想要的东西,真正开始尝试新的Linux系统。
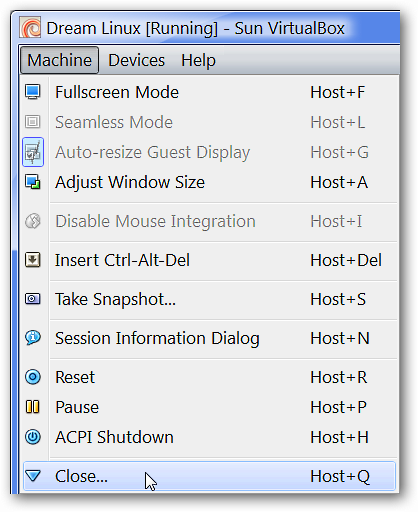
After you have finished using your new Linux system for a bit, all that you have to do to shut it down is hit the “Right Ctrl” key on your keyboard (unless you have set a different key to use to escape the virtual window), and go to the Machine Menu to select “Close”.
稍微使用完新的Linux系统后,只需按键盘上的“ Right Ctrl”键即可将其关闭,除非您设置了其他键来退出虚拟窗口。 ,然后进入机器菜单选择“关闭”。
Note: You can also create a Snapshot to save the changes and alterations you have made to your Linux system using this menu.
注意:您也可以使用此菜单创建快照以保存对Linux系统所做的更改和更改。
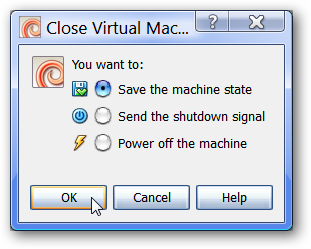
Once you have started the shut down process, there is no need to lose any of the changes you have made (since the last Snapshot or if you have not made any Snapshots yet). Be certain that “Save the machine state” is selected and click “OK”. The next time you start your Linux system up, it will return you to where you were when you shut everything down (i.e. Desktop, etc.).
一旦开始关闭过程,就无需丢失所做的任何更改(自上一个快照以来,或者尚未创建任何快照)。 确定已选择“保存机器状态”,然后单击“确定”。 下次启动Linux系统时,它将使您回到关闭所有设备(例如台式机等)时的状态。
Conclusion
结论
You can have a lot of fun trying out different Linux distributions with this method and if you happen to not like a particular distribution, then it is easy to delete the profile for that system from your VirtualBox set up. Have fun!
使用这种方法尝试不同的Linux发行版可能会很有趣,如果您碰巧不喜欢某个特定的发行版,那么很容易从VirtualBox设置中删除该系统的配置文件。 玩得开心!
Links
链接
Download VirtualBox (version 3.0)
下载VirtualBox(3.0版)
See the Operating Systems that run in VirtualBox
查看在VirtualBox中运行的操作系统
Download Dream Linux 3.5 (Gnome & XFCE versions)
下载Dream Linux 3.5(Gnome和XFCE版本)
翻译自: https://www.howtogeek.com/howto/2128/use-virtualbox-to-test-linux-on-your-windows-pc/


")


还没有评论,来说两句吧...