SpringSecurity--SpringBoot基本配置
SpringSecurity的基本配置
SpringBoot针对SpringSecurity提供了自动化配置方案,因此可以使SpringSecurity非常容易地整合进SpringBoot项目中,这也是在SpringBoot项目中使用SpringSecurity的优势。
基本用法
创建项目,添加依赖:
org.springframework.boot
spring-boot-starter-security
org.springframework.boot
spring-boot-starter-web
添加hello接口:
@RestController
public class HelloController {@GetMapping("/hello")public String hello(){return "Hello";}
}
启动项目测试:
访问/hello接口会自动跳转到登录页面,这个登录页面是由SpringSecutiry提供的: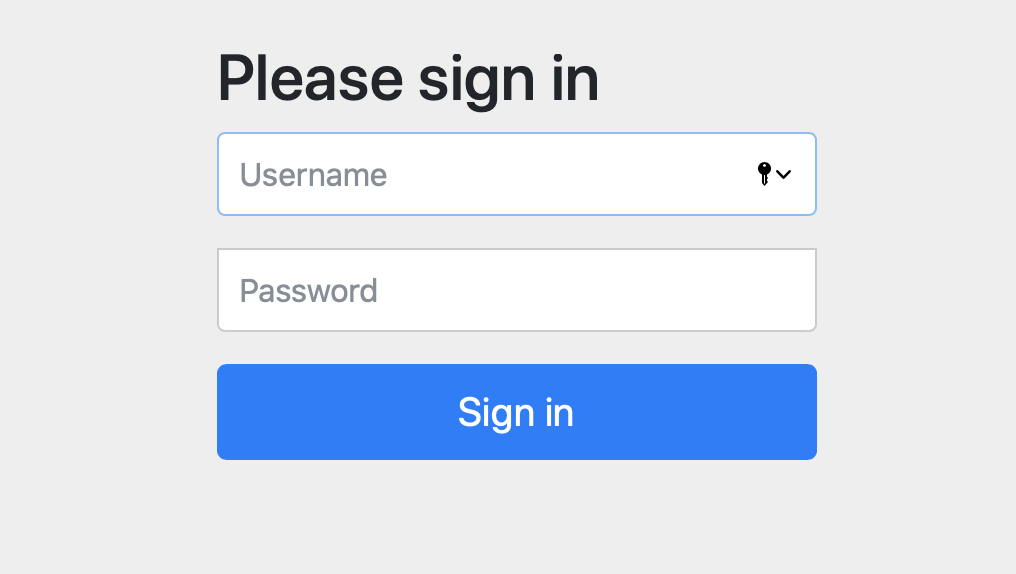
默认的用户名是user,默认的登录密码则在每次启动项目时随机生成: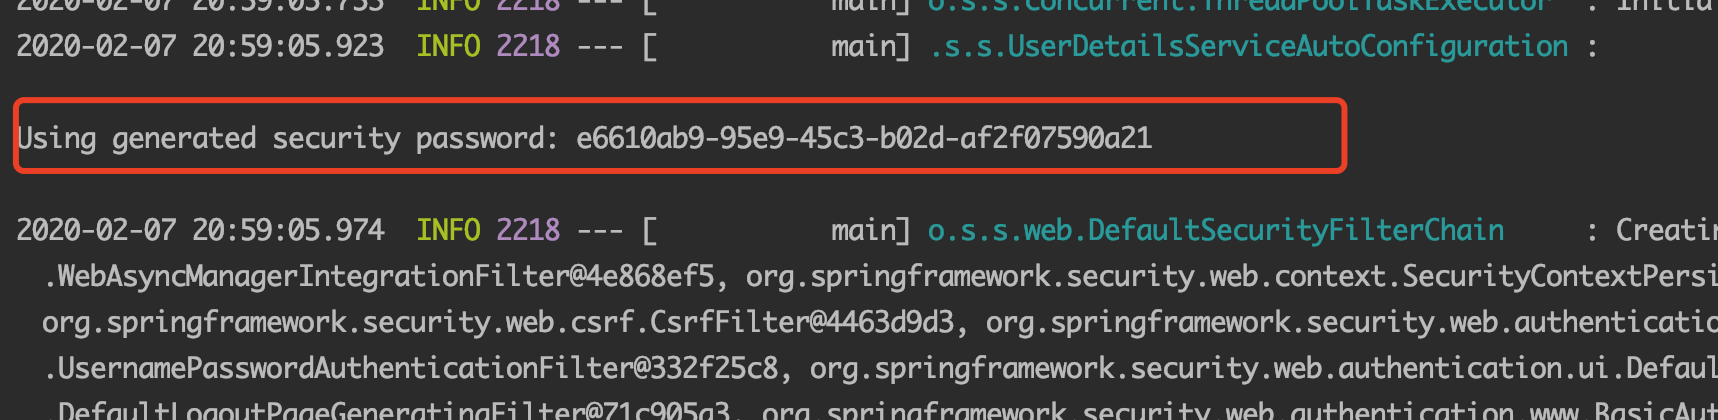
配置用户名和密码
可以在application.properties中配置默认的用户名、密码以及用户角色:
spring.security.user.name=sangspring.security.user.password=123spring.security.user.roles=admin
当开发者在application.properties中配置了默认的用户名和密码后,再次启动项目,项目启动日志就不会打印出随机生成的密码了,用户可直接使用配置好的用户名和密码登录,登录成功后,用户还具有一个角色——admin。
基于内存的认证
开发者也可以自定义类继承自WebSecurityConfigurerAdapter,进而实现对SpringSecurity更多的自定义配置,例如基于内存的认证,配置方式如下:
//自定义MyWebSecurityConfig继承WebSecurityConfigurerAdapter@Configurationpublic class MyWebSecurityConfig extends WebSecurityConfigurerAdapter {//指定不对密码进行加密@BeanPasswordEncoder passwordEncoder(){return NoOpPasswordEncoder.getInstance();}/* 重写configure(AuthenticationManagerBuilder auth) 配置两个用户: 1. 用户名:admin,密码:123,角色:ADMIN和USER 2. 用户名:sang,密码:123,角色:USER */@Overrideprotected void configure(AuthenticationManagerBuilder auth) throws Exception {auth.inMemoryAuthentication().withUser("admin").password("123").roles("ADMIN", "USER").and().withUser("sang").password("123").roles("USER");}}
配置完成后,重启项目,就可以使用这里配置的两个用户进行登录了。
HttpSecurity
虽然现在可以实现认证功能,但是受保护的资源都是默认的,而且也不能根据实际情况进行角色管理,如果要实现这些功能,就需要重写WebSecurityConfigurerAdapter中的另一个方法:
@Configurationpublic class MyWebSecurityConfig2 extends WebSecurityConfigurerAdapter {@BeanPasswordEncoder passwordEncoder(){return NoOpPasswordEncoder.getInstance();}/* 配置三个用户: 1. root用户具备ADMIN和DBA角色 2. admin具备ADMIN和USER角色 3. sang具备USER角色 */@Overrideprotected void configure(AuthenticationManagerBuilder auth) throws Exception {auth.inMemoryAuthentication().withUser("root").password("123").roles("ADMIN", "DBA").and().withUser("admin").password("123").roles("ADMIN", "USER").and().withUser("sang").password("123").roles("USER");}/* 1. 用户访问"/admin/**"必须具备ADMIN角色 2. 用户访问"/user/**"必须具备ADMIN或者USER角色 3. 用户访问"/db/**"必须具备ADMIN和DBA的角色 */@Overrideprotected void configure(HttpSecurity http) throws Exception {//开启HttpSecurity的配置http.authorizeRequests().antMatchers("/admin/**").hasRole("ADMIN").antMatchers("/user/**").access("hasAnyRole('ADMIN', 'USER')").antMatchers("/db/**").access("hasRole('ADMIN') and hasRole('DBA')").anyRequest()//除了前面定义的URL模式之外,用户访问其它的URL都必须认证后访问.authenticated().and().formLogin()//开启表单登录,配置登录接口为"/login",可以直接调用"/login"接口,发起一个POST请求进行登录,参数中用户名必须为username,密码必须为password.loginProcessingUrl("/login").permitAll()//和登录相关的接口都不要认证即可访问.and().csrf()//关闭csrf.disable();}}
在Controller添加如下接口进行测试:
@RestControllerpublic class HelloController {@GetMapping("/hello")public String hello(){return "Hello";}@GetMapping("/admin/hello")public String admin(){return "hello admin!";}@GetMapping("/user/hello")public String user(){return "hello user!";}@GetMapping("/db/hello")public String dba(){return "hello dba!";}}
测试结果:
- “/admin/hello”接口:root和admin用户具有访问权限
- “/user/hello”接口:admin和sang用户具有访问权限
- “/db/hello”接口:只有root用户具有访问权限


")

")


还没有评论,来说两句吧...