手写数字识别
1. 创建、训练和查询3层神经网络:
import numpy as npimport matplotlib.pyplot as pltimport scipy.special as sppclass Ann2020:# 初始化神经网络def __init__(self, inputnodes, hiddennodes, outputnodes, learningrate):# 设置每个输入层、隐藏层和输出层的节点数self.inodes = inputnodesself.hnodes = hiddennodesself.onodes = outputnodes# 链接权重矩阵,wih和who# 数组中的权值为w_i_j,其中链接是从下一层的节点i到节点j# w11 w21# w12 w22 etcself.wih = np.random.normal(0.0, pow(self.inodes, -0.5), (self.hnodes, self.inodes))self.who = np.random.normal(0.0, pow(self.hnodes, -0.5), (self.onodes, self.hnodes))# 学习率self.lr = learningrate# 激活函数self.activation_function = lambda x: spp.expit(x)pass# 训练神经网络def train(self, inputs_list, targets_list):# convert inputs list to 2d arrayinputs = np.array(inputs_list, ndmin=2).Ttargets = np.array(targets_list, ndmin=2).T# 计算信号到隐藏层hidden_inputs = np.dot(self.wih, inputs)# 计算从隐层发出的信号hidden_outputs = self.activation_function(hidden_inputs)# 将信号计算到最终的输出层final_inputs = np.dot(self.who, hidden_outputs)# 计算最终输出层发出的信号final_outputs = self.activation_function(final_inputs)# 输出层误差为(目标-实际)output_errors = targets - final_outputs# 隐藏层错误是output_errors,按权重拆分,在隐藏节点上重新组合hidden_errors = np.dot(self.who.T, output_errors)# 更新隐藏层和输出层之间链接的权重self.who += self.lr * np.dot((output_errors * final_outputs * (1.0 - final_outputs)),np.transpose(hidden_outputs))# 更新输入层和隐藏层之间链接的权重self.wih += self.lr * np.dot((hidden_errors * hidden_outputs * (1.0 - hidden_outputs)),np.transpose(inputs))pass# 查询神经网络def query(self, inputs_list):# 将输入列表转换为2d数组inputs = np.array(inputs_list, ndmin=2).T# 计算信号到隐藏层hidden_inputs = np.dot(self.wih, inputs)# 计算从隐层发出的信号hidden_outputs = self.activation_function(hidden_inputs)# 将信号计算到最终的输出层final_inputs = np.dot(self.who, hidden_outputs)# 计算最终输出层发出的信号final_outputs = self.activation_function(final_inputs)return final_outputs# 输入、隐藏和输出节点的数量input_nodes = 784hidden_nodes = 200 #最佳可调整至500output_nodes = 10# 学习率为 0.3learning_rate = 0.1# 创建神经网络实例n = Ann2020(input_nodes, hidden_nodes, output_nodes, learning_rate)# 测试查询(目前还没有任何有用的含义)f = np.load('mnist.npz')x_train, y_train = f['x_train'], f['y_train']x_test, y_test = f['x_test'], f['y_test']f.close()epochs = 5for e in range(epochs):# 遍历所有数据for record,y_trainn in zip(x_train,y_train):# 缩放输入值inputs = (np.asfarray(record[:]).ravel() / 255.0 * 0.99) + 0.01# 创建目标输出值(除所需的标签为0.99外,其余均为0.01)targets = np.zeros(output_nodes) + 0.01# 记录标签targets[int(y_trainn)] = 0.99n.train(inputs, targets)passpassscorecard = []for record,y_testn in zip(x_test,y_test):# 导入标签correct_label = int(y_testn)# 预处理输入inputs = (np.asfarray(record[:]).ravel() / 255.0 * 0.99) + 0.01# 查询神经网络outputs = n.query(inputs)# 将最大值的索引对应到标签label = np.argmax(outputs)# 将识别分数添加进列表if (label == correct_label):# 匹配 计1scorecard.append(1)else:# 不匹配 计0scorecard.append(0)passpassscorecard_array = np.asarray(scorecard)print ("准确率 = ", scorecard_array.sum() / scorecard_array.size)
准确率高达98%
2. 自制自己的手写数字图像进行测试:
我所使用的手机拍摄图片: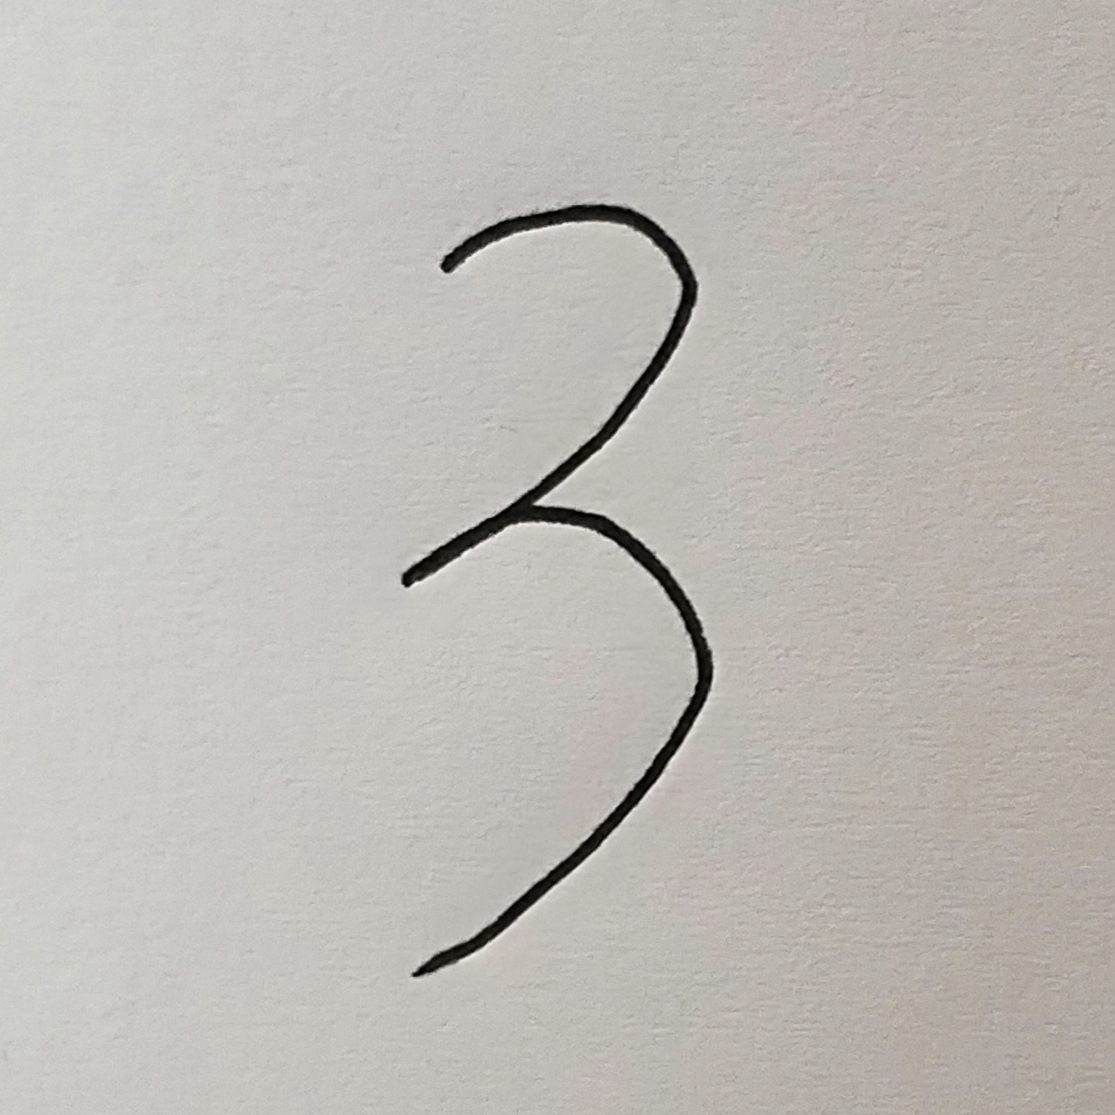
自制图像的去噪与黑白转换代码:
# -*- coding: utf-8 -*-# 图像去噪并转化为黑白图像import osfrom PIL import Imagecurdir = "F:\\pyth\\shendu\\CNN2019\\image"os.chdir(curdir)def RGB2B(filename):im = Image.open(filename)print("image info,", im.format, im.mode, im.size)(w, h) = im.sizeR = 0G = 0B = 0for x in range(w):for y in range(h):pos = (x, y)rgb = im.getpixel(pos)(r, g, b) = rgbR = R + rG = G + gB = B + brate1 = R * 1000 / (R + G + B)rate2 = G * 1000 / (R + G + B)rate3 = B * 1000 / (R + G + B)print("rate:", rate1, rate2, rate3)for x in range(w):for y in range(h):pos = (x, y)rgb = im.getpixel(pos)(r, g, b) = rgbn = r * rate1 / 1000 + g * rate2 / 1000 + b * rate3 / 1000# print "n:",nif n >= 155:im.putpixel(pos, (255, 255, 255))else:im.putpixel(pos, (0, 0, 0))im.save('my_image3_whiteb.png')def saveAsBmp(fname):pos1 = fname.rfind('.')fname1 = fname[0:pos1]fname1 = fname1 + '_hui.png'im = Image.open(fname)new_im = Image.new("RGB", im.size)new_im.paste(im)new_im.save(fname1)return fname1if __name__ == "__main__":filename = saveAsBmp("my_image3.png")RGB2B(filename)
将测试部分转换为自己的图像测试:
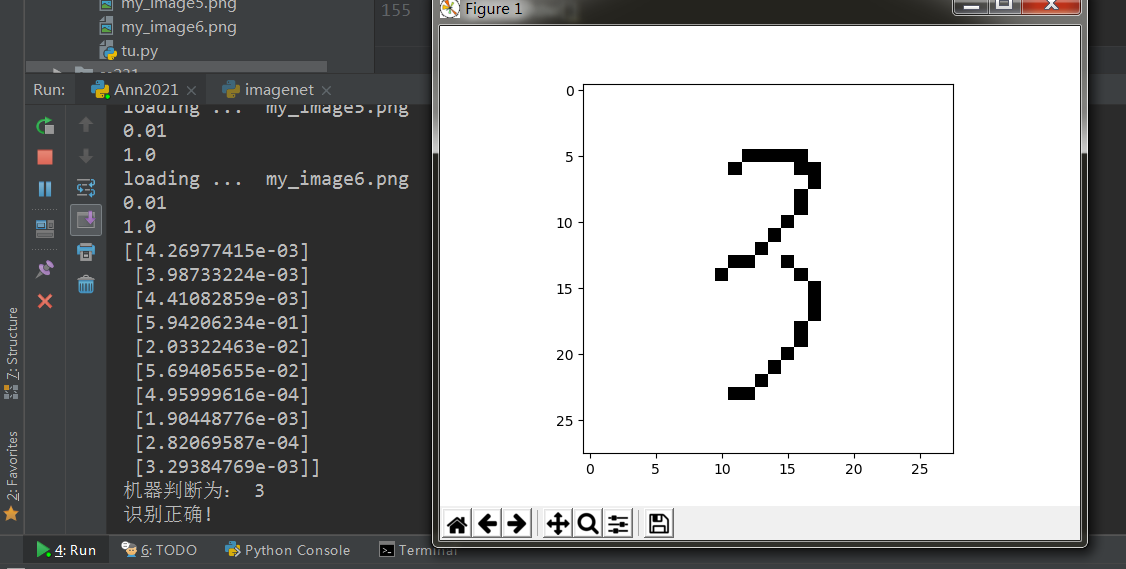
our_own_dataset = []# 获得测试图像信息for image_file_name in glob.glob('my_image?.png'):# 使用倒数第五个字符作为正确标签label = int(image_file_name[-5:-4])# 获得图像print("loading ... ", image_file_name)img_array = imageio.imread(image_file_name, as_gray=True)# 转化为一维数组 并反转img_data = 255.0 - img_array.reshape(784)# 把像素值转为到0.01到0.99之间img_data = (img_data / 255.0 * 0.99) + 0.01print(np.min(img_data))print(np.max(img_data))# 添加图像标签和信息到列表record = np.append(label, img_data)our_own_dataset.append(record)passitem = 3# 画出图像plt.imshow(our_own_dataset[item][1:].reshape(28,28), cmap='Greys', interpolation='None')#拿到正确标签correct_label = our_own_dataset[item][0]# data is remaining valuesinputs = our_own_dataset[item][1:]# 查询神经网络outputs = n.query(inputs)print (outputs)# 与输出最高的得分标签进行比较label = np.argmax(outputs)print("机器判断为:", label)# 输出判断正误if (label == correct_label):print ("识别正确!")else:print ("识别错误!")passplt.show()
效果展示:


Spring Cloud 学习笔记之Spring Cloud Stream")


")


还没有评论,来说两句吧...