[work] 安装多版本 cuda 多版本之间切换
- cuda 的下载与安装方法选择
到 CUDA Toolkit Download 下载所需版本,以 cuda_9.0.176_384.81_linux.run为例: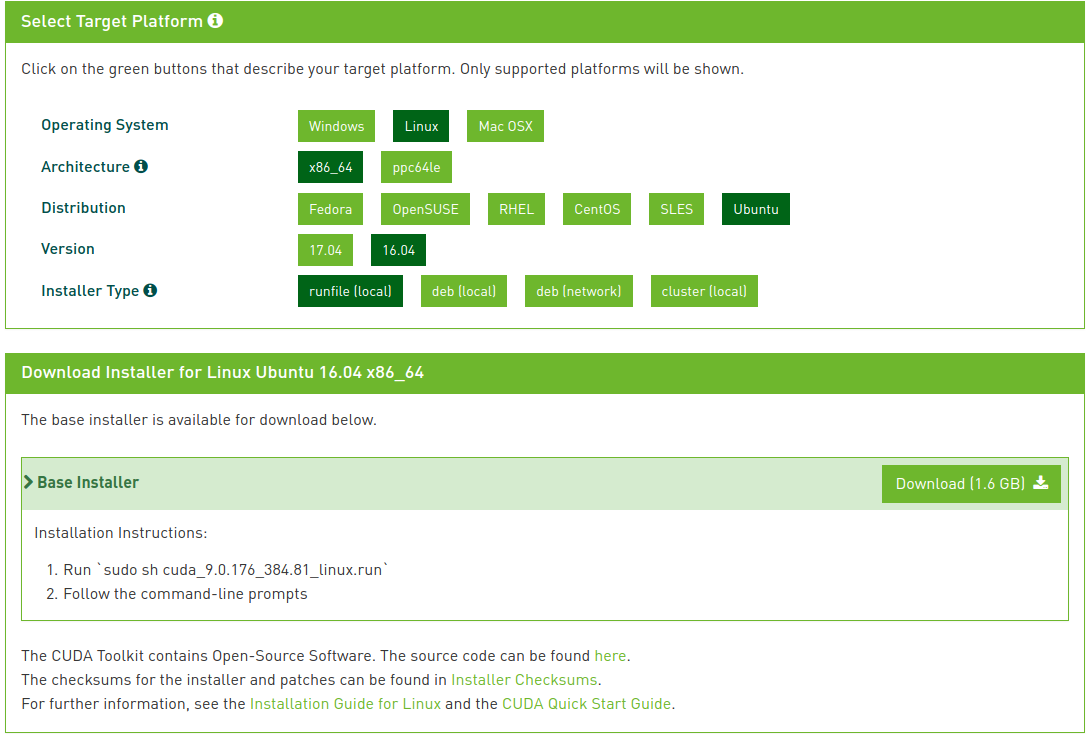
建议选择使用 .run 文件安装,因为使用 .deb可能会将已经安装的较新的显卡驱动替换。
- cuda 安装
进入到放置 cuda_9.0.176_384.81_linux.run 的目录:
sudo chmod +x cuda_9.0.176_384.81_linux.run # 为 cuda_9.0.176_384.81_linux.run 添加可执行权限./cuda_9.0.176_384.81_linux.run # 安装 cuda_9.0.176_384.81_linux.run
在安装过程中截取其中比较重要的几个选择:
Do you accept the previously read EULA?accept/decline/quit: acceptInstall NVIDIA Accelerated Graphics Driver for Linux-x86_64 384.81?(y)es/(n)o/(q)uit: n # 如果在这之前已经安装好更高版本的显卡驱动就不需要再重复安装,如果需要重复安装就选择 yes,此外还需要关闭图形界面。Install the CUDA 9.0 Toolkit?(y)es/(n)o/(q)uit: yEnter Toolkit Location[ default is /usr/local/cuda-9.0 ]: # 一般选择默认即可,也可以选择安装在其他目录,在需要用的时候指向该目录或者使用软连接 link 到 /usr/local/cuda。/usr/local/cuda-9.0 is not writable.Do you wish to run the installation with 'sudo'?(y)es/(n)o: yPlease enter your password:Do you want to install a symbolic link at /usr/local/cuda? # 是否将安装目录通过软连接的方式 link 到 /usr/local/cuda,yes or no 都可以,取决于你是否使用 /usr/local/cuda 为默认的 cuda 目录。(y)es/(n)o/(q)uit: nInstall the CUDA 9.0 Samples?(y)es/(n)o/(q)uit: n
前面选择的一些汇总:
Driver: Not SelectedToolkit: Installed in /usr/local/cuda-9.0Samples: Not SelectedPlease make sure that- PATH includes /usr/local/cuda-9.0/bin- LD_LIBRARY_PATH includes /usr/local/cuda-9.0/lib64, or, add /usr/local/cuda-9.0/lib64 to /etc/ld.so.conf and run ldconfig as rootTo uninstall the CUDA Toolkit, run the uninstall script in /usr/local/cuda-9.0/binPlease see CUDA_Installation_Guide_Linux.pdf in /usr/local/cuda-9.0/doc/pdf for detailed information on setting up CUDA.***WARNING: Incomplete installation! This installation did not install the CUDA Driver. A driver of version at least 384.00 is required for CUDA 9.0 functionality to work.To install the driver using this installer, run the following command, replacing <CudaInstaller> with the name of this run file:sudo <CudaInstaller>.run -silent -driver
安装完成后可以在 /usr/local 目录下看到:
cuda-8.0 # 笔者之前安装的cuda-8.0cuda-9.0 # 刚刚安装的cuda-9.0cuda # cuda-8.0 的软连接
- 多个 cuda 版本之间进行切换
将~/.bashrc 或 ~/.zshrc 下与cuda相关的路径都改为 /usr/local/cuda/ 而不使用 /usr/local/cuda-8.0/ 或/usr/local/cuda-9.0/。
#在切换cuda版本时rm -rf /usr/local/cuda#删除之前创建的软链接sudo ln -s /usr/local/cuda-8.0/ /usr/local/cuda/nvcc --version #查看当前 cuda 版本nvcc: NVIDIA (R) Cuda compiler driverCopyright (c) 2005-2016 NVIDIA CorporationBuilt on Mon_Jan_23_12:24:11_CST_2017Cuda compilation tools, release 8.0, V8.0.62#cuda8.0 切换到 cuda9.0rm -rf /usr/local/cudasudo ln -s /usr/local/cuda-9.0/ /usr/local/cuda/nvcc --version


还没有评论,来说两句吧...