Hyperledger Explorer 安装文档
安装PostgreSQL参考 在Mac OS X上安装PostgreSQL
在linux 上安装PostgreSQL参考CentOS7安装并配置PostgreSQL
安装成功之后查看版本信息
➜ baimumanagesvr psql --versionpsql (PostgreSQL) 10.3
获取blockchain-explorer代码
git clone https://github.com/hyperledger/blockchain-explorer.gitcd blockchain-explorer
安装数据
blockchain-explorer git:(master) createuser postgres -PEnter password for new role:Enter it again:➜ blockchain-explorer git:(master) sudo psql postgresql://postgres:postgres@localhost:5432/psql (10.3)Type "help" for help.postgres=> \duList of rolesRole name | Attributes | Member of-----------+------------------------------------------------------------+-----------postgres | | {}xinzhiyun | Superuser, Create role, Create DB, Replication, Bypass RLS | {}postgres=> helpYou are using psql, the command-line interface to PostgreSQL.Type: \copyright for distribution terms\h for help with SQL commands\? for help with psql commands\g or terminate with semicolon to execute query\q to quitpostgres=> \c - xinzhiyun //切换角色,不然报没有权限fabricexplorer=# \l //查看数据库List of databasesName | Owner | Encoding | Collate | Ctype | Access privileges----------------+-----------+----------+-------------+-------------+-------------------------fabricexplorer | hppoc | UTF8 | en_US.UTF-8 | en_US.UTF-8 |postgres | xinzhiyun | UTF8 | en_US.UTF-8 | en_US.UTF-8 |template0 | xinzhiyun | UTF8 | en_US.UTF-8 | en_US.UTF-8 | =c/xinzhiyun +| | | | | xinzhiyun=CTc/xinzhiyuntemplate1 | xinzhiyun | UTF8 | en_US.UTF-8 | en_US.UTF-8 | =c/xinzhiyun +| | | | | xinzhiyun=CTc/xinzhiyun(4 rows)fabricexplorer=# \d //查看表List of relationsSchema | Name | Type | Owner--------+---------------------------+----------+-------public | blocks | table | hppocpublic | blocks_id_seq | sequence | hppocpublic | chaincodes | table | hppocpublic | chaincodes_id_seq | sequence | hppocpublic | channel | table | hppocpublic | channel_id_seq | sequence | hppocpublic | peer | table | hppocpublic | peer_id_seq | sequence | hppocpublic | peer_ref_channel | table | hppocpublic | peer_ref_channel_id_seq | sequence | hppocpublic | transaction | table | hppocpublic | transaction_id_seq | sequence | hppocpublic | write_lock | table | hppocpublic | write_lock_write_lock_seq | sequence | hppoc(14 rows)
修改config.json中的值
{"network-config": {"orgsaler": { //此处必须是org开头"name": "saler","mspid": "saler","peer1": {"requests": "grpc://peer0.saler.ennblock.cn:7051","events": "grpc://peer0.saler.ennblock.cn:7053","server-hostname": "peer0.org1.example.com","tls_cacerts": "/Users/xinzhiyun/workspace/src/source.enncloud.cn/Enn-BlockChain/blockchain-explorer/peer/fabric/peer/tls/ca.crt"},"admin": {"key": "/Users/xinzhiyun/workspace/src/source.enncloud.cn/Enn-BlockChain/blockchain-explorer/user/msp/keystore","cert": "/Users/xinzhiyun/workspace/src/source.enncloud.cn/Enn-BlockChain/blockchain-explorer/user/msp/signcerts"}}},"host": "0.0.0.0","port": "8080","channel": "mychannel","keyValueStore": "/tmp/fabric-client-kvs","eventWaitTime": "30000","pg": {"host": "127.0.0.1","port": "5432","database": "fabricexplorer","username": "hppoc","passwd": "password"},"license": "Apache-2.0"}
编译
cd blockchain-explorer/app/testnpm installnpm run testcd blockchain-explorernpm installcd client/npm installnpm test -- -u --coveragenpm run build
运行
d blockchain-explorer/./start.sh (it will have the backend up).tail -f log.log (view log)
之后访问localhost:8080就可以访问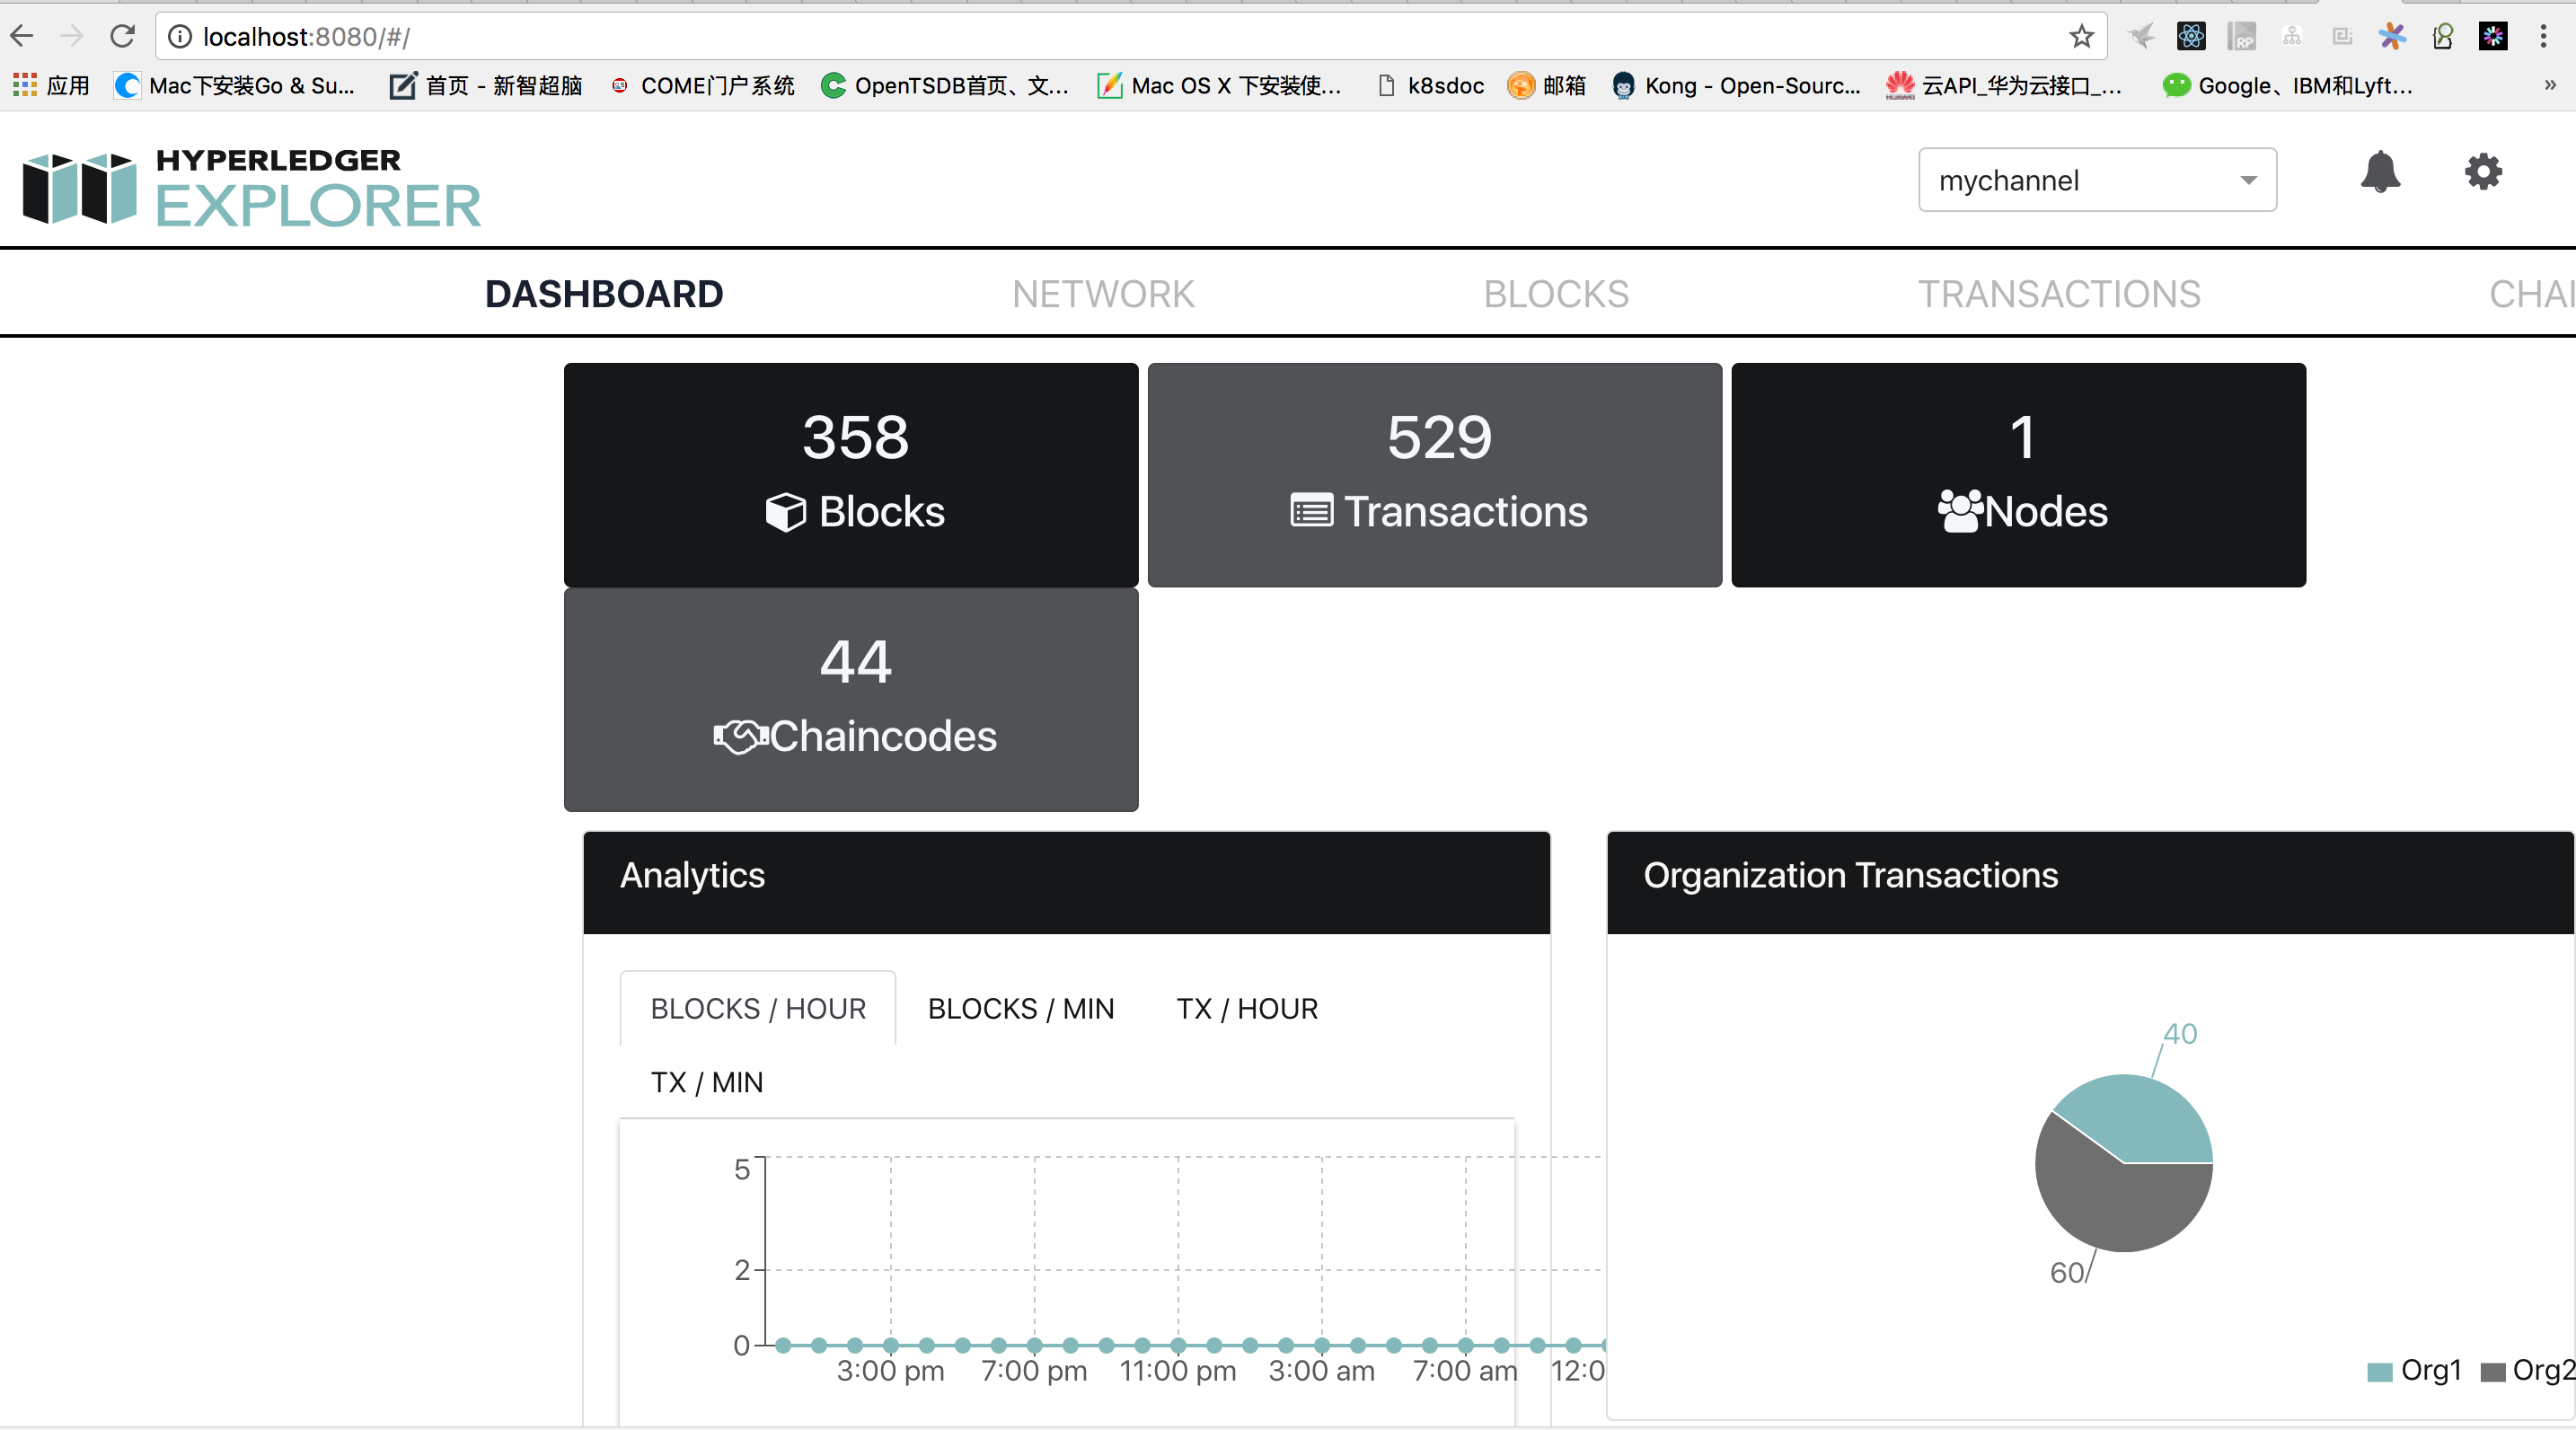
参考
blockchain-explorer
在Mac OS X上安装PostgreSQL
CentOS7安装并配置PostgreSQL





还没有评论,来说两句吧...