shiro讲解之 多Realm 之 Authentication
shiro讲解之 多Realm Authentication
本章节将详细讲解 Shiro 多 Realm 认证以、多 Realm 配置以及多 Realm 认证策略。
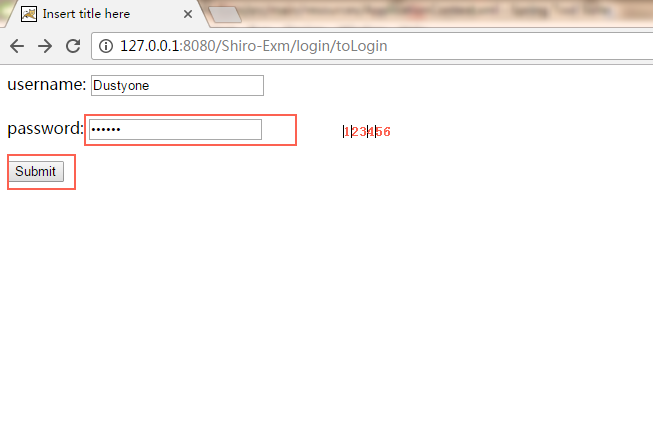
实例
首先我们以我们之前搭建的Spring + SpringMVC + Shiro 的基本框架为例子,然后进行多 Realm 配置。
多Realm 的实现
Realms 代码
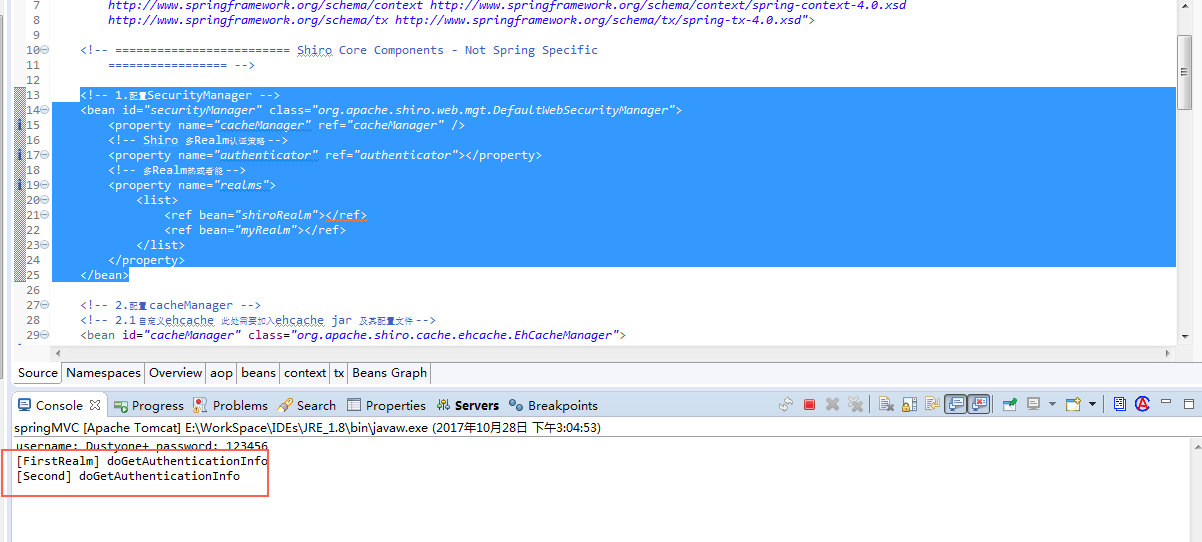
为了直观体提现多Realm 认证策略,我们再次设定 ShiroRealm 中的认证能够顺利通过,而 MyRealm 中的不能。ShiroRealm
package com.shiro.example.interceptor.realm;import java.util.HashSet;import java.util.Set;import org.apache.shiro.authc.AuthenticationException;import org.apache.shiro.authc.AuthenticationInfo;import org.apache.shiro.authc.AuthenticationToken;import org.apache.shiro.authc.LockedAccountException;import org.apache.shiro.authc.SimpleAuthenticationInfo;import org.apache.shiro.authc.UnknownAccountException;import org.apache.shiro.authc.UsernamePasswordToken;import org.apache.shiro.authz.AuthorizationInfo;import org.apache.shiro.authz.SimpleAuthorizationInfo;import org.apache.shiro.crypto.hash.SimpleHash;import org.apache.shiro.realm.AuthorizingRealm;import org.apache.shiro.subject.PrincipalCollection;import org.apache.shiro.util.ByteSource;import com.shiro.example.entity.SubjectEntity;public class ShiroRealm extends AuthorizingRealm {@Overrideprotected AuthenticationInfo doGetAuthenticationInfo(AuthenticationToken token) throws AuthenticationException {System.out.println("[FirstRealm] doGetAuthenticationInfo");// 1. 把 AuthenticationToken 转换为 UsernamePasswordTokenUsernamePasswordToken upToken = (UsernamePasswordToken) token;// 2. 从 UsernamePasswordToken 中来获取 usernameString username = upToken.getUsername();// 3. 调用数据库的方法, 从数据库中查询 username 对应的用户记录SubjectEntity principals = new SubjectEntity("580655386dc0bef1105a44f9dcbe4a1d3a7b0781", "Dustyone");// 4. 若用户不存在, 则可以抛出 UnknownAccountException 异常if ("unknown".equals(username)) {throw new UnknownAccountException("用户不存在!");}// 5. 根据用户信息的情况, 决定是否需要抛出其他的 AuthenticationException 异常.if ("monster".equals(username)) {throw new LockedAccountException("用户被锁定");}// 6. 根据用户的情况, 来构建 AuthenticationInfo 对象并返回. 通常使用的实现类为:// SimpleAuthenticationInfo// 以下信息是从数据库中获取的.// 1). principal: 认证的实体信息. 可以是 username, 也可以是数据表对应的用户的实体类对象.Object principal = principals.getUsername();// 2). credentials: 密码.Object credentials = principals.getPassword(); // "fc1709d0a95a6be30bc5926fdb7f22f4";// 3). realmName: 当前 realm 对象的 name. 调用父类的 getName() 方法即可String realmName = getName();// 4). 盐值.ByteSource credentialsSalt = ByteSource.Util.bytes(username);/* * SimpleAuthenticationInfo info = new * SimpleAuthenticationInfo(principal, credentials, realmName); */SimpleAuthenticationInfo info = new SimpleAuthenticationInfo(principal, credentials, credentialsSalt,realmName);
return info;}// 授权会被 shiro 回调的方法@Overrideprotected AuthorizationInfo doGetAuthorizationInfo(PrincipalCollection principals) {// 1. 从 PrincipalCollection 中来获取登录用户的信息Object principal = principals.getPrimaryPrincipal();// 2. 利用登录的用户的信息来用户当前用户的角色或权限(可能需要查询数据库)Set<String> roles = new HashSet<>();roles.add("user");if ("admin".equals(principal)) {roles.add("admin");}// 3. 创建 SimpleAuthorizationInfo, 并设置其 roles 属性.SimpleAuthorizationInfo info = new SimpleAuthorizationInfo(roles);// 4. 返回 SimpleAuthorizationInfo 对象.return info;}}* MyRealmpackage com.shiro.example.interceptor.realm;import java.util.HashSet;import java.util.Set;import org.apache.shiro.authc.AuthenticationException;import org.apache.shiro.authc.AuthenticationInfo;import org.apache.shiro.authc.AuthenticationToken;import org.apache.shiro.authc.SimpleAuthenticationInfo;import org.apache.shiro.authc.UsernamePasswordToken;import org.apache.shiro.authz.AuthorizationInfo;import org.apache.shiro.authz.SimpleAuthorizationInfo;import org.apache.shiro.realm.AuthorizingRealm;import org.apache.shiro.subject.PrincipalCollection;import org.apache.shiro.util.ByteSource;import com.shiro.example.entity.SubjectEntity;public class MyRealm extends AuthorizingRealm {@Overrideprotected AuthenticationInfo doGetAuthenticationInfo(AuthenticationToken token) throws AuthenticationException {System.out.println("[Second] doGetAuthenticationInfo");// 1. 把 AuthenticationToken 转换为 UsernamePasswordTokenUsernamePasswordToken upToken = (UsernamePasswordToken) token;String username = upToken.getUsername();SubjectEntity principals = new SubjectEntity("580655386dc0bef1105a44f9dcbe4a1d3a7b0781", "Dustyone");Object principal = principals.getUsername();Object credentials = principals.getPassword();String realmName = getName();ByteSource credentialsSalt = ByteSource.Util.bytes(username);SimpleAuthenticationInfo info = new SimpleAuthenticationInfo(principal, credentials, credentialsSalt,realmName);return info;}@Overrideprotected AuthorizationInfo doGetAuthorizationInfo(PrincipalCollection principals) {Object principal = principals.getPrimaryPrincipal();Set<String> roles = new HashSet<>();roles.add("user");if ("admin".equals(principal)) {roles.add("admin");}SimpleAuthorizationInfo info = new SimpleAuthorizationInfo(roles);return info;}}多Realm 认证的差异性体现在 Realm 在SpringContext中的配置,即一下配置。* 设置多个 Realm Bean* ShiroRealm<bean id="shiroRealm" class="com.shiro.example.interceptor.realm.ShiroRealm"><property name="credentialsMatcher"><bean class="org.apache.shiro.authc.credential.HashedCredentialsMatcher"><property name="hashAlgorithmName" value="SHA-1"></property><property name="hashIterations" value="1024"></property></bean></property></bean>* MyRealm<bean id="myRealm" class="com.shiro.example.interceptor.realm.MyRealm"><property name="credentialsMatcher"><bean class="org.apache.shiro.authc.credential.HashedCredentialsMatcher"><property name="hashAlgorithmName" value="MD5"></property><property name="hashIterations" value="100"></property></bean></property></bean>* 设置 多Realm 认证策略<!-- 多Realm认证策略 --><bean id="authenticator" class="org.apache.shiro.authc.pam.ModularRealmAuthenticator"><property name="authenticationStrategy"><!-- 多个Reaml认证中有一个认证成功即成功策略 --><bean class="org.apache.shiro.authc.pam.AtLeastOneSuccessfulStrategy"></bean><!-- 第一个Reaml认证策略 --><!-- <bean class="org.apache.shiro.authc.pam.FirstSuccessfulStrategy"></bean> --><!-- 必须所有Reaml都成功认证策略 --><!-- <bean class="org.apache.shiro.authc.pam.AllSuccessfulStrategy"></bean> --></property></bean>* 将 Realm 和多认证策略 Bean 交由SecurityManager 统一管理<!-- 1.配置SecurityManager --><bean id="securityManager" class="org.apache.shiro.web.mgt.DefaultWebSecurityManager"><property name="cacheManager" ref="cacheManager" /><!-- Shiro 多Realm认证策略 --><property name="authenticator" ref="authenticator"></property><!-- 多Realm Bean 引用 --><property name="realms"><list><ref bean="shiroRealm"></ref><ref bean="myRealm"></ref></list></property></bean>
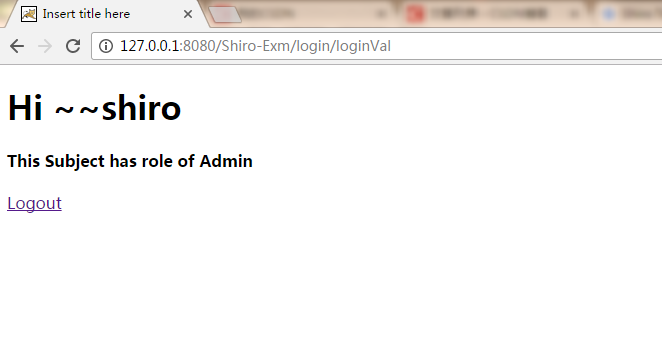
结果
多 Realm 认证策略
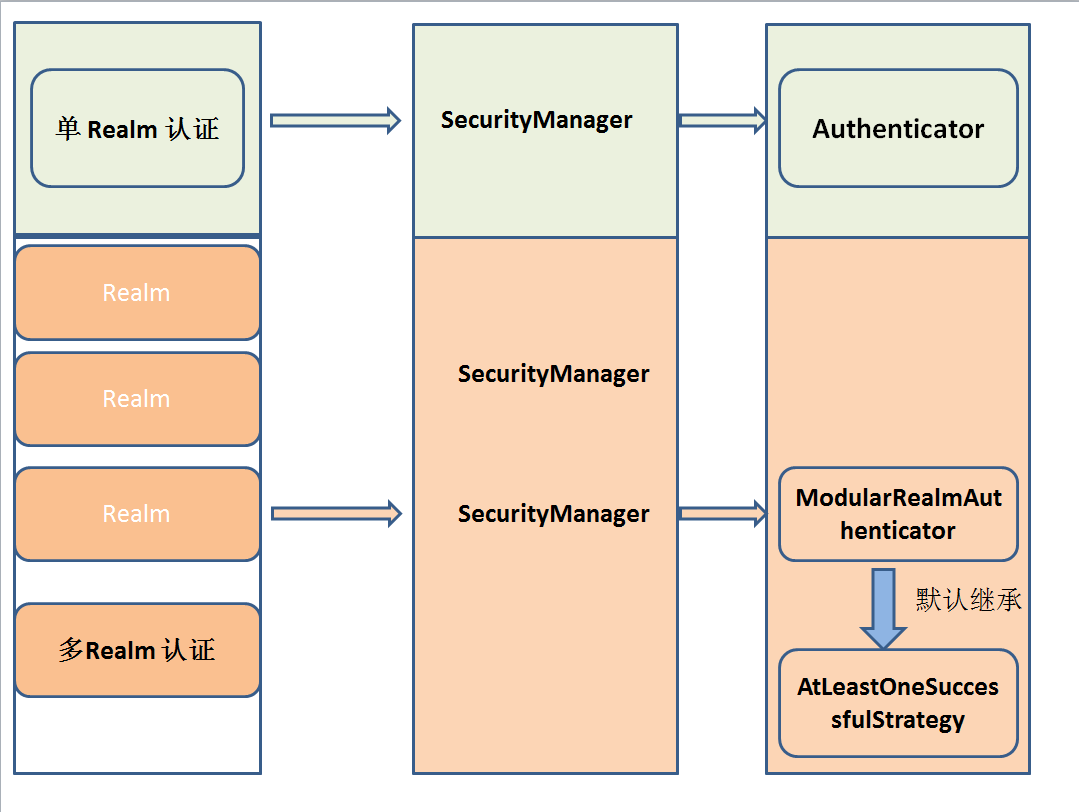
在我们的Application 中 如果我们使用的是Realm,那么一般而言 SecurityManager 继承了 Authenticator(Shiro API 中身份验证核心的入口点)。
如果使用的是多 Realm的话 一般继承 ModularRealmAuthenticator 即 SecurityManager 的身份认证将交由指定的多个 Realm 去实现,此时默认实现 AuthenticationStrategy(默认的认证策略,我们也可以自定义认证策略,自定义方式参考上文。) 接口。那么下面我们将详细了解下 Shiro 的多 Realm 认证策略。
- FirstSuccessfulStrategy
只要有一个 Realm 验证成功即可,只返回第一个 Realm 身份验证成功的认证信息,其他的忽略 - AtLeastOneSuccessfulStrategy
只要有一个Realm验证成功即可,和FirstSuccessfulStrategy 不同,将返回所有Realm身份验证成功的认证信息; - AllSuccessfulStrategy
所有Realm验证成功才算成功,且返回所有Realm身份验证成功的认证信息,如果有一个失败就失败了
ModularRealmAuthenticator 默认是 AtLeastOneSuccessfulStrategy 策略
下图为 Shiro 的 Realm、SecurityManager、Authenticator以及认证策略之间的关系
小结
Shiro 中多 Realm 的配置和实现,以本章实例为例 需在Spring的 Context中配置
- Realm 的配置
- 多Realm 的认证策略
- 多Realm 和 多 Realm 认证策略统一交由 SecurityManager 管理。
- 理解 Realm、SecurityManager、Authenticator以及认证策略之间的关系 以便我们在设计多 Realm的时候能很好地实现我们的需求。
- 使用多 Realm 做认证时 realm 被执行的顺序与Spring Context 配置有关。顺序执行。


")


还没有评论,来说两句吧...