uniapp props、$ref、$emit、$parent、$child、$on、$set 是什么?
举个例子来解释一下何为父组件,何为子组件?
举个例子来解释一下何为父组件,何为子组件?
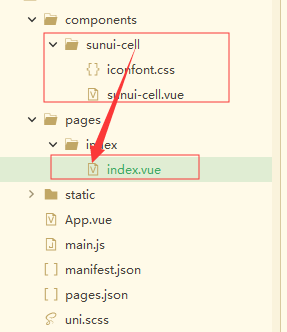
index.vue导入sunui-cell组件的时候,我们就称index.vue为父组件依次类推,在vue中只要能获取到组件的实例,那么就可以调用组件的属性或是方法进行操作
一、props(一般用来单向传值)
1. 何为单向传值?
即父组件传值给子组件(首次)但不能动态(再次)改变子组件现有的值,但我非要改呢? 通过watch监听或者通过$ref标识获取实例后修改以及使用v-modal,使用v-modal会存在不同步情况->使用.sync
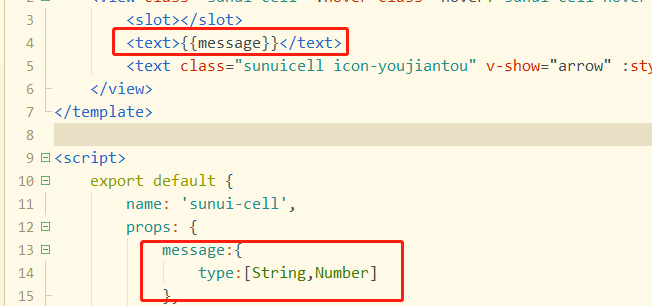
2.props静态传值
子组件通过props选项来声明一个自定义的属性,然后父组件就可以在嵌套标签的时候,通过这个属性往子组件传递数据 - 引用脚本之家

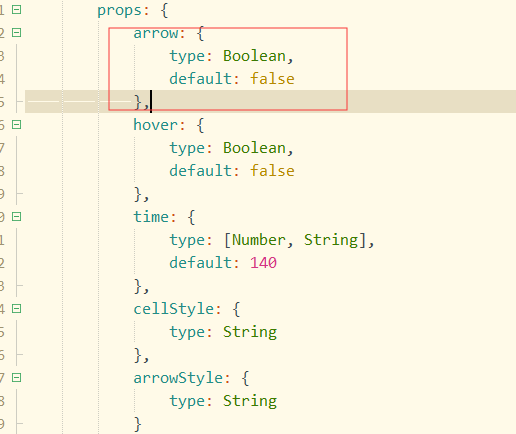
3. props动态传值
通过v-bind绑定props的自定义的属性,传递去过的就不是静态的字符串了,它可以是一个表达式、布尔值、对象等等任何类型的值 - 引用脚本之家
4. props最适合传递数据,它并不能调用子组件里的属性和方法
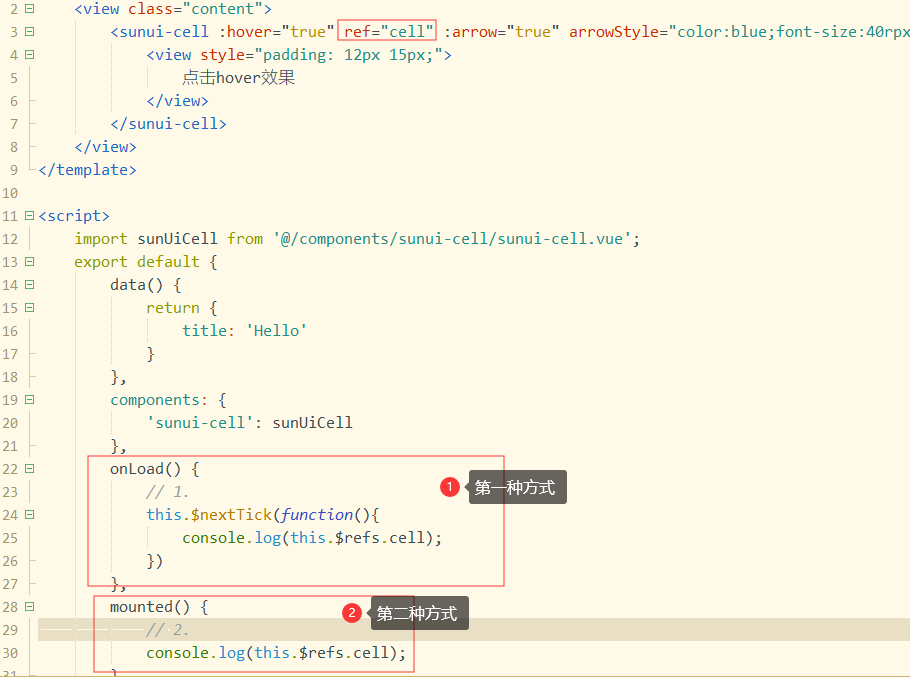
二、$ref
1.不大适合传递数据
主要用来调用子组件里的属性和方法
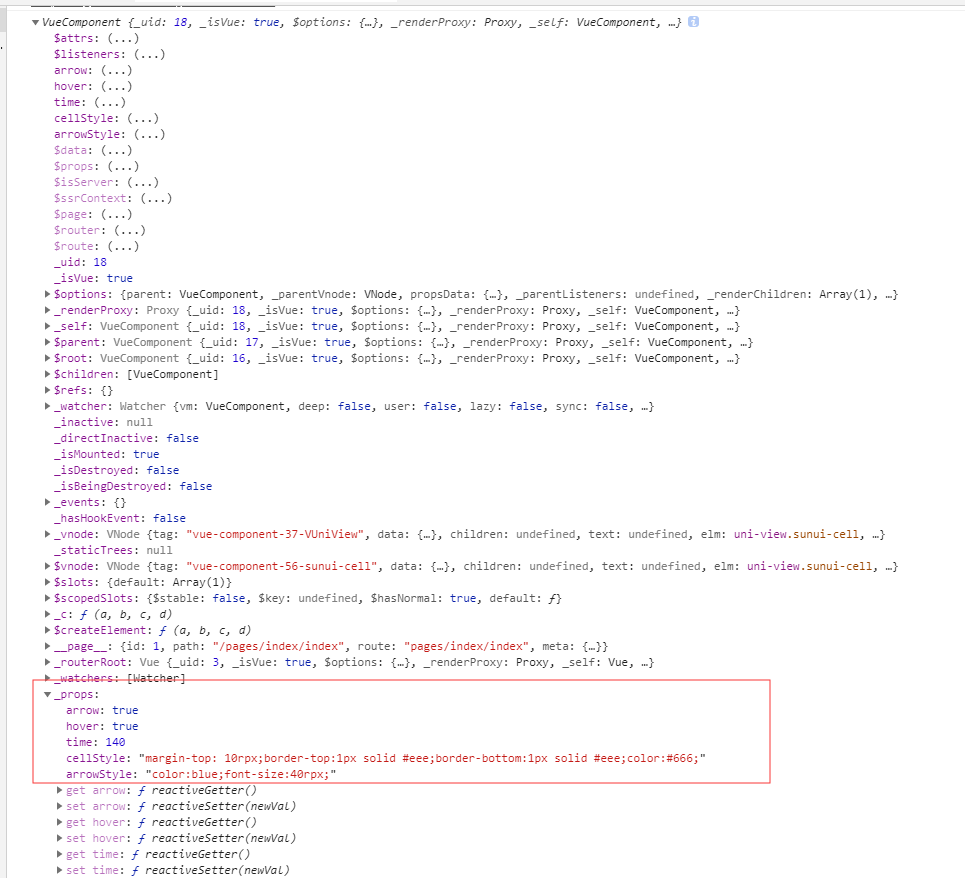
通常是初始化页面(也就是视图层渲染完以后)才能调用,如果是初始化的时候调用,建议在mounted生命周期或者使用this.$nextTick()将回调延迟到下次 DOM 更新循环之后执行(但我们首先得标识ref,相同组件ref的值如果重复会被后面的组件覆盖),如果不是初始化的话必须要等待它加载完以后才能够调用(this.nextTick)
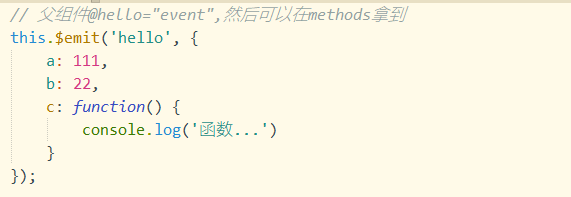
三、$emit
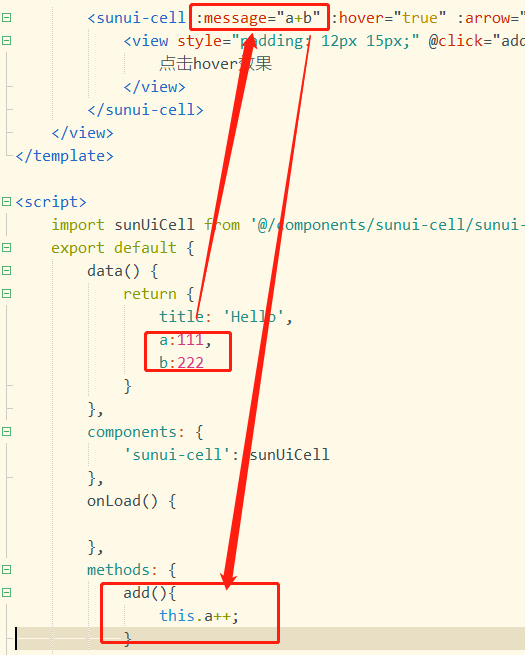
1. $emit 绑定一个自定义事件event,当这个这个语句被执行到的时候,就会将参数arg传递给父组件,父组件通过@event监听并接收参数
四、$on(非父组件之间传值)
1.父组件需要导入A和B组件
<template><view class="content"><view style="padding: 12px 15px;">点击hover效果</view><onA></onA><onB></onB></view></template><script>import onA from '@/components/onA.vue';import onB from '@/components/onB.vue';export default {data() {return {title: 'Hello'}},components: {onA,onB},onLoad() {},mounted() {},methods: {}}</script><style>.content {display: flex;flex-direction: column;align-items: center;justify-content: center;}.logo {height: 200rpx;width: 200rpx;margin-top: 200rpx;margin-left: auto;margin-right: auto;margin-bottom: 50rpx;}.text-area {display: flex;justify-content: center;}.title {font-size: 36rpx;color: #8f8f94;}</style>
2. onA组件
<template><view><button type="primary" @click="onSend">传值给onB组件</button></view></template><script>import bridge from '@/utils/bridge.js';export default {data() {return {msg: 'hello,onB'};},methods: {onSend() {bridge.$emit('receiveA', this.msg);}},mounted() {bridge.$on('receiveB', (val) => {console.log('我是onA组件,接收来自onB的值:', val);});}}</script><style></style>
3.onB组件
<template><view><button type="primary" @click="onSend">传值给onA组件</button></view></template><script>import bridge from '@/utils/bridge.js';export default {data() {return {msg: 'hello,onA'};},methods: {onSend() {bridge.$emit('receiveB', this.msg);}},mounted() {bridge.$on('receiveA', (val) => {console.log('我是onB组件,接收来自onA的值:', val);});}}</script><style></style>
五、$parent(用于子组件获取父组件实例) - 当前组件树的根 Vue 实例。如果当前实例没有父实例,此实例将会是其自己
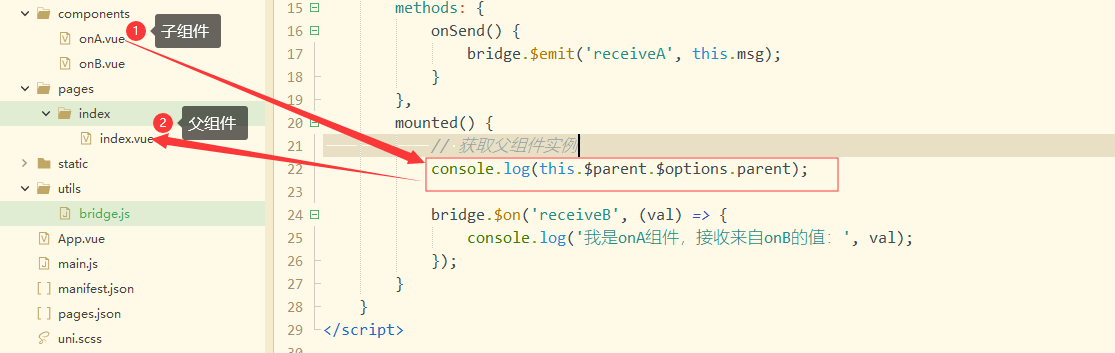
六、$child - 当前实例的直接子组件。需要注意 $children 并不保证顺序,也不是响应式的。如果你发现自己正在尝试使用 $children 来进行数据绑定,考虑使用一个数组配合 v-for 来生成子组件,并且使用 Array 作为真正的来源
<template><view class="content"><view style="padding: 12px 15px;">点击hover效果</view><onA></onA><onB></onB></view></template><script>import onA from '@/components/onA.vue';import onB from '@/components/onB.vue';export default {data() {return {title: 'Hello'}},components: {onA,onB},onLoad() {},mounted() {console.log(this.$root.$children[0].$children[0]._data);console.log(this.$root.$children[0].$children[1]._data.msg);console.log(this.$root.$children[0].$children[2]._data.msg);},methods: {}}</script><style>.content {display: flex;flex-direction: column;align-items: center;justify-content: center;}.logo {height: 200rpx;width: 200rpx;margin-top: 200rpx;margin-left: auto;margin-right: auto;margin-bottom: 50rpx;}.text-area {display: flex;justify-content: center;}.title {font-size: 36rpx;color: #8f8f94;}</style>
七、$set - **在开发过程中,我们时常会遇到这样一种情况:当vue的data里边声明或者已经赋值过的对象或者数组(数组里边的值是对象)时,向对象中添加新的属性,如果更新此属性的值,是不会更新视图的**
1.运行这个示例时,我们发现对象新增的属性(e)是不会更新的
<template><view><view @click="addd(obj)">点击增加1:{{obj.d}}</view><view @click="adde(obj)">点击增加2:{{obj.e}}</view></view></template><script>export default {data() {return {obj: {}}},mounted() {// 原有的this.obj = {d: 0};// 新增的对象.ethis.obj.e = 0;console.log('after--', this.obj);},methods: {addd(item) {item.d = item.d + 1;console.log('item--1', item);},adde(item) {item.e = item.e + 1;// this.$forceUpdate();console.log('item--2', item);}}}</script>
- 我们有两种解决方案,一种是利用this.$set或者this.$foreUpdate();让它渲染到视图层 - 代码引用简书:https://www.jianshu.com/p/71b1807b1815
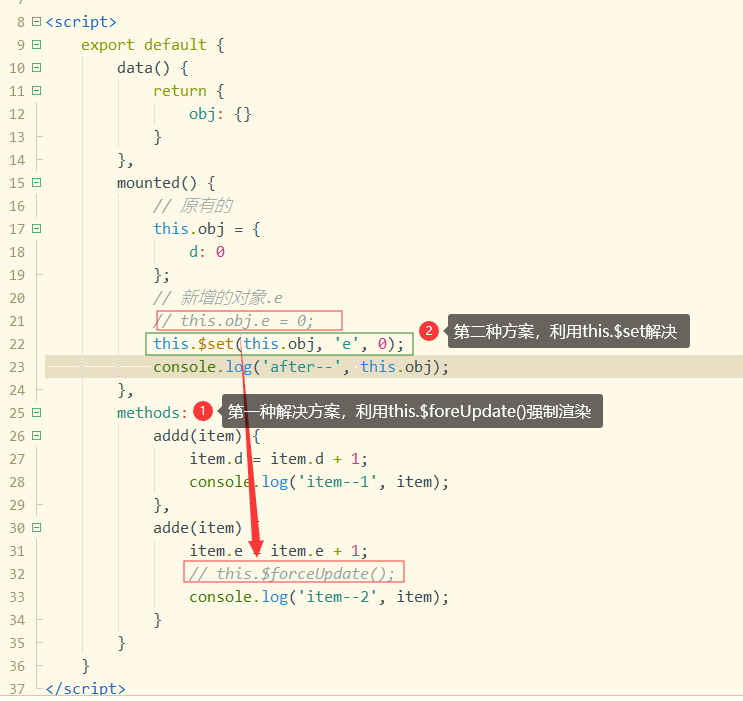
<template><view><view @click="addd(obj)">点击增加1:{{obj.d}}</view><view @click="adde(obj)">点击增加2:{{obj.e}}</view></view></template><script>export default {data() {return {obj: {}}},mounted() {// 原有的this.obj = {d: 0};// 新增的对象.e// this.obj.e = 0;this.$set(this.obj, 'e', 0);console.log('after--', this.obj);},methods: {addd(item) {item.d = item.d + 1;console.log('item--1', item);},adde(item) {item.e = item.e + 1;// this.$forceUpdate();console.log('item--2', item);}}}</script>
理清一下已经使用过的vue实例,可能会再次更新(-.-)


:删除排序链表中的重复元素")


还没有评论,来说两句吧...