Python MQTT introduce essay
2019-10-15
MQTT in Python
- MQTT(Message Queuing Telemetry Transport)
- IoT(Internet of Things) protocol,
- supports Python 2.7.9+ or 3.4+
- include server,client(pub and sub)
message include
- topic——message type,after subscriber subscribe the topic,it will receive the message content of the topic(payload)
- payload——message content
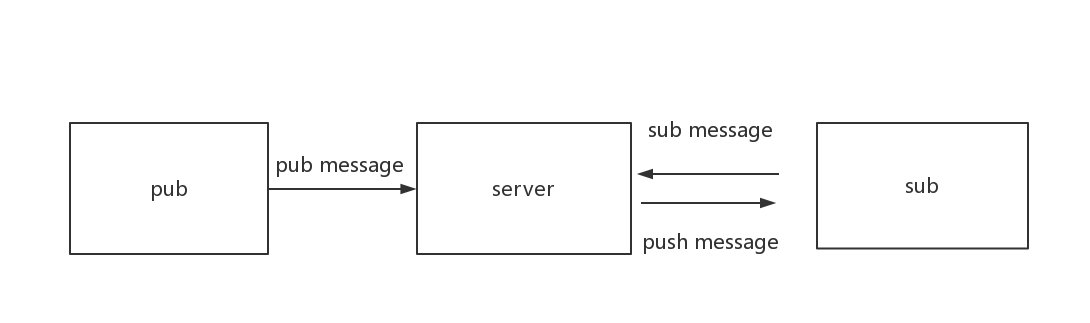
- Architecture diagram
install
pip install paho-mqtt
or with virtualenv
virtualenv paho-mqttsource paho-mqtt/bin/activatepip install paho-mqtt
full code
git clone git://git.eclipse.org/gitroot/paho/org.eclipse.paho.mqtt.python.git
import
import paho.mqtt.client as mqtt
example
pub.py-- coding: utf-8 --
import paho.mqtt.client as mqtt
MQTTHOST = “127.0.0.1”
MQTTPORT = 1883
client = mqtt.Client()
def connnect():client.connect(MQTTHOST,MQTTPORT,60)def pub(topic,message,qos):client.publish(topic,message,qos)print('pub success!')def main():connnect()text=input('please input text:')while text:#send a message which topic is 'test'pub("test",text,2)client.loop_start()text=input('please input text:')if __name__=="__main__":main()
sub.py
# -*- coding: utf-8 -*-import paho.mqtt.client as mqttMQTTHOST = "127.0.0.1"MQTTPORT = 1883client = mqtt.Client()def connnect():client.connect(MQTTHOST,MQTTPORT,60)client.loop_start()def on_message(client,user,msg):# msg.payload's type is bytes,so we must decode itprint("get message:topic=%s content=%s"%(msg.topic,msg.payload.decode()))def sub():client.subscribe('test',2)client.on_message=on_message #function to receive messagesdef main():connnect()sub()while True:pass# client.loop_forever()if __name__=="__main__":main()
runserver–mosquitto
install
https://mosquitto.org/download/notice:article’s example is for windows.
run demo
terminal 1 for server
mosquitto -d -v
terminal 2 for sub
mosquitto_sub -t test
terminal 3 for pub
mosquitto_pub -t test -m “haloha”
while you excute the terminal 3’s command,the terminal 2 will display the message ‘haloha’.
run Python demo
start mosquitto servermosquitto -d -v
then run sub.py to to subscribe topic and run pub.py to send message.
run sub.py
result
D:\PythonProject>python .\sub.pyget message:topic=test content=helloget message:topic=test content=how are you
run pub.py
result
D:\PythonProject> python .\pub.pyplease input text:hellopub success!please input text:how are youpub success!


还没有评论,来说两句吧...