nginx安装、卸载、启动、重启、关闭
nginx安装
方法1、官网下载nginx
1、网址:http://nginx.org/,选择nginx-1.16.0,下载安装包到桌面,解压。
2、注意:下载到非/usr/local目录,不然安装的时候会报错:cp: /usr/local/nginx/conf/koi-win and conf/koi-win are identical (not copied).
3、/usr/lcoal下创建nginx目录
4、cd desktop/nginx-1.16.0
5、./configure --prefix=/usr/local/nginx --conf-path=/usr/local/nginx/conf/nginx.conf
6、make && make install
方法2、brew安装
20210312亲测可用
一、安装homebrew
1、设置hosts
# GitHub start140.82.113.4 github.com185.199.108.133 raw.githubusercontent.com185.199.109.133 raw.githubusercontent.com185.199.110.133 raw.githubusercontent.com185.199.111.133 raw.githubusercontent.com# GitHub End
2、安装
(1)
/bin/bash -c "$(curl -fsSL https://raw.githubusercontent.com/Homebrew/install/HEAD/install.sh)"
(2)如果命令执行中卡在下面信息
①core卡住
==> Tapping homebrew/coreCloning into '/usr/local/Homebrew/Library/Taps/homebrew/homebrew-core'...
control + c终端脚本执行如下命令
cd "$(brew --repo)/Library/Taps/"mkdir homebrew && cd homebrewgit clone git://mirrors.ustc.edu.cn/homebrew-core.git
②cask卡住
cd "$(brew --repo)/Library/Taps/"cd homebrewgit clone https://mirrors.ustc.edu.cn/homebrew-cask.git
成功执行后继续执行之前的安装命令
/bin/bash -c "$(curl -fsSL https://cdn.jsdelivr.net/gh/ineo6/homebrew-install/install.sh)"
(3)如果看到installation successful就说明安装成功了
(4)最后更新下
brew update
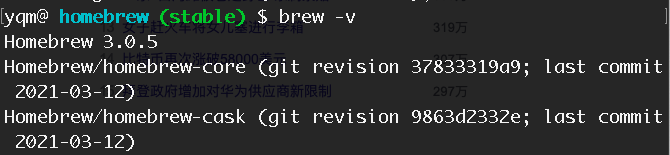
(5)
brew -v
二、brew安装nginx
// 查询有没有nginxbrew search nginx// 开始安装nginxbrew install nginx// 查看nginx版本及安装的本地位置nginx -V// 查看nginx版本nginx -v

三、nginx 配置文件路径
// 校验配置文件。会把配置文件路径打印出来nginx -t
1、路径:/usr/local/etc/nginx/nginx.conf
四、nginx 静态资源文件路径
/usr/local/var/www/index.html
配置系统变量nginx
一、执行nginx -v ,报错nginx: command not found
1、/etc/profile中加上PATH
vim /etc/profilei // 编辑PATH=$PATH:/usr/local/nginx/sbinexport PATH
2、terminal执行source /etc/profile,使文件生效。
启动
一、如果没有配置系统变量nginx,则用这种方式启动sudo /usr/local/nginx/sbin/nginx -c /usr/local/nginx/conf/nginx.conf
二、如果已经配置了系统变量nginx,则用下列这种方式启动sudo nginx
1、报错:nginx: [emerg] bind() to 0.0.0.0:80 failed (48: Address already in use)
2、原因:80端口被占用
3、解决:
(1)lsof -i 80
(2)
(3)kill -9 11778kill -9 11779
重启
sudo nginx -s reload
关闭
1、sudo nginx -s stop // 快速停止和关闭Nginx
stop是快速关闭,不管有没有正在处理的请求。
2、sudo nginx -s quit // 正常停止或关闭Nginx
quit是优雅关闭,Nginx在退出前完成已经接受的连接请求
nginx卸载(macos)
一、安装包安装的nginx,可以通过下列方式卸载:
1、删除/usr/local/nginx文件夹。
2、删除/usr/local/var/nginx文件夹。
二、brew安装的nginx可以通过下列方式卸载:brew uninstall nginx
一、查看nginx运行状态
1、浏览器输入127.0.0.1,出现nginx界面,则启动成功。
nginx文件配置
一、如果要配置多个端口,nginx.conf中可以添加include servers/*.conf,servers文件夹中可以根据需要配置文件。
user root;http {server {listen 80location / {root /usr/local/html;index index.html;try_files $uri $uri/ /index.html;}}include servers/*.conf}
线上服务器安装nginx
安装
# 安装Nginxyum -y install nginx# 查看nginx版本nginx -v# 查看nginx 安装目录rpm -ql nginx# 启动nginxservice nginx start
配置文件目录(默认)
/etc/nginx/nginx.conf
web项目目录
/usr/share/nginx/html/index.html
问题
一、 浏览器输入ip,报错403 forbidden
有以下几种原因
1、 原因1:启动用户和nginx 工作用户不一致
(1)①查看nginx的启动用户,发现是nginx,而是用root启动的
命令:ps aux | grep "nginx:worker process" | awk '{print $1}'
(2)、解决:将nginx.conf的user改为和启动用户一致
vim /etc/nginx/nginx.conf,把首行的user nginx; 改成user root;
2、原因2:缺少index.html文件,就是配置文件中的index index.html index.htm这行中指定的文件
(1)检查文件是否成功上传。
3、原因3:配置文件用了alias: xxx;
解决,改成root: xxx;
二、接口调用405
nginx上接口转发没有配置
# location ^~ /api/ {# proxy_pass http://10.137.8.100:8000/api/;# proxy_cookie_path /api/ /; # 一定要记得/eCommerceAnalysis/后面再加个/,不然会报错# proxy_pass_header Set-cookie;}
三、执行nginx -s reload,报错open() “/run/nginx.pid” failed (2: No such files or directory)
原因:80端口被占用
解决:关闭80端口,重启
1、关闭80端口
(1)查看80端口占用的进程
netstat -tunlp | grep 80
(2)根据进程号杀掉80端口占用的进程(nginx占用了80端口)
kill 1096
2、nginx -c /etc/nginx/nginx.conf
3、nginx -s reload
报错
一、make && make install时报错:*** No rule to make target build', needed bydefault’. Stop.
1、解决办法
(1)安装配置
yum -y install make zlib-devel gcc-c++ libtool openssl openssl-devel
(2)重新configure
./configure --user=nobody --group=nobody --prefix=/usr/local/nginx --with-http_stub_status_module --with-http_gzip_static_module --with-http_realip_module --with-http_sub_module --with-http_ssl_module
(3)编译
make && make install
二、yum update时报错:-bash: yum: command not found
解决
方法1:
1、去 http://mirrors.163.com/centos/7/os/x86\_64/Packages/ 地址下载4个rpm安装包:
python-iniparse-0.4-9.el7.noarch.rpm
yum-metadata-parser-1.1.4-10.el7.x86_64.rpm
yum-3.4.3-163.el7.centos.noarch.rpm
yum-plugin-fastestmirror-1.1.31-52.el7.noarch.rpm
2、下载完成之后上传到服务器中并用rpm命令安装(注:这里安装的时候需要注意,一定要加 —force —nodeps不然会报错安装不上);命令如下所示:
rpm -ivh —force —nodeps python-iniparse-0.4-9.el7.noarch.rpm
rpm -ivh —force —nodeps yum-metadata-parser-1.1.4-10.el7.x86_64.rpm
rpm -ivh —force —nodeps yum-3.4.3-163.el7.centos.noarch.rpm
rpm -ivh —force —nodeps yum-plugin-fastestmirror-1.1.31-52.el7.noarch.rpm
方法2:
sudo apt-get install yum
三、sudo apt-get install yum时报错:sudo: apt-get: command not found
四、rpm -ivh —force —nodeps python-iniparse-0.4-9.el7.noarch.rpm 时报错:-bash: rpm: command not found
五、报错:nginx: [emerg] directive is duplicate in /usr/lo
原因:设置重复了(nginx/nginx.conf中设置了与nginx/servers/test.conf中一样的配置)
解决:删除掉其中一个就行了


")


还没有评论,来说两句吧...