LNMP架构——php+nginx+mysql源码编译搭建lnmp环境
本次实验将搭建lnmp架构,详细讲解PHP、Nginx、Mysql的源码编译过程。
文章目录
- 一、实验环境
- 二、搭建lnmp架构
- 1、安装数据库mysql-boost
- 2、源码编译安装php
- 3、源码编译nginx
一、实验环境
| 主机名 | ip | 服务 |
|---|---|---|
| server1 | 172.25.1.1 | lnmp架构 |
| 真机 | 172.25.1.250 | 测试(客户端) |
mysql源码编译时要求虚拟机的硬盘大小不能小于20G,否则后边的编译过程可能会出问题
而且会很漫长,为了提升速度我们增加CPU核数和内存大小。
二、搭建lnmp架构
封装rhel6.5版本虚拟机母盘详细过程
1、安装数据库mysql-boost
在server1上:
步骤一:在网上下载mysql-boost安装包及cmake安装包
cmake相当于configure,用来编译
步骤二:安装cmake
yum install cmake-2.8.12.2-4.el6.x86_64.rpm -y

步骤三:解压mysql-boost,进入解压目录并编译
cmake -DCMAKE_INSTALL_PREFIX=/usr/local/lnmp/mysql \ #安装目录-DMYSQL_DATADIR=/usr/local/lnmp/mysql/data \ #数据库存放目录-DMYSQL_UNIX_ADDR=/usr/local/lnmp/mysql/data/mysql.sock \ #Unix socket 文件路径-DWITH_MYISAM_STORAGE_ENGINE=1 \ #安装 myisam 存储引擎-DWITH_INNOBASE_STORAGE_ENGINE=1 \ #安装 innodb 存储引擎-DDEFAULT_CHARSET=utf8 \ #使用 utf8 字符-DDEFAULT_COLLATION=utf8_general_ci \ #校验字符-DEXTRA_CHARSETS=all \ #安装所有扩展字符集-DWITH_BOOST=boost/boost_1_59_0/

发现报错,提示需要解决依赖项,解决:
yum install -y gcc gcc-c++ ncurses-devel

清理缓存,重新编译:
make cleanrm -fr CMakeCache.txtcmake -DCMAKE_INSTALL_PREFIX=/usr/local/lnmp/mysql -DMYSQL_DATADIR=/usr/local/lnmp/mysql/data -DMYSQL_UNIX_ADDR=/usr/local/lnmp/mysql/data/mysql.sock -DWITH_MYISAM_STORAGE_ENGINE=1 -DWITH_INNOBASE_STORAGE_ENGINE=1 -DDEFAULT_CHARSET=utf8 -DDEFAULT_COLLATION=utf8_general_ci -DEXTRA_CHARSETS=all -DWITH_BOOST=boost/boost_1_59_0


发现如下报错:
CMake Warning at cmake/bison.cmake:20 (MESSAGE):
Bison executable not found in PATH
Call Stack (most recent call first):
libmysqld/CMakeLists.txt:187 (INCLUDE)
解决:
yum install -y bison

清理缓存,重新编译:
make cleanrm -fr CMakeCache.txtcmake -DCMAKE_INSTALL_PREFIX=/usr/local/lnmp/mysql -DMYSQL_DATADIR=/usr/local/lnmp/mysql/data -DMYSQL_UNIX_ADDR=/usr/local/lnmp/mysql/data/mysql.sock -DWITH_MYISAM_STORAGE_ENGINE=1 -DWITH_INNOBASE_STORAGE_ENGINE=1 -DDEFAULT_CHARSET=utf8 -DDEFAULT_COLLATION=utf8_general_ci -DEXTRA_CHARSETS=all -DWITH_BOOST=boost/boost_1_59_0

步骤四:编译安装
make && make install
注意:时间会很长,不要乱按

步骤五:复制启动脚本
cp /root/mysql-5.7.17/support-files/mysql.server /etc/init.d/mysqldchmod +x /etc/init.d/mysqld

步骤六:拷贝配置文件到数据库文件/etc/my.cnf
cp /etc/my.cnf /etc/my.cnf.bakcp my-default.cnf /etc/my.cnf

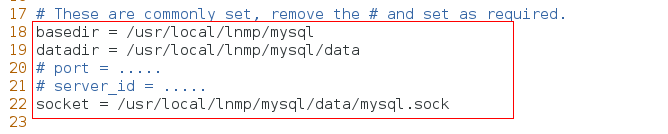
步骤七:修改/etc/my.cnf文件
vim /etc/my.cnfbasedir = /usr/local/lnmp/mysqldatadir = /usr/local/lnmp/mysql/datasocket = /usr/local/lnmp/mysql/data/mysql.sock
步骤七:添加用户和组,指定id为27,因为rpm默认安装时mysql用户的id为27,并非强制
groupadd -g 27 mysqluseradd -u 27 -g 27 mysqlchown mysql.mysql /usr/local/lnmp/mysql -R

步骤八:将mysql命令添加到环境变量
vim ~/.bash_profilePATH=$PATH:$HOME/bin:/usr/local/lnmp/mysql/binsource ~/.bash_profile


测试:
输入mysql按tab键补齐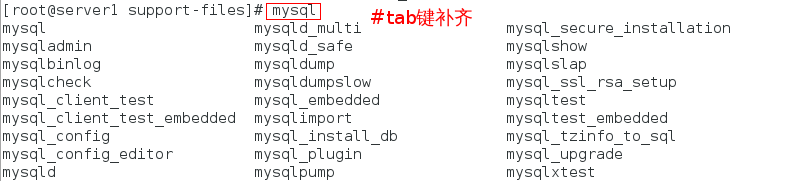
步骤九:初始化mysql,会生成一个临时密码,用于登录mysql(要记住此密码)
mysqld --user=mysql --initialize

步骤十:为了安全,再将mysql目录的所有者改为root,但是 数据目录所有者必须是mysql,不然mysql用户不能写
chown root /usr/local/lnmp/mysql -Rchown mysql /usr/local/lnmp/mysql/data -R

步骤十一:启动mysqld,并安全初始化
/etc/init.d/mysqld startmysql_secure_installation
安全初始化时会提示是否启用密码检测插件,直接回车不启用,否则会要求密码有大小写和特殊字符等要求,剩余全部选 y


步骤十二:登陆数据库测试
mysql -uroot -predhatmysql> show databases;

可以看到数据目录下生成了套节字文件:
cd /usr/local/lnmp/mysql/data/ls

查看服务开启端口:
netstat -antuple

2、源码编译安装php
在server1上:
步骤一:下载php安装包并解压
tar -jxvf php-5.6.35.tar.bz2


步骤二:进入解压目录,编译
cd php-5.6.35./configure --prefix=/usr/local/lnmp/php \--with-config-file-path=/usr/local/lnmp/php/etc \ #指定php.ini位置--with-openssl --with-snmp --with-gd --with-zlib --with-curl \--with-libxml-dir --with-png-dir \--with-jpeg-dir --with-freetype-dir --with-gmp \ # --with-freetype-dir 打开对freetype字体库的支持--with-gettext --with-pear --enable-mysqlnd \--with-mysql=mysqlnd --with-mysqli=mysqlnd --with-pdo-mysql=mysqlnd \# --with-MySQL=mysql安装目录,对mysql的支持 ;--with-MySQLi=mysqli文件目录,优化支持--enable-inline-optimization --enable-soap --enable-ftp \--enable-sockets --enable-mbstring --enable-fpm \ #--enable-fpm参数即可开启PHP-FPM--with-fpm-user=nginx --with-fpm-group=nginx \# 编译的时候指定了php的用户是nginx用户,故要建立nginx用户--with-mcrypt --with-mhash


出现如下报错:
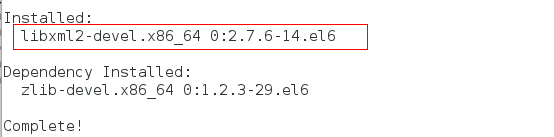
configure: error: xml2-config not found. Please check your libxml2 installation.
解决:
yum install -y libxml2-devel
再次编译:
./configure --prefix=/usr/local/lnmp/php --with-config-file-path=/usr/local/lnmp/php/etc --with-openssl --with-snmp --with-gd --with-zlib --with-curl --with-libxml-dir --with-png-dir --with-jpeg-dir --with-freetype-dir --with-gmp --with-gettext --with-pear --enable-mysqlnd --with-mysql=mysqlnd --with-mysqli=mysqlnd --with-pdo-mysql=mysqlnd --enable-inline-optimization --enable-soap --enable-ftp --enable-sockets --enable-mbstring --enable-fpm --with-fpm-user=nginx --with-fpm-group=nginx --with-mcrypt --with-mhash

出现如下报错:
configure: error: Cannot find OpenSSL’s
解决:
yum install -y openssl-devel

再次编译:
./configure --prefix=/usr/local/lnmp/php --with-config-file-path=/usr/local/lnmp/php/etc --with-openssl --with-snmp --with-gd --with-zlib --with-curl --with-libxml-dir --with-png-dir --with-jpeg-dir --with-freetype-dir --with-gmp --with-gettext --with-pear --enable-mysqlnd --with-mysql=mysqlnd --with-mysqli=mysqlnd --with-pdo-mysql=mysqlnd --enable-inline-optimization --enable-soap --enable-ftp --enable-sockets --enable-mbstring --enable-fpm --with-fpm-user=nginx --with-fpm-group=nginx --with-mcrypt --with-mhash
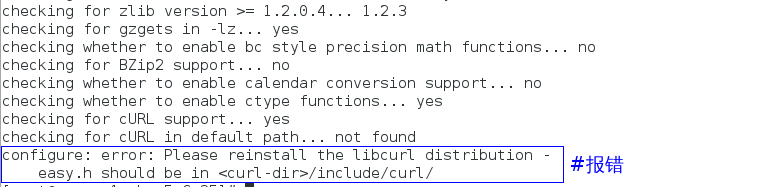
出现如下报错:
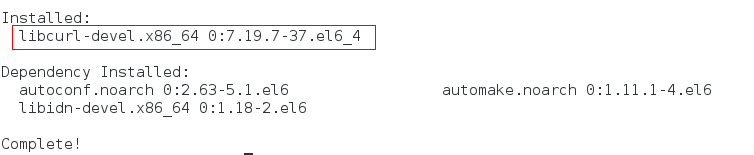
configure: error: Please reinstall the libcurl distribution -
easy.h should be in /include/curl/
解决:
yum install -y libcurl-devel
再次编译:
./configure --prefix=/usr/local/lnmp/php --with-config-file-path=/usr/local/lnmp/php/etc --with-openssl --with-snmp --with-gd --with-zlib --with-curl --with-libxml-dir --with-png-dir --with-jpeg-dir --with-freetype-dir --with-gmp --with-gettext --with-pear --enable-mysqlnd --with-mysql=mysqlnd --with-mysqli=mysqlnd --with-pdo-mysql=mysqlnd --enable-inline-optimization --enable-soap --enable-ftp --enable-sockets --enable-mbstring --enable-fpm --with-fpm-user=nginx --with-fpm-group=nginx --with-mcrypt --with-mhash

出现如下报错:
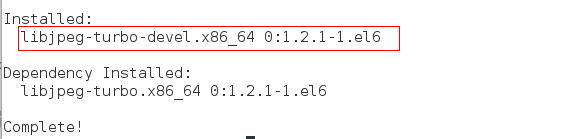
configure: error: jpeglib.h not found.
解决:
yum install -y libjpeg-turbo-devel-1.2.1-1.el6.x86_64
再次编译:
./configure --prefix=/usr/local/lnmp/php --with-config-file-path=/usr/local/lnmp/php/etc --with-openssl --with-snmp --with-gd --with-zlib --with-curl --with-libxml-dir --with-png-dir --with-jpeg-dir --with-freetype-dir --with-gmp --with-gettext --with-pear --enable-mysqlnd --with-mysql=mysqlnd --with-mysqli=mysqlnd --with-pdo-mysql=mysqlnd --enable-inline-optimization --enable-soap --enable-ftp --enable-sockets --enable-mbstring --enable-fpm --with-fpm-user=nginx --with-fpm-group=nginx --with-mcrypt --with-mhash
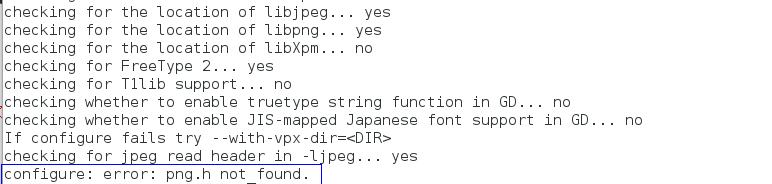
出现如下报错:
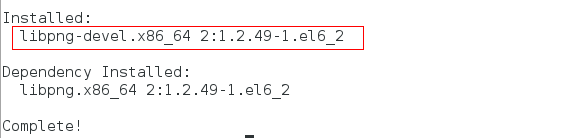
configure: error: png.h not found.
解决:
yum install -y libpng-devel-1.2.49-1.el6_2.x86_64
再次编译:
./configure --prefix=/usr/local/lnmp/php --with-config-file-path=/usr/local/lnmp/php/etc --with-openssl --with-snmp --with-gd --with-zlib --with-curl --with-libxml-dir --with-png-dir --with-jpeg-dir --with-freetype-dir --with-gmp --with-gettext --with-pear --enable-mysqlnd --with-mysql=mysqlnd --with-mysqli=mysqlnd --with-pdo-mysql=mysqlnd --enable-inline-optimization --enable-soap --enable-ftp --enable-sockets --enable-mbstring --enable-fpm --with-fpm-user=nginx --with-fpm-group=nginx --with-mcrypt --with-mhash
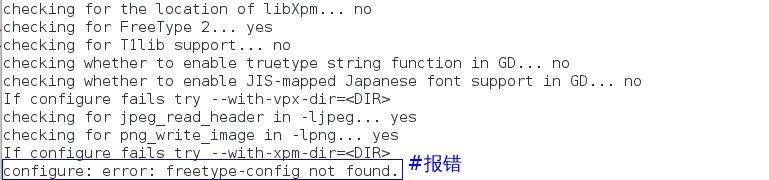
出现如下报错:
configure: error: freetype-config not found.
解决:
yum install freetype-devel-2.3.11-14.el6_3.1.x86_64 -y

再次编译:
./configure --prefix=/usr/local/lnmp/php --with-config-file-path=/usr/local/lnmp/php/etc --with-openssl --with-snmp --with-gd --with-zlib --with-curl --with-libxml-dir --with-png-dir --with-jpeg-dir --with-freetype-dir --with-gmp --with-gettext --with-pear --enable-mysqlnd --with-mysql=mysqlnd --with-mysqli=mysqlnd --with-pdo-mysql=mysqlnd --enable-inline-optimization --enable-soap --enable-ftp --enable-sockets --enable-mbstring --enable-fpm --with-fpm-user=nginx --with-fpm-group=nginx --with-mcrypt --with-mhash

出现如下报错:
configure: error: Unable to locate gmp.h
解决:
yum install gmp-devel-4.3.1-7.el6_2.2.x86_64 -y


再次编译:
./configure --prefix=/usr/local/lnmp/php --with-config-file-path=/usr/local/lnmp/php/etc --with-openssl --with-snmp --with-gd --with-zlib --with-curl --with-libxml-dir --with-png-dir --with-jpeg-dir --with-freetype-dir --with-gmp --with-gettext --with-pear --enable-mysqlnd --with-mysql=mysqlnd --with-mysqli=mysqlnd --with-pdo-mysql=mysqlnd --enable-inline-optimization --enable-soap --enable-ftp --enable-sockets --enable-mbstring --enable-fpm --with-fpm-user=nginx --with-fpm-group=nginx --with-mcrypt --with-mhash
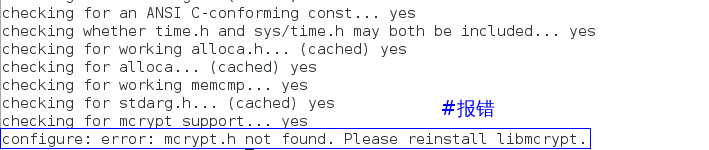
出现如下报错:
configure: error: mcrypt.h not found. Please reinstall libmcrypt.
解决:
在网上下载libmcrypt及libmcrypt-devel安装包并安装
yum install libmcrypt-2.5.8-9.el6.x86_64.rpm libmcrypt-devel-2.5.8-9.el6.x86_64.rpm -y


再次编译:
./configure --prefix=/usr/local/lnmp/php --with-config-file-path=/usr/local/lnmp/php/etc --with-openssl --with-snmp --with-gd --with-zlib --with-curl --with-libxml-dir --with-png-dir --with-jpeg-dir --with-freetype-dir --with-gmp --with-gettext --with-pear --enable-mysqlnd --with-mysql=mysqlnd --with-mysqli=mysqlnd --with-pdo-mysql=mysqlnd --enable-inline-optimization --enable-soap --enable-ftp --enable-sockets --enable-mbstring --enable-fpm --with-fpm-user=nginx --with-fpm-group=nginx --with-mcrypt --with-mhash

出现如下报错:
configure: error: Could not find net-snmp-config binary. Please check your net-snmp installation.
解决:
yum whatprovides */net-snmp-configyum install -y net-snmp-devel-5.5-49.el6.x86_64


再次编译:
./configure --prefix=/usr/local/lnmp/php --with-config-file-path=/usr/local/lnmp/php/etc --with-openssl --with-snmp --with-gd --with-zlib --with-curl --with-libxml-dir --with-png-dir --with-jpeg-dir --with-freetype-dir --with-gmp --with-gettext --with-pear --enable-mysqlnd --with-mysql=mysqlnd --with-mysqli=mysqlnd --with-pdo-mysql=mysqlnd --enable-inline-optimization --enable-soap --enable-ftp --enable-sockets --enable-mbstring --enable-fpm --with-fpm-user=nginx --with-fpm-group=nginx --with-mcrypt --with-mhash

步骤三:编译安装
make && make install


步骤四:编辑配置文件php-fpm.conf
cd /usr/local/lnmp/php/etccp php-fpm.conf.default php-fpm.confvim php-fpm.conf25 pid = run/php-fpm.pid149 user = nginx150 group = nginx


步骤五:拷贝更改php主配置文件/usr/local/lnmp/php/etc/php.ini,修改时区
cd /root/php-5.6.35cp php.ini-production /usr/local/lnmp/php/etc/php.inivim /usr/local/lnmp/php/etc/php.ini936 date.timezone = Asia/Shanghai

步骤六:拷贝php启动脚本至/etc/init.d/,并启动php-fpm,查看服务开启端口
cd /root/php-5.6.35/sapi/fpmcp init.d.php-fpm /etc/init.d/php-fpmchmod +x /etc/init.d/php-fpmuseradd nginxid nginx/etc/init.d/php-fpm startnetstat -antuple | grep 9000


3、源码编译nginx
在server1上:
步骤一:下载nginx安装包,并解压
步骤二:修改配置文件,注释掉版本号
vim src/core/nginx.h14 #define NGINX_VER "nginx/"

步骤三:修改gcc文件,关闭debug模式
vim auto/cc/gcc171 # debug172 #CFLAGS="$CFLAGS -g"

步骤四:编译
./configure --prefix=/usr/local/lnmp/nginx --with-http_ssl_module --with-http_stub_status_module --with-threads --with-file-aio --user=nginx --group=nginx

出现如下报错:
./configure: error: the HTTP rewrite module requires the PCRE library.
You can either disable the module by using —without-http_rewrite_module
option, or install the PCRE library into the system, or build the PCRE library
statically from the source with nginx by using —with-pcre= option.
解决:
yum install pcre-devel -y

再次编译:
./configure --prefix=/usr/local/lnmp/nginx --with-http_ssl_module --with-http_stub_status_module --with-threads --with-file-aio --user=nginx --group=nginx

步骤五:编译安装
make && make install

步骤六: 修改配置文件,开启php模块,添加php页面
vim /usr/local/lnmp/nginx/conf/nginx.conflocation / {root html;index index.php index.html index.htm;}location ~ \.php$ {root html;fastcgi_pass 127.0.0.1:9000;fastcgi_index index.php;# fastcgi_param SCRIPT_FILENAME /scripts$fastcgi_script_name;include fastcgi.conf;}


步骤七:创建软链接,将nginx启动脚本链接到/usr/local/sbin/下,并检测语法规范启动nginx
ln -s /usr/local/lnmp/nginx/sbin/nginx /usr/local/sbinnginx -tnginx

步骤八:此时,可以看到php、nginx、mysql服务全部开启
netstat -antuple

在客户端(真机)上测试:
浏览器搜索http://172.25.1.101
在server1上:
在nginx默认发布目录添加 index.php
vim /usr/local/lnmp/nginx/html/index.php<?phpphpinfo()?>

在客户端(真机)上测试:
浏览器搜索http://172.25.1.101/index.php
至此,lnmp搭建完成


还没有评论,来说两句吧...