Thread类的基本用法
目录
一、线程创建
1、继承Thread类
2、实现Runnable接口
3 、lambda表达式创建一个线程
二、线程中断
三、线程等待
四、线程休眠
五、获取线程实例
一、线程创建
首先如何创建一个新的线程有五种方法:
1、继承Thread类
1、定义一个类,继承自Thread类,重写run()方法。
2、创建该类的实例,即创建一个线程。
3、调用start()方法,启动线程()(不能直接调用run()方法)。
//继承Thread类class MyThread extends Thread{@Overridepublic void run() {while (true){System.out.println("hello t");}}}public class ThreadDome1 {public static void main(String[] args) {Thread t = new MyThread();t.start();while (true){System.out.println("hello main");}}}
2、实现Runnable接口
步骤:1、定义一个类,实现Runnable接口,实现run()方法。
2、创建实现类的实例。
3、创建Thread类的一个实例,将上一步中实现类的实例传入
4、调用start()方法,启动线程
//实现Runnable接口class MyRunnable implements Runnable{@Overridepublic void run() {while (true) {System.out.println("hello t");try {Thread.sleep(1000);} catch (InterruptedException e) {e.printStackTrace();}}}}public class ThreadDome2 {public static void main(String[] args) {MyRunnable myRunnable = new MyRunnable();Thread t = new Thread(myRunnable);t.start();while (true){System.out.println("hello main");try {Thread.sleep(1000);} catch (InterruptedException e) {e.printStackTrace();}}}}
另外两种方法是使用匿名内部类实现的 此处就不介绍了 可见链接中的文章https://blog.csdn.net/qq_62274623/article/details/131616670?spm=1001.2014.3001.5501
3 、lambda表达式创建一个线程
()中是要传进来的参数,{}中写的是函数体,如果只有一个参数,可以省略掉(),函数体只有一句话,{}也是可以省略的,但是不建议这样写。
public class ThreadDome5 {public static void main(String[] args) {Thread t = new Thread( () ->{while (true){System.out.println("hello t");try {Thread.sleep(1000);} catch (InterruptedException e) {e.printStackTrace();}}} );t.start();System.out.println(t.getName());while (true){System.out.println("hello main");try {Thread.sleep(1000);} catch (InterruptedException e) {e.printStackTrace();}}}}
二、线程中断
线程中断是指一个线程被强制停止执行其当前的任务,并进入一种中断状态,此时该线程不会继续执行下去,而是等待被重新唤醒。线程中断通常由其他线程发起,也可以是系统发起,例如线程执行过程中发生了未捕获的异常或系统出现故障。线程中断可以有效地控制程序的执行,避免出现死锁等问题。在Java中,可以通过Thread类的interrupt()方法来发起线程中断请求。当一个线程被中断后,需要在代码中进行相应的处理,例如停止执行某个任务或释放占用的资源
public static void main(String[] args) {Thread t = new Thread(() ->{while (!Thread.currentThread().isInterrupted() ){//currentThread是获取到当前线程实例//此处currentThread 得到的对象就是t//isInterrupted就是t对象里自带的一个标志位System.out.println("hello t");try {Thread.sleep(1000);} catch (InterruptedException e) {e.printStackTrace();}}});t.start();try {Thread.sleep(3000);} catch (InterruptedException e) {e.printStackTrace();}//把t内部的标志位给设置成truet.interrupt();}
总结一下 interrupt都做了什么, interrupt 做了两件事
首先它将t内部标志位设置为true , 让这个t线程的循环结束
interrupt的第二件事就是唤醒正在阻塞的进程 。
但是在上面这个代码中 循环并没有结束 ,而是打印了一个异常信息就继续执行了 , 如果该线程正在阻塞中(也就是正在执行sleep),此时就会将阻塞状态唤醒 , 通过抛出异常的方式让sleep立刻结束
关于这个sleep有一个很重要的问题 就是在sleep被唤醒的时候 sleep会自动的把标志位清空
也就是将 true->false 这也就导致了 虽然我们用interrupt来结束 但是sleep唤醒又被重置了
所以代码还会继续循环下去 , 然后因为主线程中只执行了一次 interrupt所以只抛出一次异常
#
三、线程等待
使用
join()方法也可以实现线程等待。在这种情况下,一个线程可以等待另一个线程完成它的任务,然后再继续执行。在这种方法中,等待线程调用join()方法,将自身置于等待状态,直到被等待线程执行完毕后才会继续执行。
public static void main(String[] args) {Thread t = new Thread(new Runnable() {@Overridepublic void run() {System.out.println("1");}});t.start();System.out.println("2");}
在上面这个代码中 ,创建了一个新线程,那先执行新的线程还是执行主线程,答案是不确定,先执行谁都是有可能的,此时的新线程和主线程是并发(并行+并发)执行的,而系统的调度是无序的,所以先执行哪一个线程都有可能。但是线程创建需要时间 , 所以大概率可能执行主线程.
所以此时如果我们想让新线程先执行 我们就需要使用Thread类的join方法,这个方法是可以规定哪一个线程先执行的,还是这个代码我们在主线程中加一行代码,就可以让新的线程先执行,新的线程执行完然后执行主线程,注意,哪个在哪个线程中加入这个方法,就是让线程进行等待(阻塞状态)
public static void main(String[] args) throws InterruptedException {Thread t = new Thread(new Runnable() {@Overridepublic void run() {System.out.println("1");}});t.start();t.join();System.out.println("2");}
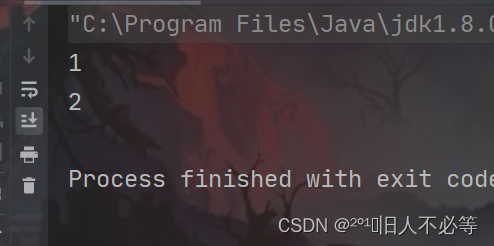
由上面能看出加入了join代码后,就可以控制让新线程先执行了,如果还有其他线程,那么其他线程是不受影响的
四、线程休眠
因为线程的调度是不可控的,所以,这个方法只能保证实际休眠时间是大于等于参数设置的休眠时间的。
public class ThreadDemo {public static void main(String[] args) throws InterruptedException {System.out.println(System.currentTimeMillis());Thread.sleep(3 * 1000);System.out.println(System.currentTimeMillis());}}
五、获取线程实例
也就是 currentThread
public class ThreadDemo {public static void main(String[] args) {Thread thread = Thread.currentThread();System.out.println(thread.getName());}}


![[C#版剑指offer]旋转数组的最小数字查询](https://image.dandelioncloud.cn/dist/img/NoSlightly.png "[C#版剑指offer]旋转数组的最小数字查询")


还没有评论,来说两句吧...