HTML input range
HTML input range
通过鼠标拖动方式设置值是很方便的操作。
将input的type属性值设置为”range”即可创建具有上述功能的控件。
此控件是HTML5新增。
代码实例如下:
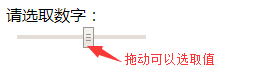
<!DOCTYPE html><html><head><meta charset=" utf-8"><meta name="author" content="http://www.dandelioncloud.cn/" /><title>蒲公英云</title></head><body><form name="myform" method="post">请选取数字:<br/><input type="range" min="1" max="10" name="range"></form></body></html>
代码运行效果截图如下:
此控件属性众多,下面介绍一下它的主要属性:
(1).autofocus(HTML5):规定页面加载后,此控件是否自动获取焦点。
(2).disabled:设置此控件不可用,既不能拖动,也不能提交它的值。
(3).form(HTML5):属性值为form表单的id属性值,可以将一个控件归属于多个form表单。
(4).list(HTML5):与datalist关联起来。
(5).min与max(HTML5):这两个属性可以规定控件可以选取的最小值与最大值。
(6).step(HTML5):规定数字选取变化的梯度。
(7).value:规定控件当前选取的值。
代码实例如下:
<!DOCTYPE html><html><head><meta charset=" utf-8"><meta name="author" content="http://www.dandelioncloud.cn/" /><title>蒲公英云</title><script>window.onload=function(){let orange=document.querySelector("#num");let obt=document.querySelector("#bt");let odiv=document.querySelector("#show");obt.onclick=function(){odiv.innerHTML=orange.value;}}</script></head><body><input type="range" id="num" min=1 max=10 name="range"><input type="button" id="bt" value="查看效果"/><div id="show"></div></body></html>
拖动可以调整选取值的大小,点击按钮可以将选取的值写入div。
通过min属性设置最小值为1,max设置最大值为10。
<!DOCTYPE html><html><head><meta charset=" utf-8"><meta name="author" content="http://www.dandelioncloud.cn/" /><title>蒲公英云</title><script>window.onload=function(){let orange=document.querySelector("#num");let obt=document.querySelector("#bt");let odiv=document.querySelector("#show");obt.onclick=function(){odiv.innerHTML=orange.value;}}</script></head><body><input type="range" id="num" min=1 max=10 list="dandelioncloud" name="range"><datalist id="dandelioncloud"><option value="2"/><option value="3"/><option value="4"/><option value="5"/></datalist><input type="button" id="bt" value="查看效果"/><div id="show"></div></body></html>
代码运行效果截图如下:
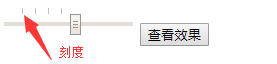
通过控件的list属性与datalist关联起来。
datalist可以在控件上方显示刻度,刻度值通过option的value属性设置。
点击刻度将控件按钮定位到对应value值位置。
<!DOCTYPE html><html><head><meta charset=" utf-8"><meta name="author" content="http://www.dandelioncloud.cn/" /><title>蒲公英云</title><script>window.onload=function(){let orange=document.querySelector("#num");let obt=document.querySelector("#bt");let odiv=document.querySelector("#show");obt.onclick=function(){odiv.innerHTML=orange.value;}}</script></head><body><input type="range" id="num" min=1 max=10 step="3" name="range"><input type="button" id="bt" value="查看效果"/><div id="show"></div></body></html>
通过step设置数字变化的梯度,默认值为1。
大家可以自定拖动控件按钮,感受此属性的作用。
<!DOCTYPE html><html><head><meta charset=" utf-8"><meta name="author" content="http://www.dandelioncloud.cn/" /><title>蒲公英云</title></head><body><form name="myform" id="ant" method="post" action="#"><input type="submit" value="提交表单"/></form><input form="ant" type="range" name="range"></body></html>
代码分析如下:
(1).在HTML5之前,表单元素必须要位于<form>元素之内,以表明它的所属。
(2).HTML5新增form属性,将其值设置为指定<form>元素的id属性值,这样表单元素即可与指定<form>表单关联起来,没必要将表单元素至于其内,并可以归属于多个表单。
<!DOCTYPE html><html><head><meta charset=" utf-8"><meta name="author" content="http://www.dandelioncloud.cn/" /><title>蒲公英云</title><script>window.onload=function(){let orange=document.querySelector("#num");let odiv=document.querySelector("#show");odiv.innerHTML=orange.value;orange.onmousemove=function(){odiv.innerHTML=this.value;}}</script></head><body><input type="range" id="num" min=1 max=20 step="1"><div id="show"></div></body></html>
上述代码中,通过鼠标拖动控件,实时将控件的值写入div。
此种效果在现实中需求更多,结合JavaScript实现,需要的朋友做一下参考。


还没有评论,来说两句吧...