springboot---基本模块详解
概述
1.基于Spring框架的“约定优先于配置(COC)”理念以及最佳实践之路。
2.针对日常企业应用研发各种场景的Spring-boot-starter自动配置依赖模块,且“开箱即用”(约定spring-boot-starter- 作为命名前缀,都位于org.springframenwork.boot包或者命名空间下)。
spring-boot-starter-jdbc
默认情况下,当我们没有配置任何DataSource,SpringBoot会为我们自动配置一个DataSource,这种自动配置的方式一般适用于测试,开发还是自己配置一个DataSource的实例比较好。
如果我们的工程只依赖一个数据库,那么,使用DataSource自动配置模块提供的参数是最方便的:
spring.datasource.url=jdbc:mysql://{datasource host}:3306/{databaseName}spring.datasource.username={database username}spring.datasource.passwd={database passwd}
还会自动配置的有:JdbcTemplate DateSourceTransactionManager等,我们只要在使用的时候注入(@Autowired)就好了
此外,SpringBoot还支持的数据库有spring-boot-data-jpa spring-boot-data-mongodb
spring-boot-starter-web
在当下项目运行mvn spring-boot:run就可以直接启用一个嵌套了tomcat的web应用。
如果没有提供任何服务的Cotroller,访问任何路径都会返回一个springBoot默认的错误页面(Whitelabel error page)。
嵌入式Web容器层面的约定和定制
spring-boot-starter-web默认使用嵌套式的Tomcat作为Web容器对外提供HTTP服务,默认端口8080对外监听和提供服务。
我们同样可以使用spring-boot-starter-jetty或者spring-boot-starter-undertow作为Web容器。
想改变默认的配置端口,可以在application.properties中指定:
server.port = 9000(the port number you want)
类似的配置还有:
server.addressserver.ssl.*server.tomcat.*
如果上诉仍然没有办法满足要求,springBoot支持对嵌入式的Web容器实例进行定制,可以通过向IoC容器中注册一个EmbeddedServletContainerCustomizer类型的组件来对嵌入式的Web容器进行定制
public class UnveilSpringEmbeddedTomcatCustomizer implements EmbeddedServletContainer{public void customize(ConfigurableEmbeddedServletContainer container){container.setPort(9999);container.setContextPath("C\\hello");...}}
spring-boot-starter-test
进行springboot单元测试
@RunWith(SpringRunner.class)@SpringBootTestpublic class UserControllerTest {@Autowiredprivate WebApplicationContext wac;private MockMvc mockMvc;@Beforepublic void setup() {mockMvc = MockMvcBuilders.webAppContextSetup(wac).build();}@Testpublic void whenQuerySuccess() throws Exception {String result = mockMvc.perform(get("/user").param("username", "jojo").param("age", "18").param("ageTo", "60").param("xxx", "yyy")// .param("size", "15") //MockMvcRequestBuilders// .param("page", "3")// .param("sort", "age,desc").contentType(MediaType.APPLICATION_JSON_UTF8)).andExpect(status().isOk()).andExpect(jsonPath("$.length()").value(3)) //MockMvcResultMatchers.andReturn().getResponse().getContentAsString();System.out.println(result);}
spring-boot-devtools
当配置了 devtools 后,我们在classpath修改任何文件项目都将会自动重启。
(1)某些资源在更改时不一定需要触发重新启动。例如, Thymeleaf 模板可以就地进行编辑。默认情况下更改资源路径包括了:/META-INF/maven, /META-INF/resources ,/resources ,/static ,/public 或者 /templates 不会触发重新启动, 但会触发实时重新加载。
如果逆向排除这些路径,可以使用如下配置:
spring.devtools.restart.exclude=static/,public/
(2)如果要保留这些默认值并添加其他排除项, 请使用 spring.devtools.restart.additional-exclude 属性代替。
(3)通过 System.setProperty(“spring.devtools.restart.enabled”, “false”); 方法,可以在SpringApplication.run()方法运行天使用关闭 devtools。
(4)当我们再次启动 App.java 的时候,使用的加载器就变为了 restartedMain 了,说明热部署已经成功。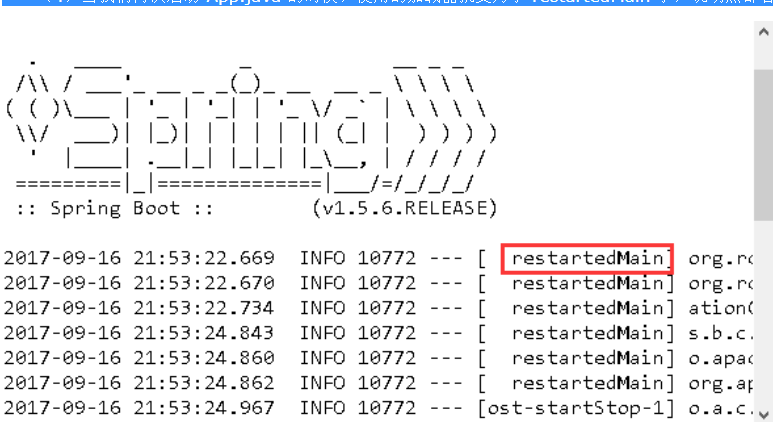
注意点:devtools 由于是双类加载机制,再结合了通用Mapper后可能会出现 java.lang.ClassCastException 异常(例如:说class x.x.A cannot be cast to x.x.A。)。
解决方案就如下:
在 src/main/resources 中创建 META-INF 目录,在此目录下添加 spring-devtools.properties 配置,内容如下:
restart.include.mapper=/mapper-[\w-\.]+jar
restart.include.pagehelper=/pagehelper-[\w-\.]+jar
spring-boot-starter-aop
AOP:Aspect Oriented Programming,面向切面编程
spring-boot-starter-aop主要由2部分组成:
1.位于spring-boot-autoconfigure的org.sringframework.boot.autoconfigure.aop.AopAutoConfiguration提供的@Configuration配置类和相应的配置项,即下面的2个配置项:
spring.aop.auto=truespring.aop.proxy-target-class=false
2.spring-boot-starter-aop模块提供了针对spring-aop aspectjrt 和aspectjweaver的依赖
spring-boot-starter-security
应用安全
spring-boot-starter-security 主要面向的是Web应用开发,配合spring-boot-starter-web
spring-boot-starter-security 默认会提供一个基于HTTP Basic认证的安全防护策略,默认用户为user,访问密码则在当前web应用启动的时候,打印到控制台,要想定制,则在配置文件如下进行配置:
security.user.name={username}security.user.password={passwd}
除此之外,spring-boot-starter-security还会默认启动一些必要的Web安全防护,比如针对XSS CSRF等场针对Web应用的攻击,同时,也会将一些常见的静态资源路径排除在安全防护之外。
AuthenticationManager AccessDecisionManager AbstractSecurityInterceptor被称为Spring Security的基础铁三角,前2者负责制定规则, AbstractSecurityInterceptor负责执行。我们常见的Filter类就可以定制和扩展SpringSecurity的防护机制。
进一步定制spring-boot-starter-security
上诉使用SecurityProperties暴露的配置项,即以security.*对spring-boot-starter-security进行简单的配置,还可以通过给出一个继承了WebSecurityConfigurerAdapter的JavaConfig配置类对spring-boot-starter-security的行为进行更深级别的定制,例如:
- 使用其他的AuthenticationManager实例
- 对默认的HttpSecurity定义的资源访问的规则重新定义
- 对默认提供的WebSecurity行为进行调整
- 一般配@Order(SecurityProperties.ACCESS_OVERRIDE_ORDER)进行标注。
mybatis-spring-boot-starter
MyBatis-Spring-Boot-Starter依赖将会提供如下
- 自动检测现有的DataSource
- 将创建并注册SqlSessionFactory的实例,该实例使用
- SqlSessionFactoryBean将该DataSource作为输入进行传递
- 将创建并注册从SqlSessionFactory中获取的SqlSessionTemplate的实例。
- 自动扫描您的mappers,将它们链接到SqlSessionTemplate并将其注册到Spring上下文,以便将它们注入到您的bean中。
使用了该Starter之后,只需要定义一个DataSource即可(application.properties或application.yml中可配置),它会自动创建使用该DataSource的SqlSessionFactoryBean以及SqlSessionTemplate。会自动扫描你的Mappers,连接到SqlSessionTemplate,并注册到Spring上下文中。
pagehelper-spring-boot-starter
引入的jar包必须是要pagehelper-spring-boot-starter如果单独引入pagehelper的话,分页会不成功.
使用时PageHelper.startPage(pageNum, pageSize)一定要放在列表查询上面,这样在查询时会查出相应的数据量且会查询出总数,像图中总数量有两条,page里面查询出来了是2,但list只查出了1条,因为我传的分页是pageNo=1,pageSize=1
PageHelper.startPage(pageNum, pageSize);List<SystemUserPageVo> systemUserList = systemUserMapper.page(find);PageInfo<SystemUserPageVo> page = new PageInfo<>(systemUserList);
打印的sql如下所示
Preparing: SELECT count(0) FROM (SELECT su.id, su.name, su.nick_name, su.email, su.phone, su.sex, su.fail_num, su.status, su.create_time, su.update_time, GROUP_CONCAT(sr.name) AS rolesName FROM SYSTEM_USER su, system_user_role sur, system_role sr WHERE su.id = sur.user_id AND sur.role_id = sr.id GROUP BY su.id) table_countParameters:Total: 1Preparing: SELECT su.id, su.name, su.nick_name, su.email, su.phone, su.sex, su.fail_num, su.status, su.create_time, su.update_time, group_concat(sr.name) as rolesName FROM SYSTEM_USER su, system_user_role sur, system_role sr WHERE su.id = sur.user_id AND sur.role_id = sr.id GROUP BY su.id LIMIT ?Parameters: 1(Integer)Total: 1
druid-spring-boot-starter
Druid是Java语言中最好的数据库连接池。Druid能够提供强大的监控和扩展功能。DruidDataSource支持的数据库:
理论上说,支持所有有jdbc驱动的数据库。最近发现Druid在springboot框架下有更加好用的Druid Spring Boot Starter,可以省去原本写Druid的一些配置文件或者@Configuration来配置,直接将配置写在application.yml里,看起来更简单一些。
编写application.yml,部分说明写在注释了:
spring:application:name: springboot-test-exam1datasource:# 使用阿里的Druid连接池type: com.alibaba.druid.pool.DruidDataSourcedriver-class-name: com.mysql.jdbc.Driver# 填写你数据库的url、登录名、密码和数据库名url: jdbc:mysql://localhost:3306/databaseName?useSSL=false&characterEncoding=utf8username: rootpassword: rootdruid:# 连接池的配置信息# 初始化大小,最小,最大initial-size: 5min-idle: 5maxActive: 20# 配置获取连接等待超时的时间maxWait: 60000# 配置间隔多久才进行一次检测,检测需要关闭的空闲连接,单位是毫秒timeBetweenEvictionRunsMillis: 60000# 配置一个连接在池中最小生存的时间,单位是毫秒minEvictableIdleTimeMillis: 300000validationQuery: SELECT 1 FROM DUALtestWhileIdle: truetestOnBorrow: falsetestOnReturn: false# 打开PSCache,并且指定每个连接上PSCache的大小poolPreparedStatements: truemaxPoolPreparedStatementPerConnectionSize: 20# 配置监控统计拦截的filters,去掉后监控界面sql无法统计,'wall'用于防火墙filters: stat,wall,log4j# 通过connectProperties属性来打开mergeSql功能;慢SQL记录connectionProperties: druid.stat.mergeSql\=true;druid.stat.slowSqlMillis\=5000# 配置DruidStatFilterweb-stat-filter:enabled: trueurl-pattern: "/*"exclusions: "*.js,*.gif,*.jpg,*.bmp,*.png,*.css,*.ico,/druid/*"# 配置DruidStatViewServletstat-view-servlet:url-pattern: "/druid/*"# IP白名单(没有配置或者为空,则允许所有访问)allow: 127.0.0.1,192.168.163.1# IP黑名单 (存在共同时,deny优先于allow)deny: 192.168.1.73# 禁用HTML页面上的“Reset All”功能reset-enable: false# 登录名login-username: admin# 登录密码login-password: 123456
为了方便使用application.properties的读者,使用下面的配置和上面相同
server.port=8080spring.application.name=springboot-test-exam1spring.datasource.type=com.alibaba.druid.pool.DruidDataSourcespring.datasource.driver-class-name=com.mysql.jdbc.Driverspring.datasource.url=jdbc:mysql://localhost:3306/databaseName?useSSL=false&characterEncoding=utf8spring.datasource.username=rootspring.datasource.password=rootspring.datasource.druid.initial-size=5spring.datasource.druid.min-idle=5spring.datasource.druid.maxActive=20spring.datasource.druid.maxWait=60000spring.datasource.druid.timeBetweenEvictionRunsMillis=60000spring.datasource.druid.minEvictableIdleTimeMillis=300000spring.datasource.druid.validationQuery=SELECT 1 FROM DUALspring.datasource.druid.testWhileIdle=truespring.datasource.druid.testOnBorrow=falsespring.datasource.druid.testOnReturn=falsespring.datasource.druid.poolPreparedStatements=truespring.datasource.druid.maxPoolPreparedStatementPerConnectionSize=20spring.datasource.druid.filters=stat,wall,log4jspring.datasource.druid.connectionProperties=druid.stat.mergeSql\=true;druid.stat.slowSqlMillis\=5000spring.datasource.druid.web-stat-filter.enabled=truespring.datasource.druid.web-stat-filter.url-pattern=/*spring.datasource.druid.web-stat-filter.exclusions=*.js,*.gif,*.jpg,*.bmp,*.png,*.css,*.ico,/druid/*spring.datasource.druid.stat-view-servlet.url-pattern=/druid/*spring.datasource.druid.stat-view-servlet.allow=127.0.0.1,192.168.163.1spring.datasource.druid.stat-view-servlet.deny=192.168.1.73spring.datasource.druid.stat-view-servlet.reset-enable=falsespring.datasource.druid.stat-view-servlet.login-username=adminspring.datasource.druid.stat-view-servlet.login-password=123456
mybatis-generator-core
SSM框架可以使用mybatis-generator-core-1.3.2.jar来自动生成代码,以下是配置和使用的代码。
generatorConfig.xml
<?xml version="1.0" encoding="UTF-8"?><!DOCTYPE generatorConfiguration PUBLIC "-//mybatis.org//DTD MyBatis Generator Configuration 1.0//EN" "http://mybatis.org/dtd/mybatis-generator-config_1_0.dtd"><generatorConfiguration><context id="testTables" targetRuntime="MyBatis3"><commentGenerator><!-- 是否去除自动生成的注释 true:是 : false:否 --><property name="suppressAllComments" value="true" /></commentGenerator><!--数据库连接的信息:驱动类、连接地址、用户名、密码 --><jdbcConnection driverClass="com.mysql.jdbc.Driver" connectionURL="jdbc:mysql://localhost:3306/crm" userId="root" password="1111"></jdbcConnection><!-- 数据库连接配置 sqlserver--><!--<jdbcConnection driverClass="com.microsoft.sqlserver.jdbc.SQLServerDriver" connectionURL="jdbc:sqlserver://gsdy.eicp.net:8633;databasename=qkmls" userId="sa" password="sa@20170410" />--><!--<jdbcConnection driverClass="oracle.jdbc.OracleDriver" connectionURL="jdbc:oracle:thin:@127.0.0.1:1521:yycg" userId="yycg" password="yycg"> </jdbcConnection> --><!-- 默认false,把JDBC DECIMAL 和 NUMERIC 类型解析为 Integer,为 true时把JDBC DECIMAL 和 NUMERIC 类型解析为java.math.BigDecimal --><javaTypeResolver><property name="forceBigDecimals" value="false" /></javaTypeResolver><!-- targetProject:生成PO类的位置 --><javaModelGenerator targetPackage="com.ma.core.po" targetProject=".\src"><!-- enableSubPackages:是否让schema作为包的后缀 --><property name="enableSubPackages" value="false" /><!-- 从数据库返回的值被清理前后的空格 --><property name="trimStrings" value="true" /></javaModelGenerator><!-- targetProject:mapper映射文件生成的位置 --><sqlMapGenerator targetPackage="com.ma.mapper" targetProject=".\src"><!-- enableSubPackages:是否让schema作为包的后缀 --><property name="enableSubPackages" value="false" /></sqlMapGenerator><!-- targetPackage:mapper接口生成的位置 --><javaClientGenerator type="XMLMAPPER" targetPackage="com.ma.core.dao" targetProject=".\src"><!-- enableSubPackages:是否让schema作为包的后缀 --><property name="enableSubPackages" value="false" /></javaClientGenerator><!-- 指定数据库表 --><table tableName="customer" schema=""/><table tableName="sys_user" schema=""/><table tableName="base_dict" schema=""/><!-- <table schema="" tableName="T_Qk_Orders"></table> <table schema="" tableName="T_Qk_Orderitem"></table> <table schema="" tableName="T_Qk_Amount"></table> --><!--<table schema="" tableName="tb_content"></table> <table schema="" tableName="tb_content_category"></table> <table schema="" tableName="tb_item"></table> <table schema="" tableName="tb_item_cat"></table> <table schema="" tableName="tb_item_desc"></table> <table schema="" tableName="tb_item_param"></table> <table schema="" tableName="tb_item_param_item"></table> <table schema="" tableName="tb_order"></table> <table schema="" tableName="tb_order_item"></table> <table schema="" tableName="tb_order_shipping"></table> <table schema="" tableName="tb_user"></table> --></context></generatorConfiguration>
GeneratorSqlmap.java使用代码
package com.ma.common.utils;import java.io.File;import java.io.IOException;import java.util.ArrayList;import java.util.List;import org.mybatis.generator.api.MyBatisGenerator;import org.mybatis.generator.config.Configuration;import org.mybatis.generator.config.xml.ConfigurationParser;import org.mybatis.generator.exception.XMLParserException;import org.mybatis.generator.internal.DefaultShellCallback;public class GeneratorSqlmap {public void generator() throws Exception{List<String> warnings = new ArrayList<String>();boolean overwrite = true;//指定 逆向工程配置文件File configFile = new File("resource/generatorConfig.xml");ConfigurationParser cp = new ConfigurationParser(warnings);Configuration config = cp.parseConfiguration(configFile);DefaultShellCallback callback = new DefaultShellCallback(overwrite);MyBatisGenerator myBatisGenerator = new MyBatisGenerator(config,callback, warnings);myBatisGenerator.generate(null);}public static void main(String[] args) throws Exception {try {GeneratorSqlmap generatorSqlmap = new GeneratorSqlmap();generatorSqlmap.generator();} catch (Exception e) {e.printStackTrace();}}}
把上面的配置文件和代码,放到一个可以运行的项目下运行就可以了。根据自己的需求配置不同的数据源和生成代码的位置。
commons-lang3
这个包中的很多工具类可以简化我们的操作,在这里简单的研究其中的几个工具类的使用。
apache提供的众多commons工具包,号称Java第二API,而common里面lang3包更是被我们使用得最多的。因此本文主要详细讲解lang3包里面几乎每个类的使用,希望以后大家使用此工具包,写出优雅的代码


 —— 一个窗口显示多张图片")


还没有评论,来说两句吧...