Flink消费kafka消息实战

本次实战的内容是开发Flink应用,消费来自kafka的消息,进行实时计算;
环境情况
本次实战用到了三台机器,它们的IP地址和身份如下表所示:

注意:
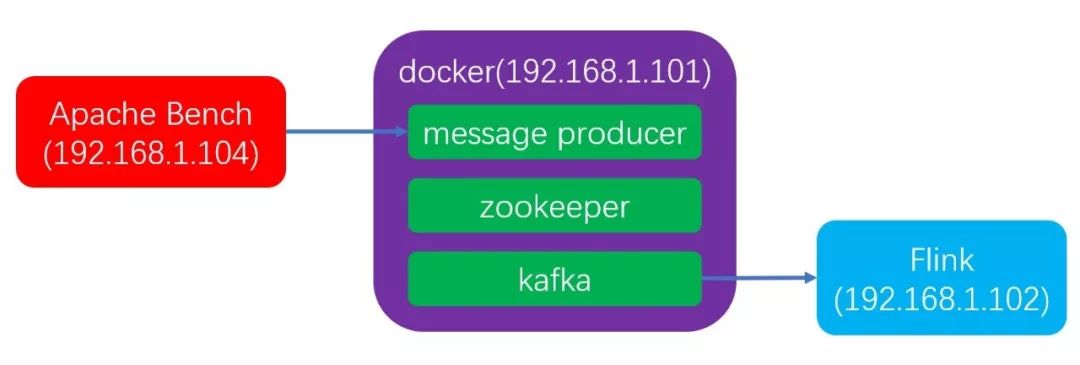
本文的重点是Flink,所以在192.168.1.101这台机器上通过Docker快速搭建了kafka server和消息生产者,只要向这台机器的消息生产者容器发起http请求,就能生产一条消息到kafka;
192.168.1.104这台机器安装了Apache Bench,可以通过简单的命令,向192.168.1.101发起大量http请求,这样就能产生大量kafka消息;
整体架构如下图:
操作步骤
在机器192.168.1.101上部署三个容器(消息生产者、zookeeper、kafka);
在机器192.168.1.104上安装Apache Bench;
在机器192.168.1.102上配置kafak相关的host;
开发Flink应用,部署到机器192.168.1.102;
在机器192.168.1.104上发起压力测试,请求地址是消息生产者的http接口地址,产生大量消息;
观察Flink应用的处理情况;
版本信息
操作系统:Centos7
docker:17.03.2-ce
docker-compose:1.23.2
kafka:0.11.0.3
zookeeper:3.4.9
JDK:1.8.0_191
spring boot:1.5.9.RELEASE
spring-kafka:1.3.8.RELEASE
Flink:1.7
在机器192.168.1.101上部署三个容器(消息生产者、zookeeper、kafka)
构建kafka相关的环境不是本文重点,因此这里利用docker快速实现,步骤如下:
在机器192.168.1.101上安装docker和docker-compose;
创建docker-compose.yml文件,内容如下:
version: ‘2’
services:
zookeeper:
image: wurstmeister/zookeeperports:- "2181:2181"
kafka1:
image: wurstmeister/kafka:2.11-0.11.0.3ports:- "9092:9092"environment:KAFKA\_ADVERTISED\_LISTENERS: PLAINTEXT://kafka1:9092KAFKA\_LISTENERS: PLAINTEXT://:9092KAFKA\_ZOOKEEPER\_CONNECT: zookeeper:2181KAFKA\_CREATE\_TOPICS: "topic001:2:1"volumes:- /var/run/docker.sock:/var/run/docker.sock
producer:
image: bolingcavalry/kafka01103producer:0.0.1-SNAPSHOTports:- "8080:8080"
在docker-compose.yml所在目录执行命令docker-compose up -d,即可启动容器;
如果您想了解更多docker环境下kafka消息生产者的细节,请参考《如何使用Docker内的kafka服务》;
在机器192.168.1.104上安装Apache Bench
不同的操作系统安装Apache Bench的命令也不一样:
ubuntu上的安装命令apt-get install apache2-utils;
centos上的安装命令yum install httpd-tools;
源码下载
接下来的实战是编写Flink应用的源码,您可以选择直接从GitHub下载这个工程的源码,地址和链接信息如下表所示:

这个git项目中有多个文件夹,本章源码在flinkkafkademo这个文件夹下,如下图红框所示:

开发Flink应用,部署到机器192.168.1.102
Flink环境搭建请参考《Flink1.7从安装到体验》;
应用基本代码是通过mvn命令创建的,在命令行输入以下命令:
mvn archetype:generate -DarchetypeGroupId=org.apache.flink -DarchetypeArtifactId=flink-quickstart-java -DarchetypeVersion=1.7.0
根据提示,输入groupId为com.bolingcavalry,artifactId为flinkkafkademo,其他的直接按下回车键即可使用默认值,这样就得到了一个maven工程:flinkkafkademo;
打开工程的pom.xml文件,增加以下两个依赖:
新增一个辅助类,用于将kafka消息中的内容转换成java对象:
/**
* @Description: 解析原始消息的辅助类
* @author: willzhao E-mail: zq2599@gmail.com
* @date: 2019/1/1 20:13
*/
public class JSONHelper {
/\*\*\* 解析消息,得到时间字段\* @param raw\* @return\*/public static long getTimeLongFromRawMessage(String raw)\{SingleMessage singleMessage = parse(raw);return null==singleMessage ? 0L : singleMessage.getTimeLong();\}/\*\*\* 将消息解析成对象\* @param raw\* @return\*/public static SingleMessage parse(String raw)\{SingleMessage singleMessage = null;if (raw != null) \{singleMessage = JSONObject.parseObject(raw, SingleMessage.class);\}return singleMessage;\}
}
SingleMessage对象的定义:
public class SingleMessage {
private long timeLong;private String name;private String bizID;private String time;private String message;public long getTimeLong() \{return timeLong;\}public void setTimeLong(long timeLong) \{this.timeLong = timeLong;\}public String getName() \{return name;\}public void setName(String name) \{this.name = name;\}public String getBizID() \{return bizID;\}public void setBizID(String bizID) \{this.bizID = bizID;\}public String getTime() \{return time;\}public void setTime(String time) \{this.time = time;\}public String getMessage() \{return message;\}public void setMessage(String message) \{this.message = message;\}
}
实时处理的操作都集中在StreamingJob类,源码的关键位置已经加了注释,就不再赘述了:
/*
* Licensed to the Apache Software Foundation (ASF) under one
* or more contributor license agreements. See the NOTICE file
* distributed with this work for additional information
* regarding copyright ownership. The ASF licenses this file
* to you under the Apache License, Version 2.0 (the
* “License”); you may not use this file except in compliance
* with the License. You may obtain a copy of the License at
*
* http://www.apache.org/licenses/LICENSE-2.0
*
* Unless required by applicable law or agreed to in writing, software
* distributed under the License is distributed on an “AS IS” BASIS,
* WITHOUT WARRANTIES OR CONDITIONS OF ANY KIND, either express or implied.
* See the License for the specific language governing permissions and
* limitations under the License.
*/
package com.bolingcavalry;
import org.apache.flink.api.common.functions.FlatMapFunction;
import org.apache.flink.api.common.serialization.SimpleStringSchema;
import org.apache.flink.api.java.tuple.Tuple;
import org.apache.flink.api.java.tuple.Tuple2;
import org.apache.flink.streaming.api.TimeCharacteristic;
import org.apache.flink.streaming.api.environment.StreamExecutionEnvironment;
import org.apache.flink.streaming.api.functions.AssignerWithPunctuatedWatermarks;
import org.apache.flink.streaming.api.functions.windowing.WindowFunction;
import org.apache.flink.streaming.api.watermark.Watermark;
import org.apache.flink.streaming.api.windowing.time.Time;
import org.apache.flink.streaming.api.windowing.windows.TimeWindow;
import org.apache.flink.streaming.connectors.kafka.FlinkKafkaConsumer011;
import javax.annotation.Nullable;
import java.util.Properties;
/**
* Skeleton for a Flink Streaming Job.
*
*
For a tutorial how to write a Flink streaming application, check the
* tutorials and examples on the Flink Website.
*
*
To package your application into a JAR file for execution, run
* ‘mvn clean package’ on the command line.
*
*
If you change the name of the main class (with the public static void main(String[] args))
* method, change the respective entry in the POM.xml file (simply search for ‘mainClass’).
*/
public class StreamingJob {
public static void main(String[] args) throws Exception {
final StreamExecutionEnvironment env = StreamExecutionEnvironment.getExecutionEnvironment();
env.enableCheckpointing(5000); // 要设置启动检查点
env.setStreamTimeCharacteristic(TimeCharacteristic.EventTime);
Properties props = new Properties();
props.setProperty(“bootstrap.servers”, “kafka1:9092”);
props.setProperty(“group.id”, “flink-group”);
//数据源配置,是一个kafka消息的消费者
FlinkKafkaConsumer011
new FlinkKafkaConsumer011<>(“topic001”, new SimpleStringSchema(), props);
//增加时间水位设置类
consumer.assignTimestampsAndWatermarks(new AssignerWithPunctuatedWatermarks
@Override
public long extractTimestamp(String element, long previousElementTimestamp) {
return JSONHelper.getTimeLongFromRawMessage(element);
}
@Nullable
@Override
public Watermark checkAndGetNextWatermark(String lastElement, long extractedTimestamp) {
if (lastElement != null) {
return new Watermark(JSONHelper.getTimeLongFromRawMessage(lastElement));
}
return null;
}
});
env.addSource(consumer)
//将原始消息转成Tuple2对象,保留用户名称和访问次数(每个消息访问次数为1)
.flatMap((FlatMapFunction
SingleMessage singleMessage = JSONHelper.parse(s);
if (null != singleMessage) {
collector.collect(new Tuple2<>(singleMessage.getName(), 1L));
}
})
//以用户名为key
.keyBy(0)
//时间窗口为2秒
.timeWindow(Time.seconds(2))
//将每个用户访问次数累加起来
.apply((WindowFunction
long sum = 0L;
for (Tuple2
sum += record.f1;
}
Tuple2
result.f1 = sum;
out.collect(result);
})
//输出方式是STDOUT
.print();
env.execute(“Flink-Kafka demo”);
}
}
在pom.xml所在文件夹执行以下命令打包:
mvn clean package -Dmaven.test.skip=true -U
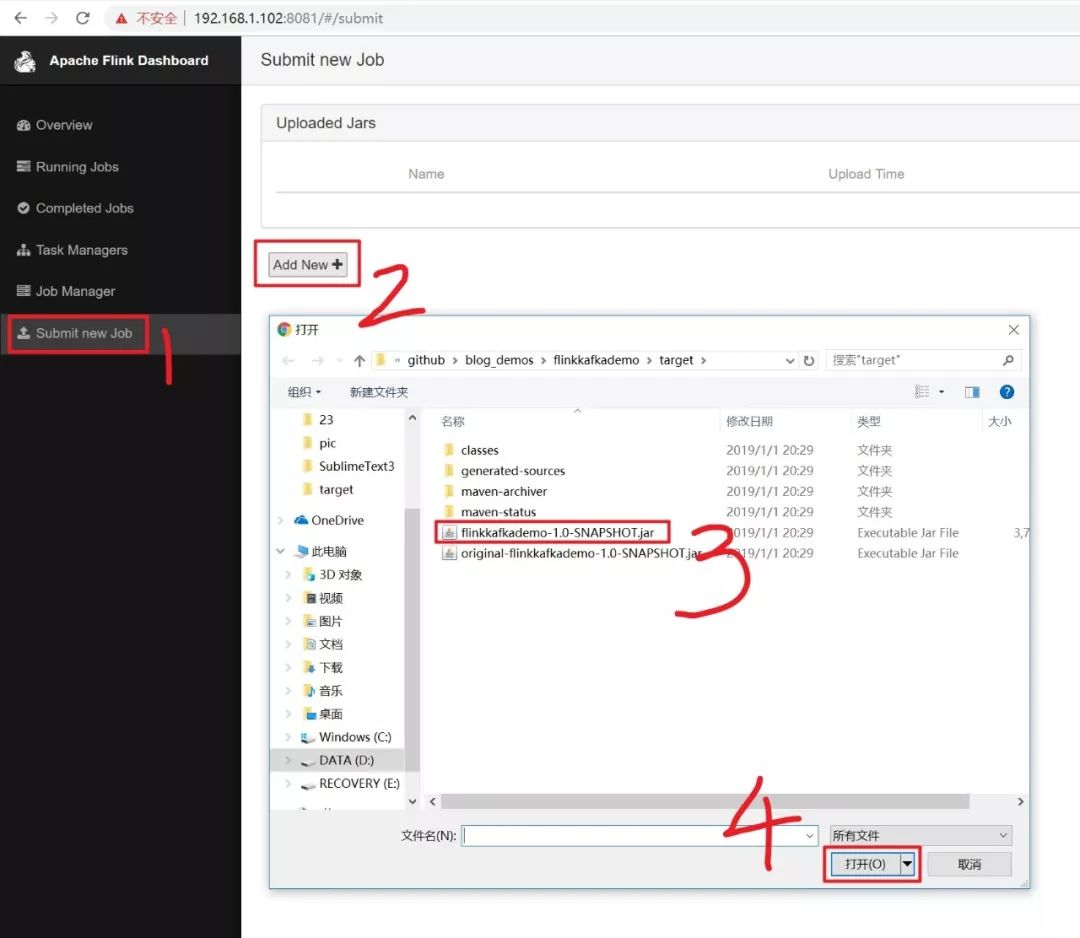
打包成功后,会在target目录下生成文件flinkkafkademo-1.0-SNAPSHOT.jar,将此文件提交到Flinkserver上,如下图:
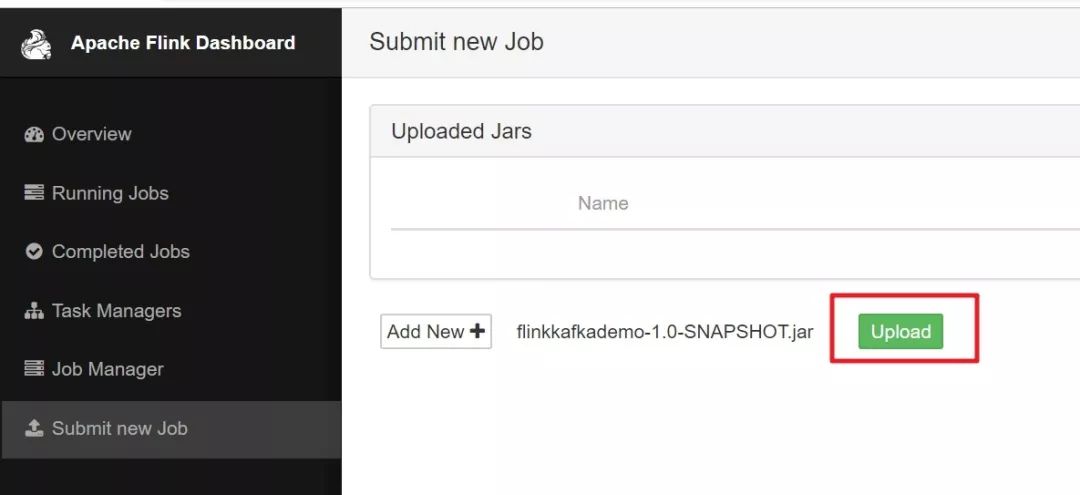
点击下图红框中的”Upload”按钮:
如下图,选中刚刚上传的文件,填写类名,再点击”Submit”按钮即可启动Job:

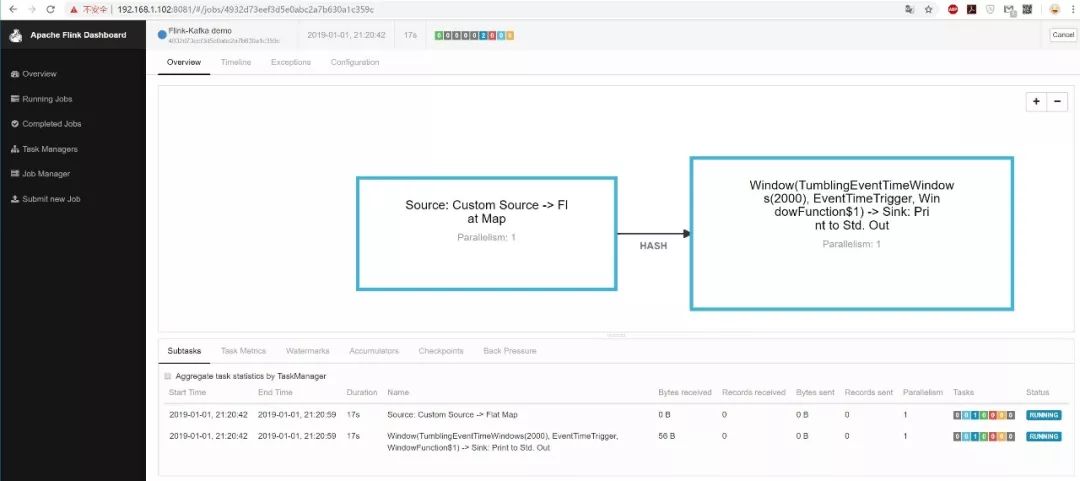
如下图,在Overview页面可见正在运行的任务:
现在所有服务都准备完毕,可以生产消息验证了;
在机器192.168.1.104上发起压力测试,产生大量消息
登录部署了Apache Bench的机器,执行以下命令:
ab -n 10000 -c 2 http://192.168.1.101:8080/send/Jack/hello
192.168.1.101是消息生产者的web服务的地址,上述命令发起了并发数为2的压力测试,一共会发起一万次请求;
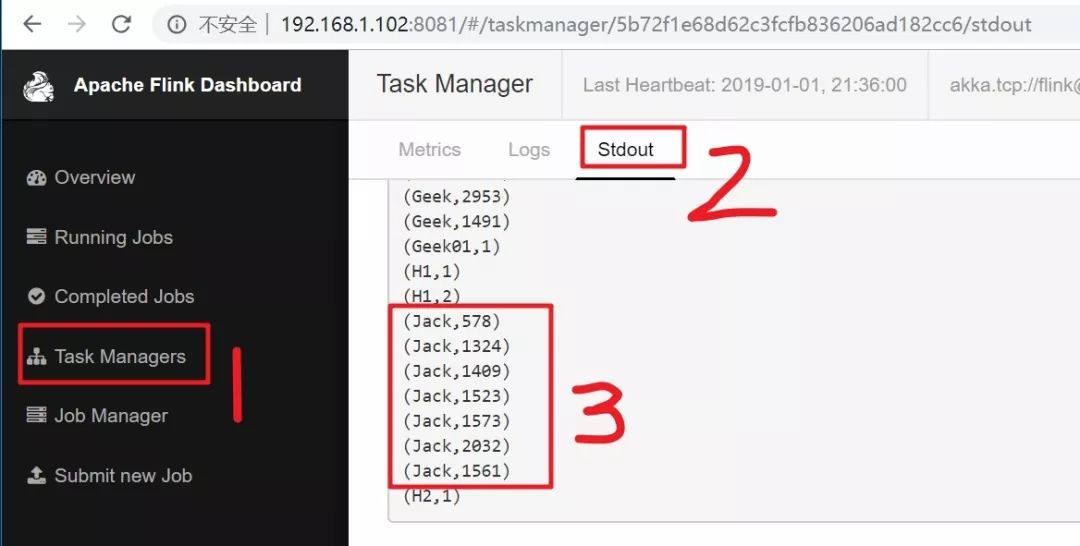
压力测试完毕后,在Flink的Task Managers页面的Stdout页可以见到实时计算的统计数据,如下图:
至此,Flink消费kafka消息的实战就全部完成了,本次实战从消息产生到实时处理全部实现,希望在您构建基于kafak的实时计算环境时可以提供一些参考;

猜你喜欢
零基础学习大数据的路线和方向
六大主流大数据采集平台架构分析
hadoop伪分布式虚拟机环境搭建
Docker容器化实战项目及GitHub开源代码开发标准

长按关注公众号
作者:博陵精骑
原文:https://blog.csdn.net/boling\_cavalry/article/details/85549434
版权声明:本文为博主原创文章,转载请附上博文链接!


网关服务")
——Zabbix监控Mysql")


还没有评论,来说两句吧...