手把手教你搭建Spring开发环境(IDEA)
首先打开IDEA,HAHAHA
- 创建Maven项目,我一般习惯用使用maven-archetype-webapp骨架。(为啥使用骨架: maven骨架的使用能够帮我们快速的构建结构一致的项目,省时省力。)
![\[外链图片转存失败,源站可能有防盗链机 制,建议将图失败,源站可能有防盗链机制,建议将图片保存下来直接上传片保存下来(img-5UFYsb4p-1600396874553)(C:\\Users\\apple\\AppData\\Roaming\\Typora\\typora-user-images\\image-20200918093209083.png)(C:\\Users\\apple\\AppData\\Roaming\\Typora\\typora-user-images\\image-20200918093209083.png)\]](https://image.dandelioncloud.cn/images/20221123/30135bad08b546258557be80348807c6.png)
改下项目名称和GroupId
![\[外链图片转存失败,源站可能有防盗链机制,建议将图片保存下来直接上传(img-8jRZlWql-1600396874556)(C:\\Users\\apple\\AppData\\Roaming\\Typora\\typora-user-images\\image-20200918093351817.png)\]](https://image.dandelioncloud.cn/images/20221123/ea9d47f217d34f439ff7c5d89ef87e52.png)
在pom.xml中添加依赖(记得刷新maven)
<dependencies><!-- 单元测试的依赖--><dependency><groupId>junit</groupId><artifactId>junit</artifactId><version>4.11</version><scope>test</scope></dependency><!-- spring的依赖--><dependency><groupId>org.springframework</groupId><artifactId>spring-context</artifactId><version>5.0.2.RELEASE</version></dependency><!-- 使用Lombok--><dependency><groupId>org.projectlombok</groupId><artifactId>lombok</artifactId><version>1.16.20</version><scope>provided</scope></dependency></dependencies>
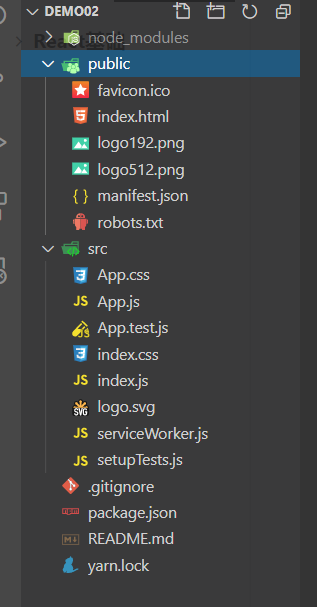
完成目录结构
- 一般你右击new一个Directory的时候,缺失的都会显示出来,你直接添加就可以了
![\[外链图片转存失败,源站可能有防盗链机制,建议将图片保存下来直接上传(img-MZSMvwVq-1600396874560)(C:\\Users\\apple\\AppData\\Roaming\\Typora\\typora-user-images\\image-20200918093548420.png)\]](https://image.dandelioncloud.cn/images/20221123/9d45d137fb0f421db7114cc3ac581a64.png)
然后需要添加spring的配置文件了。当然是再resoures下啦,我一般创建的文件名为bean.xml(看你自己喽,我是为了方便记忆)
基本约束
<?xml version="1.0" encoding="UTF-8"?><beans xmlns="http://www.springframework.org/schema/beans" xmlns:xsi="http://www.w3.org/2001/XMLSchema-instance" xsi:schemaLocation="http://www.springframework.org/schema/beans http://www.springframework.org/schema/beans/spring-beans.xsd"></beans>
所有约束
<beans xmlns="http://www.springframework.org/schema/beans" xmlns:mvc="http://www.springframework.org/schema/mvc" xmlns:context="http://www.springframework.org/schema/context" xmlns:xsi="http://www.w3.org/2001/XMLSchema-instance" xsi:schemaLocation=" http://www.springframework.org/schema/beans http://www.springframework.org/schema/beans/spring-beans.xsd http://www.springframework.org/schema/mvc http://www.springframework.org/schema/mvc/spring-mvc.xsd http://www.springframework.org/schema/context http://www.springframework.org/schema/context/spring-context.xsd"></beans>
Let`s go来使用一下
创建一个实体类
import lombok.Getter;import lombok.Setter;import lombok.ToString;@Getter@Setter@ToStringpublic class Student {private Integer id;private String name;private Integer age;private Integer score;}
创建对象交给spring来管理吧(在我们刚才的配置文件中添加)
<?xml version="1.0" encoding="UTF-8"?><beans xmlns="http://www.springframework.org/schema/beans" xmlns:xsi="http://www.w3.org/2001/XMLSchema-instance" xsi:schemaLocation="http://www.springframework.org/schema/beans http://www.springframework.org/schema/beans/spring-beans.xsd"><bean id="student" class="model.Student"><property name="id" value="1"/><property name="name" value="mxh"/><property name="age" value="21"/><property name="score" value="85"/></bean></beans>
使用一哈看看效果
import org.junit.Test;import org.springframework.context.ApplicationContext;import org.springframework.context.support.ClassPathXmlApplicationContext;public class SpringTest {@Testpublic void f(){//1.获取核心容器ApplicationContext ac = new ClassPathXmlApplicationContext("bean.xml");//2.根据id获取对象Student s = (Student) ac.getBean("student");//3.处理对象System.out.println(s);System.out.println("test1 "+s.hashCode());}@Testpublic void f1(){//1.获取核心容器ApplicationContext ac = new ClassPathXmlApplicationContext("bean.xml");//2.根据id获取对象Student s = (Student) ac.getBean("student");//3.处理对象System.out.println(s);System.out.println("test2 "+s.hashCode());}}

我们可以看出是同一个对象,都来自于spring容器。


还没有评论,来说两句吧...