OpenGL学习笔记——纹理
文章目录
- 一、简介
- 二、代码实现
- 2.1单个纹理对象与单元
- 2.2多个纹理单元与对象
一、简介
如果我们的程序单纯的只是一些颜色什么的,未免不够真实和有趣,但是如果让我们为每一个像素都手动的分配更为真实的颜色值,又过于繁杂而不切实际,因此在OpenGL中也就有了纹理映射这一过程(或者说是为我们的图形进行贴图)。
纹理映射的过程其实非常类似于缓冲区分配的过程,都是在设置OpenGL的状态:
1、创建一个纹理对象。
2、激活纹理单元,并绑定相应的纹理对象。
3、为纹理对象设置相应的参数并将数据传递给纹理对象。
4、在着色器程序中利用纹理采样器(simple2D或者是其他类型),根据纹理坐标以及纹理对象实现对颜色的采样。这一工作主要集中在片元着色器中。
5、绘制出相应的纹理图案。
二、代码实现
2.1单个纹理对象与单元
shader.h
#ifndef SHADER_H#define SHADER_H#include <glad/glad.h> // include glad to get all the required OpenGL headers#include"glm\glm.hpp" //矩阵部分头文件#include"glm\gtc\matrix_transform.hpp"#include"glm\gtc\type_ptr.hpp"#include <string>#include <fstream>#include <sstream>#include <iostream>class Shader{public:// the program IDunsigned int ID;// constructor reads and builds the shaderShader(const char* vertexPath, const char* fragmentPath);// use/activate the shadervoid use();// utility uniform functionsvoid setBool(const std::string &name, bool value) const;void setInt(const std::string &name, int value) const;void setFloat(const std::string &name, float value) const;void setVec2(const std::string &name, const glm::vec2 &value) const;void setVec2(const std::string &name, float x, float y) const;void setVec3(const std::string &name, const glm::vec3 &value) const;void setVec3(const std::string &name, float x, float y, float z) const;void setVec4(const std::string &name, const glm::vec4 &value) const;void setVec4(const std::string &name, float x, float y, float z, float w) const;void setMat2(const std::string &name, const glm::mat2 &mat) const;void setMat3(const std::string &name, const glm::mat3 &mat) const;void setMat4(const std::string &name, const glm::mat4 &mat) const;private:void checkCompileErrors(GLuint shader, std::string type);};Shader::Shader(const char * vertexPath, const char * fragmentPath){// 1. retrieve the vertex/fragment source code from filePathstd::string vertexCode;std::string fragmentCode;std::ifstream vShaderFile;std::ifstream fShaderFile;// ensure ifstream objects can throw exceptions:vShaderFile.exceptions(std::ifstream::failbit | std::ifstream::badbit);fShaderFile.exceptions(std::ifstream::failbit | std::ifstream::badbit);try{// open filesvShaderFile.open(vertexPath);fShaderFile.open(fragmentPath);std::stringstream vShaderStream, fShaderStream;// read file's buffer contents into streamsvShaderStream << vShaderFile.rdbuf(); //重定向方法,读取文件数据fShaderStream << fShaderFile.rdbuf(); //将文件内容通过缓冲区传递给stringstream对象// close file handlersvShaderFile.close();fShaderFile.close();// convert stream into string,将stringstream对象转换为string对象vertexCode = vShaderStream.str();fragmentCode = fShaderStream.str();}catch (std::ifstream::failure e){std::cout << "ERROR::SHADER::FILE_NOT_SUCCESFULLY_READ" << std::endl;}const char* vShaderCode = vertexCode.c_str();const char* fShaderCode = fragmentCode.c_str();// 2. compile shadersunsigned int vertex, fragment;int success;char infoLog[512];// vertex Shadervertex = glCreateShader(GL_VERTEX_SHADER);glShaderSource(vertex, 1, &vShaderCode, NULL); //将源码传递给顶点着色器对象glCompileShader(vertex); //运行时动态编译着色器源码,并生成着色器对象// print compile errors if anyglGetShaderiv(vertex, GL_COMPILE_STATUS, &success);if (!success){glGetShaderInfoLog(vertex, 512, NULL, infoLog);std::cout << "ERROR::SHADER::VERTEX::COMPILATION_FAILED\n" << infoLog << std::endl;};// similiar for Fragment Shader// fragment Shaderfragment = glCreateShader(GL_FRAGMENT_SHADER);glShaderSource(fragment, 1, &fShaderCode, NULL);glCompileShader(fragment);//checkCompileErrors(fragment, "FRAGMENT");// shader ProgramID = glCreateProgram(); //创建一个程序对象glAttachShader(ID, vertex); //将着色器对象添加到程序对象之中glAttachShader(ID, fragment);glLinkProgram(ID); //链接为真正的着色器程序// print linking errors if anyglGetProgramiv(ID, GL_LINK_STATUS, &success);if (!success){glGetProgramInfoLog(ID, 512, NULL, infoLog);std::cout << "ERROR::SHADER::PROGRAM::LINKING_FAILED\n" << infoLog << std::endl;}// delete the shaders as they're linked into our program now and no longer necessaryglDeleteShader(vertex); //在生成真正的着色器程序之后,则着色器对象将没有用处glDeleteShader(fragment);}void Shader::use() {glUseProgram(ID);}void Shader::setBool(const std::string & name, bool value) const{glUniform1i(glGetUniformLocation(ID, name.c_str()), (int)value);}void Shader::setInt(const std::string & name, int value) const{glUniform1i(glGetUniformLocation(ID, name.c_str()), value);}void Shader::setFloat(const std::string & name, float value) const{glUniform1f(glGetUniformLocation(ID, name.c_str()), value);}void Shader::setVec2(const std::string & name, const glm::vec2 & value) const{glUniform2fv(glGetUniformLocation(ID, name.c_str()), 1, &value[0]);}void Shader::setVec2(const std::string & name, float x, float y) const{glUniform2f(glGetUniformLocation(ID, name.c_str()), x, y);}void Shader::setVec3(const std::string & name, const glm::vec3 & value) const{glUniform3fv(glGetUniformLocation(ID, name.c_str()), 1, &value[0]);}void Shader::setVec3(const std::string & name, float x, float y, float z) const{glUniform3f(glGetUniformLocation(ID, name.c_str()), x, y, z);}void Shader::setVec4(const std::string & name, const glm::vec4 & value) const{glUniform4fv(glGetUniformLocation(ID, name.c_str()), 1, &value[0]);}void Shader::setVec4(const std::string & name, float x, float y, float z, float w) const{glUniform4f(glGetUniformLocation(ID, name.c_str()), x, y, z, w);}void Shader::setMat2(const std::string & name, const glm::mat2 & mat) const{glUniformMatrix2fv(glGetUniformLocation(ID, name.c_str()), 1, GL_FALSE, &mat[0][0]);}void Shader::setMat3(const std::string & name, const glm::mat3 & mat) const{glUniformMatrix3fv(glGetUniformLocation(ID, name.c_str()), 1, GL_FALSE, &mat[0][0]);}void Shader::setMat4(const std::string & name, const glm::mat4 & mat) const{glUniformMatrix4fv(glGetUniformLocation(ID, name.c_str()), 1, GL_FALSE, &mat[0][0]);}void Shader::checkCompileErrors(GLuint shader, std::string type){GLint success;GLchar infoLog[1024];if (type != "PROGRAM"){glGetShaderiv(shader, GL_COMPILE_STATUS, &success);if (!success){glGetShaderInfoLog(shader, 1024, NULL, infoLog);std::cout << "ERROR::SHADER_COMPILATION_ERROR of type: " << type << "\n" << infoLog << "\n -- --------------------------------------------------- -- " << std::endl;}}else{glGetProgramiv(shader, GL_LINK_STATUS, &success);if (!success){glGetProgramInfoLog(shader, 1024, NULL, infoLog);std::cout << "ERROR::PROGRAM_LINKING_ERROR of type: " << type << "\n" << infoLog << "\n -- --------------------------------------------------- -- " << std::endl;}}}#endif
main.cpp
#include<glad\glad.h>#include<GLFW\glfw3.h>#include"shader.h"#define STB_IMAGE_IMPLEMENTATION#include "stb_image.h"#include<iostream>int main() {glfwInit();glfwWindowHint(GLFW_CONTEXT_VERSION_MAJOR, 3);glfwWindowHint(GLFW_CONTEXT_VERSION_MINOR, 3);glfwWindowHint(GLFW_OPENGL_PROFILE, GLFW_OPENGL_CORE_PROFILE);GLFWwindow *window = glfwCreateWindow(800, 600, "Texture", 0, 0);if (window == NULL) {std::cout << "创建窗口失败" << std::endl;glfwTerminate(); //释放glfw相关资源return -1;}glfwMakeContextCurrent(window); //为特定的窗口创建一个上下文if (!gladLoadGLLoader((GLADloadproc)glfwGetProcAddress)) { //加载相关的函数地址std::cout << "GLAD初始化失败,函数地址无法被加载" << std::endl;return -1;}//设置视口,类似于现实生活中的窗户/*int viewWidth, viewHeight; glfwGetFramebufferSize(window, &viewWidth, &viewHeight); glViewport(0, 0, 800, 600);*///初始化我们的着色器Shader ourShader("../Shader/shader_texture.vs", "../Shader/shader_texture.fs");//数据部分static float vertices[] = {// positions // colors // texture coords0.5f, 0.5f, 0.0f, 1.0f, 0.0f, 0.0f, 1.0f, 1.0f, // top right0.5f, -0.5f, 0.0f, 0.0f, 1.0f, 0.0f, 1.0f, 0.0f, // bottom right-0.5f, -0.5f, 0.0f, 0.0f, 0.0f, 1.0f, 0.0f, 0.0f, // bottom left-0.5f, 0.5f, 0.0f, 1.0f, 1.0f, 0.0f, 0.0f, 1.0f // top left};unsigned int indices[] = { //由于OpenGL的基础图元只有三种:点、线以及三角形,所以我们这里使用两个三角形来构建一个矩形0, 1, 3, // first triangle1, 2, 3 // second triangle};//GPU部分unsigned int VBO, VAO, EBO; //这些变量有点类似于我们经常使用的文件描述符,也可以说是“句柄”,主要是用来管理GPU分配的内存glGenVertexArrays(1, &VAO); //创建一个顶点数组对象名字,类似于声明glGenBuffers(1, &VBO); //创建一个缓冲区对象名字glGenBuffers(1, &EBO);glBindVertexArray(VAO); //绑定顶点数组对象,并为其分配内存空间glBindBuffer(GL_ARRAY_BUFFER, VBO); //将VBO绑定到一个目标上,不同的目标代表这不同的用途glBufferData(GL_ARRAY_BUFFER,sizeof(vertices),vertices,GL_STATIC_DRAW); //将数据传给GL_ARRAY_BUFFER目标上的VBO缓冲对象glBindBuffer(GL_ELEMENT_ARRAY_BUFFER, EBO);glBufferData(GL_ELEMENT_ARRAY_BUFFER, sizeof(indices), indices, GL_STATIC_DRAW);//指定顶点数据属性不同部分的意义//位置,第一部分glVertexAttribPointer(0, 3, GL_FLOAT, GL_FALSE, 8 * sizeof(float), (void*)0);glEnableVertexAttribArray(0); //启用这一部分属性数组//颜色,第二部分glVertexAttribPointer(1, 3, GL_FLOAT, GL_FALSE, 8 * sizeof(float), (void*)(3 * sizeof(float)));glEnableVertexAttribArray(1);//纹理,第三部分glVertexAttribPointer(2, 2, GL_FLOAT, GL_FALSE, 8 * sizeof(float), (void*)(6 * sizeof(float)));glEnableVertexAttribArray(2);//设置纹理,类似于上面缓冲区的设置过程unsigned int texture;glGenTextures(1, &texture);//glActiveTexture(GL_TEXTURE0); //默认是激活的,所以可以不写glBindTexture(GL_TEXTURE_2D, texture);glTexParameteri(GL_TEXTURE_2D, GL_TEXTURE_WRAP_S, GL_REPEAT); //设置我们想要的坐标轴S、TglTexParameteri(GL_TEXTURE_2D, GL_TEXTURE_WRAP_T, GL_REPEAT);glTexParameteri(GL_TEXTURE_2D, GL_TEXTURE_MIN_FILTER, GL_LINEAR); //图像分辨率大但是窗口小时,所采用的策略glTexParameteri(GL_TEXTURE_2D, GL_TEXTURE_MAG_FILTER, GL_LINEAR);//加载图像int width, height, nrChannels;unsigned char *data = stbi_load("container.jpg", &width, &height, &nrChannels, 0);if (data){glTexImage2D(GL_TEXTURE_2D, 0, GL_RGB, width, height, 0, GL_RGB, GL_UNSIGNED_BYTE, data); //将图像传递给纹理对象glGenerateMipmap(GL_TEXTURE_2D); //为当前绑定的纹理自动生成所有需要的多级渐远纹理}else{std::cout << "Failed to load texture" << std::endl;}stbi_image_free(data); //释放加载进来的图像数据内存//glBindTexture(GL_TEXTURE_2D, 0); //解绑纹理对象ourShader.use();while (!glfwWindowShouldClose(window)){//渲染glClearColor(0.2f, 0.3f, 0.3f, 1.0f); //指定了清除缓冲区所用的颜色glClear(GL_COLOR_BUFFER_BIT);glDrawElements(GL_TRIANGLES, 6, GL_UNSIGNED_INT, 0); //使用GL_ELEMENT_ARRAY_BUFFER目标上的对象绘制两个三角形以达到四边形的效果glfwSwapBuffers(window);glfwPollEvents(); //检测所有的事件(键盘、鼠标或者一些窗口的状态等)是否被触发}glDeleteVertexArrays(1, &VAO);glDeleteBuffers(1, &VBO);glDeleteBuffers(1, &EBO);glfwTerminate();return 0;}
着色器部分:
shader_texture.vs
#version 330 corelayout (location = 0) in vec3 aPos;layout (location = 1) in vec3 aColor;layout (location = 2) in vec2 aTexCoord;out vec3 ourColor;out vec2 TexCoord;void main(){gl_Position = vec4(aPos, 1.0);ourColor = aColor;TexCoord = aTexCoord;}
shader_texture.fs
#version 330 coreout vec4 FragColor;in vec3 ourColor;in vec2 TexCoord;uniform sampler2D ourTexture;//uniform sampler2D texture1;//uniform sampler2D texture2;void main(){FragColor = texture(ourTexture, TexCoord);//FragColor = texture(ourTexture, TexCoord)*vec4(ourColor, 1.0);//FragColor = mix(texture(texture1, TexCoord), texture(texture2, TexCoord), 0.2);}
实现效果: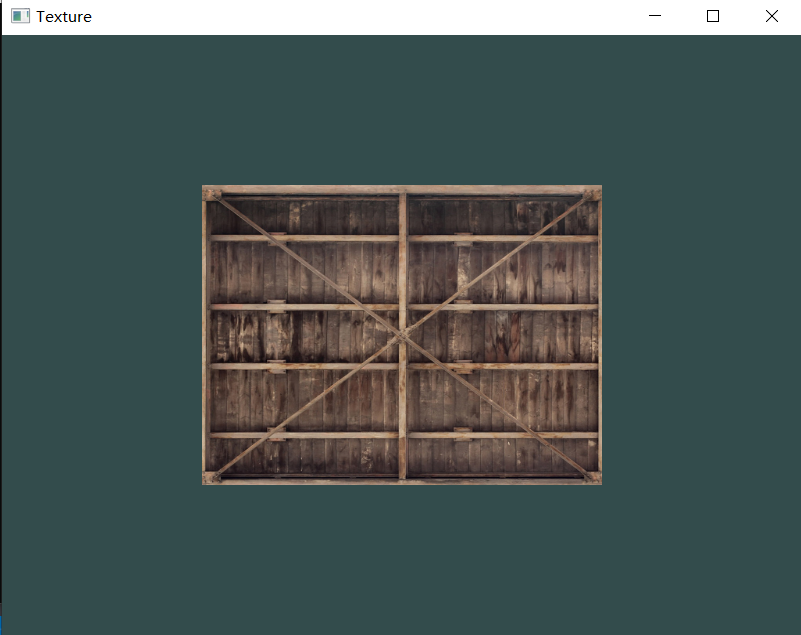
在这里要特别注意着色器中ourTexture这个uniform变量,它并没有在CPU端被修改,但是它仍然正常工作了,这是因为OpenGL总是会默认激活一个纹理单元GL_TEXTURE0,这个纹理单元已经与texture纹理对象进行了关联,所以变量ourTexture会默认利用纹理坐标来对texture纹理对象进行颜色的采样。
2.2多个纹理单元与对象
OpenGL中存在大约16个纹理单元,因此其可以同时利用多个纹理对象来绘制一些比较有趣图案。
修改上述纹理部分的代码,如下所示:
//设置纹理,类似于上面缓冲区的设置过程unsigned int texture1, texture2;glGenTextures(1, &texture1);//glActiveTexture(GL_TEXTURE0); //默认是激活的,所以可以不写glBindTexture(GL_TEXTURE_2D, texture1);glTexParameteri(GL_TEXTURE_2D, GL_TEXTURE_WRAP_S, GL_REPEAT); //设置我们想要的坐标轴S、TglTexParameteri(GL_TEXTURE_2D, GL_TEXTURE_WRAP_T, GL_REPEAT);glTexParameteri(GL_TEXTURE_2D, GL_TEXTURE_MIN_FILTER, GL_LINEAR); //图像分辨率大但是窗口小时,所采用的策略glTexParameteri(GL_TEXTURE_2D, GL_TEXTURE_MAG_FILTER, GL_LINEAR);//加载图像int width, height, nrChannels;unsigned char *data = stbi_load("container.jpg", &width, &height, &nrChannels, 0);if (data){std::cout << "container:" << nrChannels << std::endl;glTexImage2D(GL_TEXTURE_2D, 0, GL_RGB, width, height, 0, GL_RGB, GL_UNSIGNED_BYTE, data); //将图像传递给纹理对象glGenerateMipmap(GL_TEXTURE_2D); //为当前绑定的纹理自动生成所有需要的多级渐远纹理}else{std::cout << "Failed to load texture" << std::endl;}stbi_image_free(data); //释放加载进来的图像数据内存//glBindTexture(GL_TEXTURE_2D, 0); //解绑纹理对象//设置第二个纹理对象glGenTextures(1, &texture2);glBindTexture(GL_TEXTURE_2D, texture2);glTexParameteri(GL_TEXTURE_2D, GL_TEXTURE_WRAP_S, GL_REPEAT); //设置我们想要的坐标轴S、TglTexParameteri(GL_TEXTURE_2D, GL_TEXTURE_WRAP_T, GL_REPEAT);glTexParameteri(GL_TEXTURE_2D, GL_TEXTURE_MIN_FILTER, GL_LINEAR); //图像分辨率大但是窗口小时,所采用的策略glTexParameteri(GL_TEXTURE_2D, GL_TEXTURE_MAG_FILTER, GL_LINEAR);data = stbi_load("awesomeface.png", &width, &height, &nrChannels, 0);if (data){std::cout << "awesomeface:" << nrChannels<<std::endl;glTexImage2D(GL_TEXTURE_2D, 0, GL_RGBA, width, height, 0, GL_RGBA, GL_UNSIGNED_BYTE, data); //将图像传递给纹理对象glGenerateMipmap(GL_TEXTURE_2D); //为当前绑定的纹理自动生成所有需要的多级渐远纹理}else{std::cout << "Failed to load texture" << std::endl;}stbi_image_free(data); //释放加载进来的图像数据内存//glBindTexture(GL_TEXTURE_2D, 0); //解绑纹理对象ourShader.use();glUniform1i(glGetUniformLocation(ourShader.ID, "texture1"), 0);ourShader.setInt("texture2", 1);//绑定相应的纹理对象glActiveTexture(GL_TEXTURE0);glBindTexture(GL_TEXTURE_2D, texture1);glActiveTexture(GL_TEXTURE1);glBindTexture(GL_TEXTURE_2D, texture2);
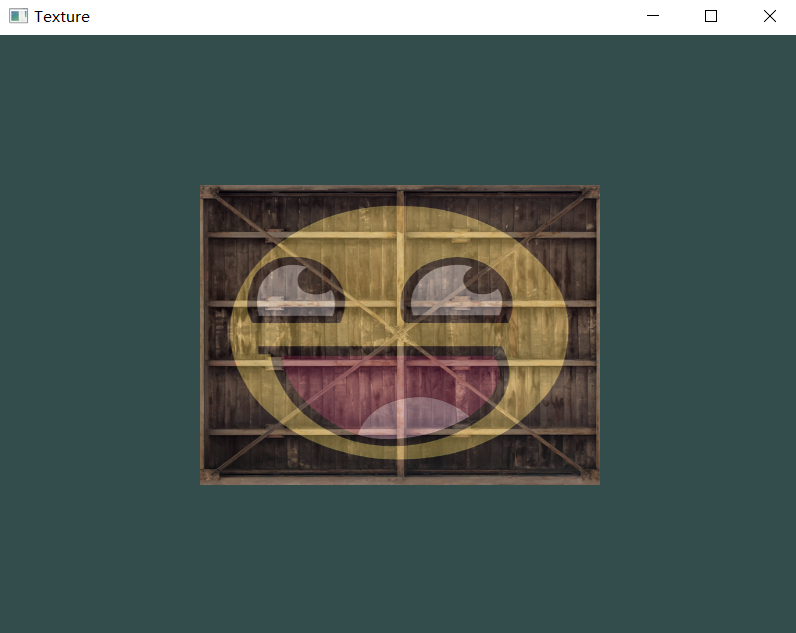
运行效果如下所示:
不过因为纹理坐标的坐标系统与图片的坐标系统有点不一样(y轴不同),导致图片相对于窗口是倒置的,要想解决这个问题我们可以用书中提到的两个小方法:
1、翻转y值,也就是用1减去y值。
2、可以经着色器中的aTexCoord替换为vec2(aTexCoord.x, 1.0f - aTexCoord.y)。
我这里是使用了第一种方法,将顶点数据中的纹理坐标修改为下面的这种形式就正常了:
static float vertices[] = {// positions // colors // texture coords0.5f, 0.5f, 0.0f, 1.0f, 0.0f, 0.0f, 1.0f, 0.0f, // top right0.5f, -0.5f, 0.0f, 0.0f, 1.0f, 0.0f, 1.0f, 1.0f, // bottom right-0.5f, -0.5f, 0.0f, 0.0f, 0.0f, 1.0f, 0.0f, 1.0f, // bottom left-0.5f, 0.5f, 0.0f, 1.0f, 1.0f, 0.0f, 0.0f, 0.0f // top left};
参考资料:《Learning OpenGL》 《OpenGL编程指南》


还没有评论,来说两句吧...