从零搭建 Spring Boot 后端项目(二)
简介
这一小节主要是整合mybatis、Druid连接池、PageHelper分页
步骤
在之前的开发依赖界面中,我们可以选择所需要的依赖,当然我们也可以手动添加依赖,以在项目中整合mybatis、Druid连接池、PageHelper分页,在pom.xml 文件中
添加如下依赖 <!-- mysql数据库驱动--><dependency><groupId>mysql</groupId><artifactId>mysql-connector-java</artifactId><scope>runtime</scope></dependency><!-- druid 数据库连接池--><dependency><groupId>com.alibaba</groupId><artifactId>druid-spring-boot-starter</artifactId><version>1.1.10</version></dependency><!-- mybatis --><dependency><groupId>org.mybatis.spring.boot</groupId><artifactId>mybatis-spring-boot-starter</artifactId><version>2.1.0</version></dependency><!-- pagehelper --><dependency><groupId>com.github.pagehelper</groupId><artifactId>pagehelper-spring-boot-starter</artifactId><version>1.2.5</version></dependency>
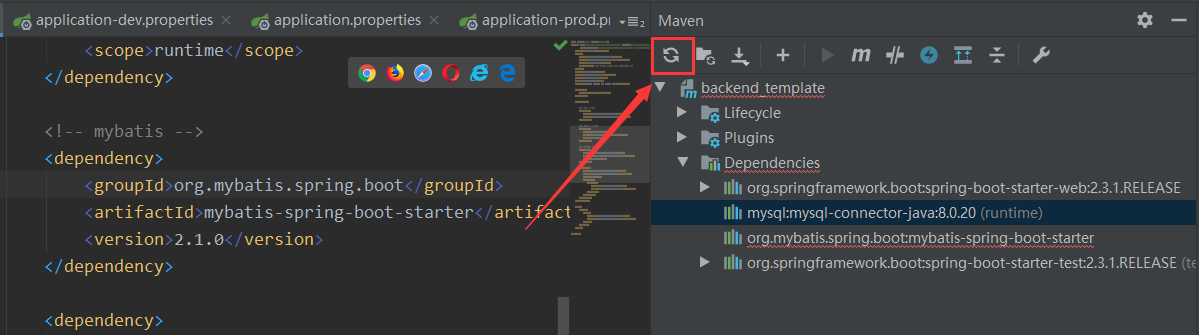
注:有时输入正确,但 pom.xml 文件仍然报错,此时考虑依赖并未下载完全,可使用Maven的Reimport功能重新导入即可
配置 application-dev.properties 文件,在该配置文件内配置以下内容
# 开发环境配置文件# Druid# 数据连接池的类型spring.datasource.type=com.alibaba.druid.pool.DruidDataSource# 数据连接池的名称spring.datasource.name=druid_datasource# 数据库驱动、url、用户名和密码spring.datasource.druid.driver-class-name=com.mysql.cj.jdbc.Driverspring.datasource.druid.url=jdbc //127.0.0.1:3306/test?useUnicode=true&characterEncoding=utf-8&useSSL=false&allowPublicKeyRetrieval=true
spring.datasource.druid.username=rootspring.datasource.druid.password=password# 配置连接池初始化大小、最大值、最小值spring.datasource.druid.initial-size=20spring.datasource.druid.max-active=40spring.datasource.druid.min-idle=1# 获取连接等待超时时间spring.datasource.druid.max-wait=60000# 间隔多久进行一次检测,检测需要关闭的空闲连接spring.datasource.druid.time-between-eviction-runs-millis=60000# 一个连接在池中最小生存的时间spring.datasource.druid.min-evictable-idle-time-millis=300000# 检测连接是否有效spring.datasource.druid.validation-query=SELECT 1 FROM DUALspring.datasource.druid.test-while-idle= truespring.datasource.druid.test-on-borrow= falsespring.datasource.druid.test-on-return= false# Mybatis# mapper映射xml文件的所在路径mybatis.mapper-locations=classpath*:mapper/*.xml# 对应实体类的路径mybatis.type-aliases-package=com.example.backend_template.entity# 开启驼峰命名mybatis.configuration.map-underscore-to-camel-case=true# Pagehelper# 指定数据库pagehelper.helperDialect=mysql# 是否支持接口参数来传递分页参数pagehelper.supportMethodsArguments=true
配置 application.properties 文件,在该配置文件内配置以下内容
spring.profiles.active=dev
测试
接下来测试一下,目前搭的框架有没有问题
创建数据库和数据表
CREATE DATABASE test;use test;CREATE TABLE `tb_user` (`id` int(11) NOT NULL,`username` varchar(255) DEFAULT NULL,`password` varchar(255) DEFAULT NULL,PRIMARY KEY (`id`)) ENGINE=InnoDB DEFAULT CHARSET=utf8;INSERT INTO `tb_user` VALUES ('1', 'AA', '112233');INSERT INTO `tb_user` VALUES ('2', 'BB', '123456');INSERT INTO `tb_user` VALUES ('3', 'CC', '123456');INSERT INTO `tb_user` VALUES ('4', 'DD', '123456');INSERT INTO `tb_user` VALUES ('5', 'EE', '123456');INSERT INTO `tb_user` VALUES ('6', 'FF', '123456');
在com.example.backend_template.entity下新建实体类User
package com.example.backend_template.entity;import java.io.Serializable;/*** @ClassName User* @Description* @Author L* @Date Create by 2020/6/25*/public class User implements Serializable {private Long id;//编号private String username;//用户名private String password;//密码public Long getId() {return id;}public void setId(Long id) {this.id = id;}public String getUsername() {return username;}public void setUsername(String username) {this.username = username;}public String getPassword() {return password;}public void setPassword(String password) {this.password = password;}}
在com.example.backend_template.dao下新建UserDao类,需要使用@Mapper注解,不然SpringBoot无法扫描
package com.example.backend_template.dao;import com.example.backend_template.entity.User;import org.apache.ibatis.annotations.Mapper;import java.util.List;/*** @ClassName UserDao* @Description* @Author L* @Date Create by 2020/6/25*/@Mapper//指定这是一个操作数据库的mapperpublic interface UserDao {List<User> findAll();}
在resources.mapper下创建UserDao.xml
- namespace中需要与使用@Mapper的接口对应
- UserDao.xml文件名称必须与使用@Mapper的接口一致
标签中的id必须与@Mapper的接口中的方法名一致,且参数一致
<?xml version=”1.0” encoding=”UTF-8” ?>
<!DOCTYPE mapper PUBLIC “-//mybatis.org//DTD Mapper 3.0//EN” “http://mybatis.org/dtd/mybatis-3-mapper.dtd“ >
在com.example.backend_template.service下创建UserService接口
package com.example.backend_template.service;import com.example.backend_template.entity.User;import java.util.List;/*** @ClassName UserService* @Description* @Author L* @Date Create by 2020/6/25*/public interface UserService {List<User> findAll();List<User> findAll(Integer page,Integer size);}
在com.example.backend_template.service.impl下创建UserServiceImpl实现类
需要在接口实现类中使用@Service注解,才能被SpringBoot扫描,在Controller中使用@Authwired注入
package com.example.backend_template.service.impl;
import com.example.backend_template.dao.UserDao;
import com.example.backend_template.entity.User;
import com.example.backend_template.service.UserService;
import com.github.pagehelper.PageHelper;
import org.springframework.beans.factory.annotation.Autowired;
import org.springframework.stereotype.Service;import java.util.List;
/**
- @ClassName UserServiceImpl
- @Description
- @Author L
@Date Create by 2020/6/25
*/
@Service(“userService”)
public class UserServiceImpl implements UserService {@Autowired
private UserDao userDao;@Override
public ListfindAll() { return userDao.findAll();
}
@Override
public ListfindAll(Integer page, Integer size){ //开启分页查询,只有紧跟的第一个查询有效//第一个参数为查询第几页,第二个为页面大小PageHelper.startPage(page,size);List<User> userList = userDao.findAll();return userList;
}
}
在com.example.backend_template.controller下创建UserController类
package com.example.backend_template.controller;import com.example.backend_template.entity.User;import com.example.backend_template.service.UserService;import org.springframework.beans.factory.annotation.Autowired;import org.springframework.web.bind.annotation.RequestMapping;import org.springframework.web.bind.annotation.RequestParam;import org.springframework.web.bind.annotation.RestController;import java.util.List;/*** @ClassName UserController* @Description* @Author L* @Date Create by 2020/7/3*/@RestController@RequestMapping("/user")public class UserController {@Autowiredprivate UserService userService;@RequestMapping("/findAll")public List<User> findAll(){return userService.findAll();}@RequestMapping("/find")public List<User> findAll(@RequestParam(defaultValue = "0") Integer page,@RequestParam(defaultValue = "0") Integer size) {return userService.findAll(page, size);}}
在启动类中添加对@MapperScan的扫描
package com.example.backend_template;import org.mybatis.spring.annotation.MapperScan;import org.springframework.boot.SpringApplication;import org.springframework.boot.autoconfigure.SpringBootApplication;@SpringBootApplication@MapperScan("com.example.backend_template.dao")//使用MapperScan批量扫描所有的Mapper接口;public class BackendTemplateApplication {public static void main(String[] args) {SpringApplication.run(BackendTemplateApplication.class, args);}}
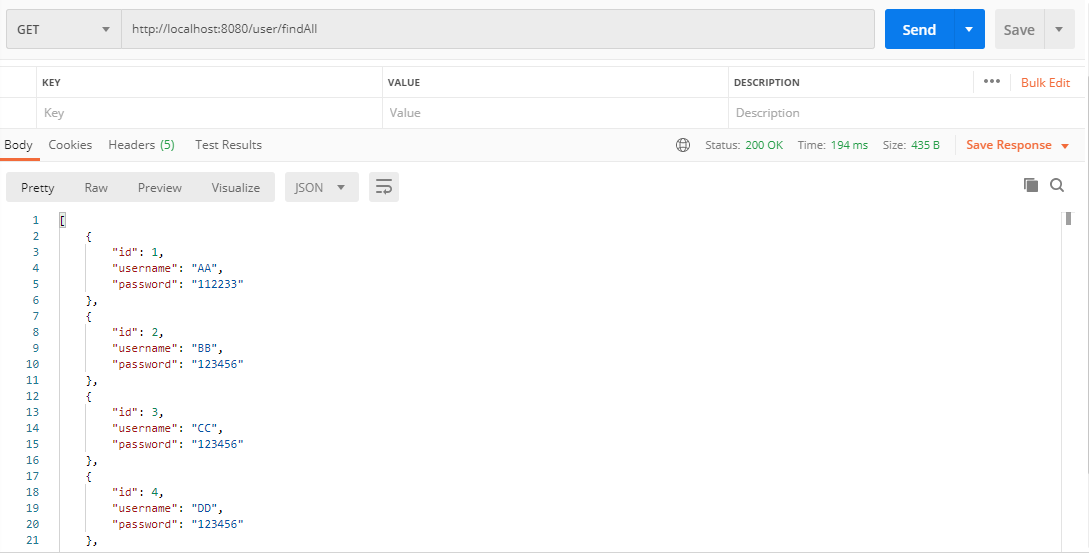
- 启动springboot ,不分页情况下,访问 http://localhost:8080/user/findAll ,结果如下
- 分页情况下,访问http://localhost:8080/user/find?page=2&size=2 ,结果如下
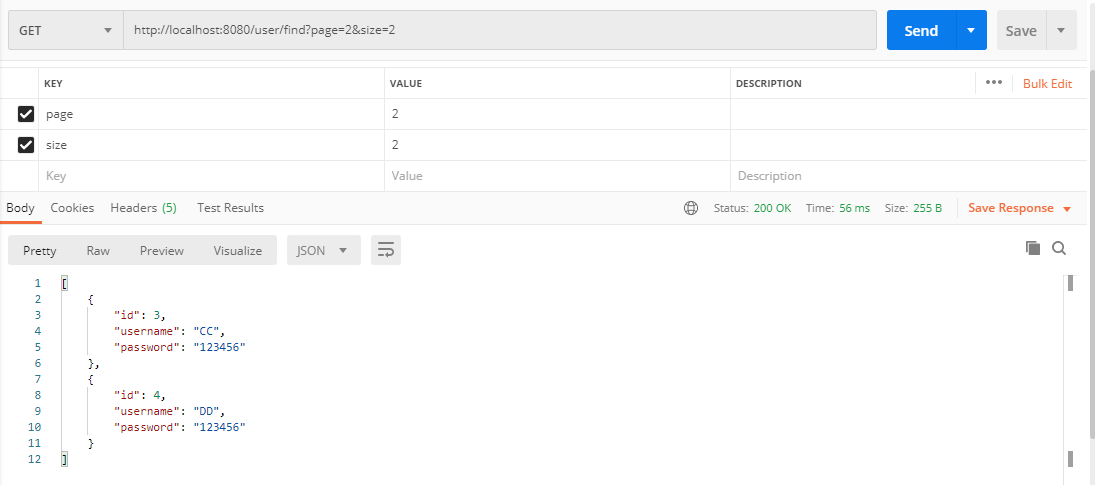
如出现以上两种结果则到表明框架整合成功。测试完后,就可以把从测试开始新建的文件和注解删除了,之后会新加其它的文件,但这里数据库暂时不要删除,之后换数据库的时候再删也不迟
项目地址
项目介绍:从零搭建 Spring Boot 后端项目
代码地址:https://github.com/xiaoxiamo/backend-template
下一篇
三、整合Redis


之组合模式")


还没有评论,来说两句吧...