使用docker部署nginx+tomcat架构
架构说明:
使用nginx+tomcat实现动态/静态(资源请求)分离和负载均衡。
参考文档:
https://www.runoob.com/docker/docker-tutorial.html
配置docker镜像仓库:/etc/docker/daemon.json
{"registry-mirrors": ["https://registry.docker-cn.com", "http://hub-mirror.c.163.com", "https://pee6w651.mirror.aliyuncs.com"]}
下载nginx和tomcat的镜像:
docker pull nginxdocker pull tomcat
创建nginx和tomcat本地目录,稍后将挂载到docker容器上:
mkdir -p ~/nginx/www ~/nginx/conf/ ~/nginx/logsmkdir -p ~/tomcat/webapps/ROOT ~/tomcat/conf ~/tomcat/logs
在tomcat/webapps/ROOT中创建index.html:
<!DOCTYPE html><html><head><meta charset="UTF-8"><title>docker deployment</title></head><body><h1>hello, world</h1><img src="/static/image/lichmama.png"></body></html>
启动tomcat:
docker run -d --name tomcat1 -v ~/tomcat/webapps:/usr/local/tomcat/webapps tomcatdocker run -d --name tomcat2 -v ~/tomcat/webapps:/usr/local/tomcat/webapps tomcat
获取tomcat容器IP,获取到的IP将配置到nginx的配置文件中:
docker inspect tomcat1|grep "IPAddress"docker inspect tomcat2|grep "IPAddress"
在nginx/conf增加配置文件nginx.conf:


user nginx;worker_processes 1;error_log /var/log/nginx/error.log warn;pid /var/run/nginx.pid;events {worker_connections 1024;}http {include /etc/nginx/mime.types;default_type application/octet-stream;log_format main '$remote_addr - $remote_user [$time_local] "$request" ''$status $body_bytes_sent "$http_referer" ''"$http_user_agent" "$http_x_forwarded_for" "$upstream_addr"';access_log /var/log/nginx/access.log main;sendfile on;#tcp_nopush on;keepalive_timeout 65;#gzip on;upstream tomcat {server 172.17.0.2:8080;server 172.17.0.4:8080;}server {listen 80;server_name localhost;location / {proxy_pass http://tomcat;proxy_redirect off;index index.html index.htm;proxy_set_header Host $host;proxy_set_header X-Real-IP $remote_addr;proxy_set_header X-Real-Port $remote_port;proxy_set_header X-Forwarded-For $proxy_add_x_forwarded_for;}location /static/ {alias /usr/share/nginx/html/;}}include /etc/nginx/conf.d/*.conf;}
启动nginx:
docker run -d -p 80:80 --name nginx -v ~/nginx/www:/usr/share/nginx/html -v ~/nginx/conf/nginx.conf:/etc/nginx/nginx.conf -v ~/nginx/logs:/var/log/nginx nginx
使用docker ps查看docker进程:

访问http://server\_ip/index.html:
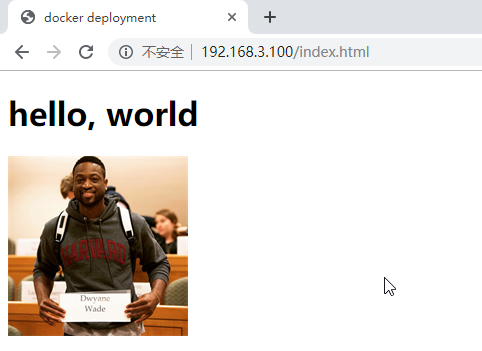
OK,部署成功。
转载于 //www.cnblogs.com/lichmama/p/11366262.html


")


还没有评论,来说两句吧...