SpringBoot核心【基本配置】
文章目录
- 基本配置
- 1.入口类和相关注解
- 2.定制Banner
- 2.1 修改banner图标
- 2.2 关闭banner
- 3.SpringBoot的配置文件
- 3.1 tomcat端口号修改
- 3.2 常规属性配置
- 3.3 类型安全的配置
前面两篇文章简单介绍了下SpringBoot及其构建的方式,本文开始介绍下SpringBoot中的一些核心内容。
基本配置
1.入口类和相关注解
SpringBoot项目通常都有一个名为*Application的入口类,入口类中有一个main方法,这个main方法就是一个标准的java应用的入口方法,方法中使用”SpringApplication.run(…)”,启动SpringBoot应用项目。
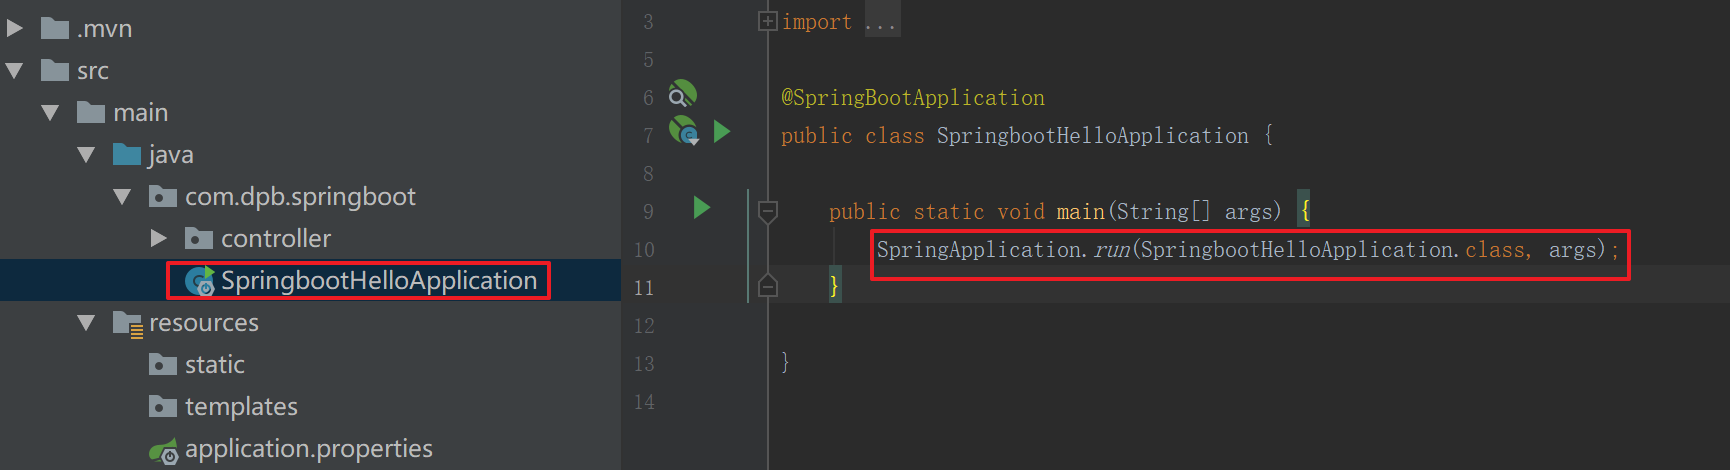
在入口类中有一个注解”@SpringBootApplication”,这是SpringBoot中的核心主键,它是一个组合组件,进入具体查看如下:
@Target({ ElementType.TYPE})@Retention(RetentionPolicy.RUNTIME)@Documented@Inherited@SpringBootConfiguration@EnableAutoConfiguration@ComponentScan(excludeFilters = { @Filter(type = FilterType.CUSTOM,classes = { TypeExcludeFilter.class}), @Filter(type = FilterType.CUSTOM,classes = { AutoConfigurationExcludeFilter.class})})public @interface SpringBootApplication
该组合注解中包括这三个:@SpringBootConfiguration ,@EnableAutoConfiguration ,@ComponentScan如果我们不使用@SpringBootApplication注解的话,我们可以分别使用这三个注解来实现。
| 注解 | 作用 |
|---|---|
| @SpringBootConfiguration | 继承自@Configuration,二者功能也一致,标注当前类是配置类,并会将当前类内声明的一个或多个以@Bean注解标记的方法的实例纳入到spring容器中,并且实例名就是方法名。 |
| @EnableAutoConfiguration | 完成依赖的自动配置,比如添加了spring-boot-starter-web依赖,会自动添加tomcat和SpringMVC的依赖,那么SpringBoot会对Tomcat和SpringMVC进行自动配置。 |
| @ComponentScan | 会自动扫描@SpringBootApplication所在类的同级包(com.dpb.springboot)以及子包中的Bean,所以建议将入口类放置在groupId+arctifactID组合的包名下 |
通过@SpringBootApplication的源码我们会发现SpringBoot会帮助我们完成很多的自动配置,但有些情况下我们并不需要SpringBoot帮助我们完成自动配置,这时我们可以通过@SpringBootApplication注解的exclude参数来设置,如下
@SpringBootApplication(exclude = { DataSourceAutoConfiguration.class})public class SpringbootHelloApplication {public static void main(String[] args) {SpringApplication.run(SpringbootHelloApplication.class, args);}}
2.定制Banner
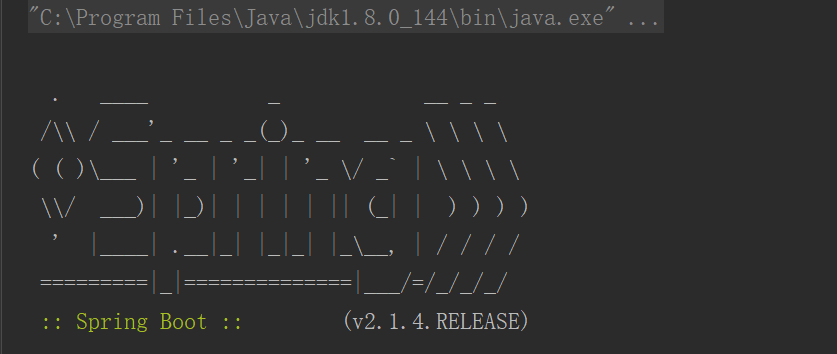
通过入口类启动的时候在控制台我们可以看到一个banner图案,处于兴趣原因们想要改下这个也是可以的,具体如下:
2.1 修改banner图标
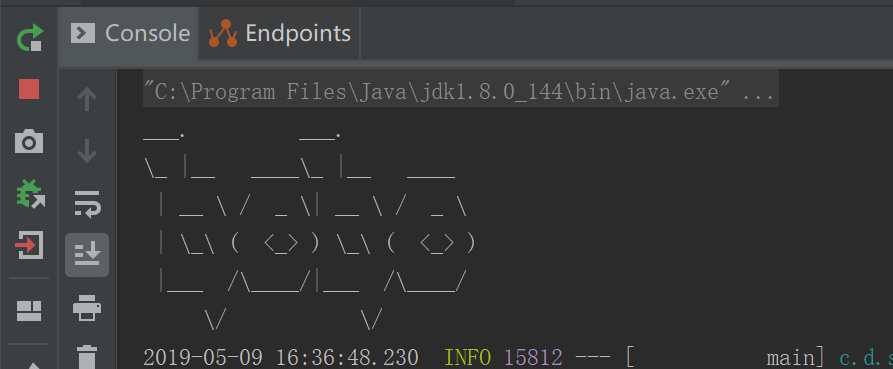
1.默认的banner如下
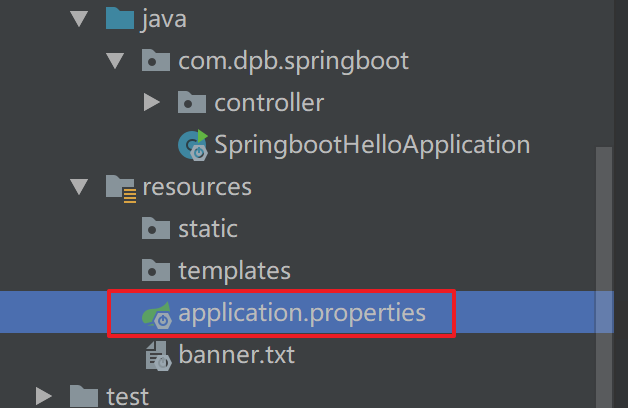
2.在src/main/resources下新建一个banner.txt文件
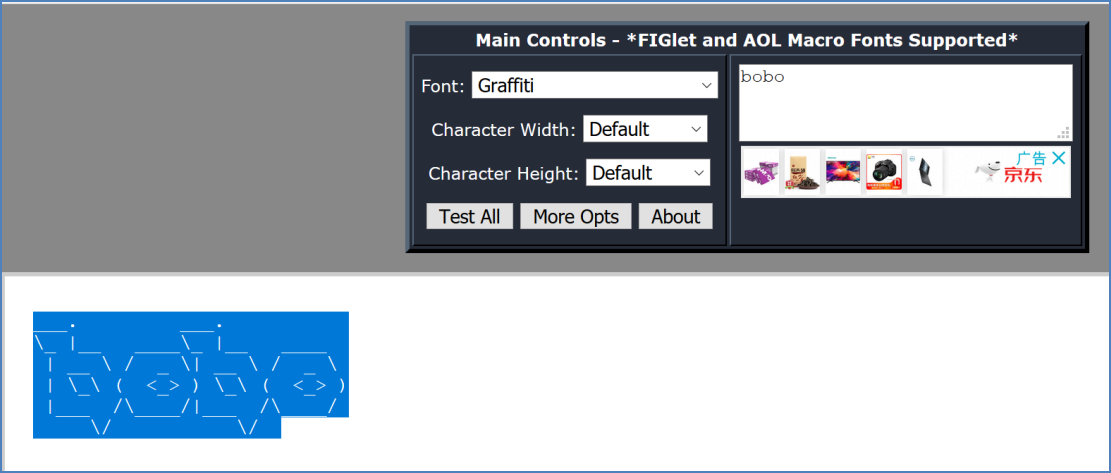
3.通过访问http://patorjk.com/software/taag 网站生成字符,如”bobo”,然后将生成的字符复制到banner.txt中,
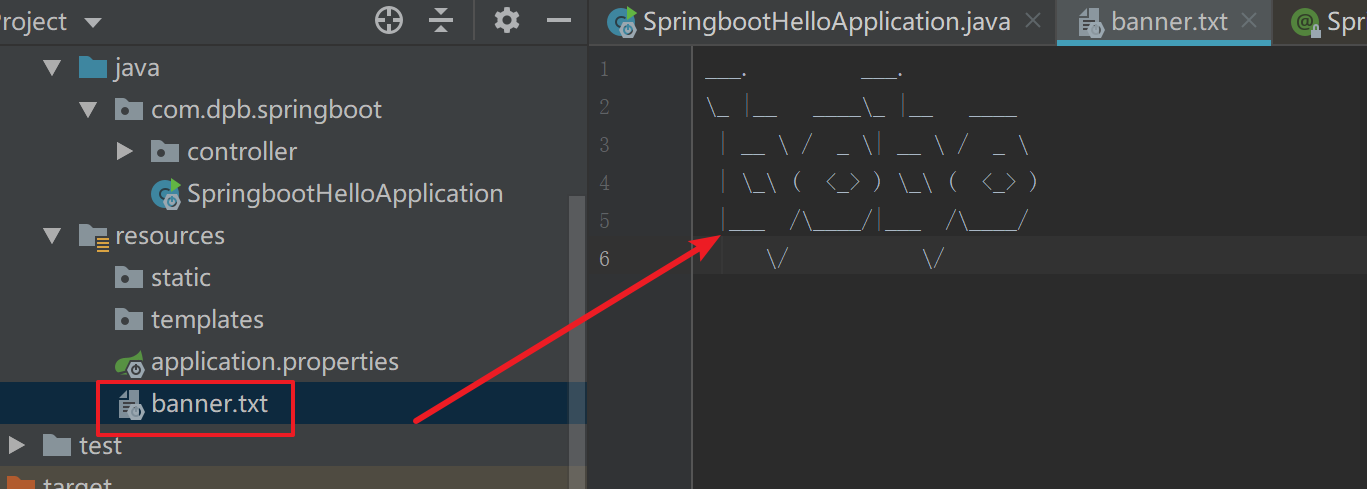
4.再次启动即可
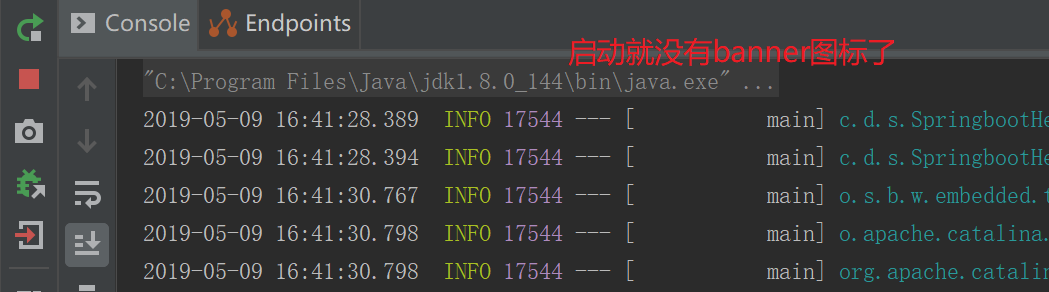
2.2 关闭banner
这个banner其实并没有什么作用,一般情况下我们会关点它,我们来看看如何关掉banner。 main方法中修改如下
public static void main(String[] args) {SpringApplication app = new SpringApplication(SpringbootHelloApplication.class);// 关闭bannerapp.setBannerMode(Banner.Mode.OFF);app.run(args);}
3.SpringBoot的配置文件
SpringBoot使用一个全局的配置文件application.properties或application.yml,位于src/main/resources目录或者类路径/config下,推荐使用properties的方式配置。
3.1 tomcat端口号修改
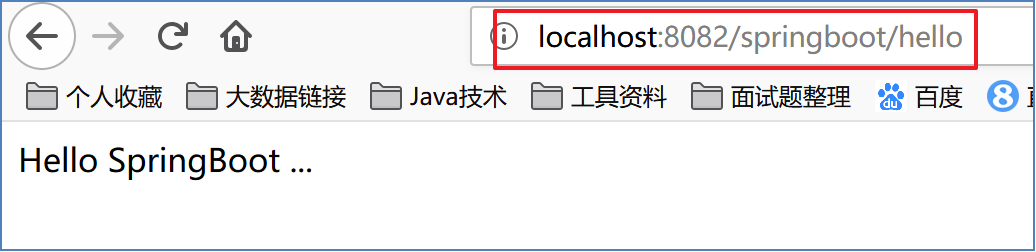
tomcat的端口号默认是8080,我们需要将之修改为8082,并将默认访问路径”/“ 修改为”/springboot”
server.port=8082server.servlet.context-path=/springboot
启动后浏览器访问即可:
3.2 常规属性配置
前面介绍Spring的时候,我们想要注入properties中的值的时候我们需要通过@PropertySource指明properties文件的位置,然后通过@Value注入值,在SpringBoot中,我们只需要在application.properties定义属性,直接使用@Value注入即可。
1.application.properties增加属性
user.username=波波烤鸭user.age=18user.address=深圳
2.代码中获取
/** * @program: springboot-hello * @description: Hello 案例 * @author: 波波烤鸭 * @create: 2019-05-08 21:10 */@RestControllerpublic class HelloController {@Value("${user.username}")private String name;@Value("${user.age}")private int age;@Value("${user.address}")private String address;@RequestMapping("/hello")public String hello(){return "Hello SpringBoot ... "+name+" "+age+" "+address;}}
3.访问测试
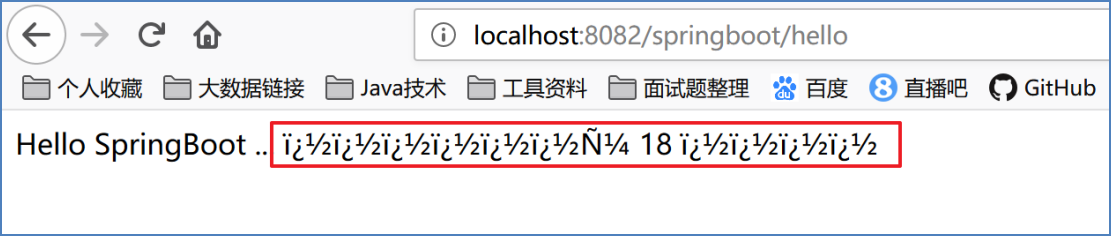
4.中文乱码处理
内容是取到了,但是中文乱码,如何解决呢,继续往下看
在application.properties中添加如下设置
server.tomcat.uri-encoding=UTF-8spring.http.encoding.charset=UTF-8spring.http.encoding.enabled=truespring.http.encoding.force=truespring.messages.encoding=UTF-8
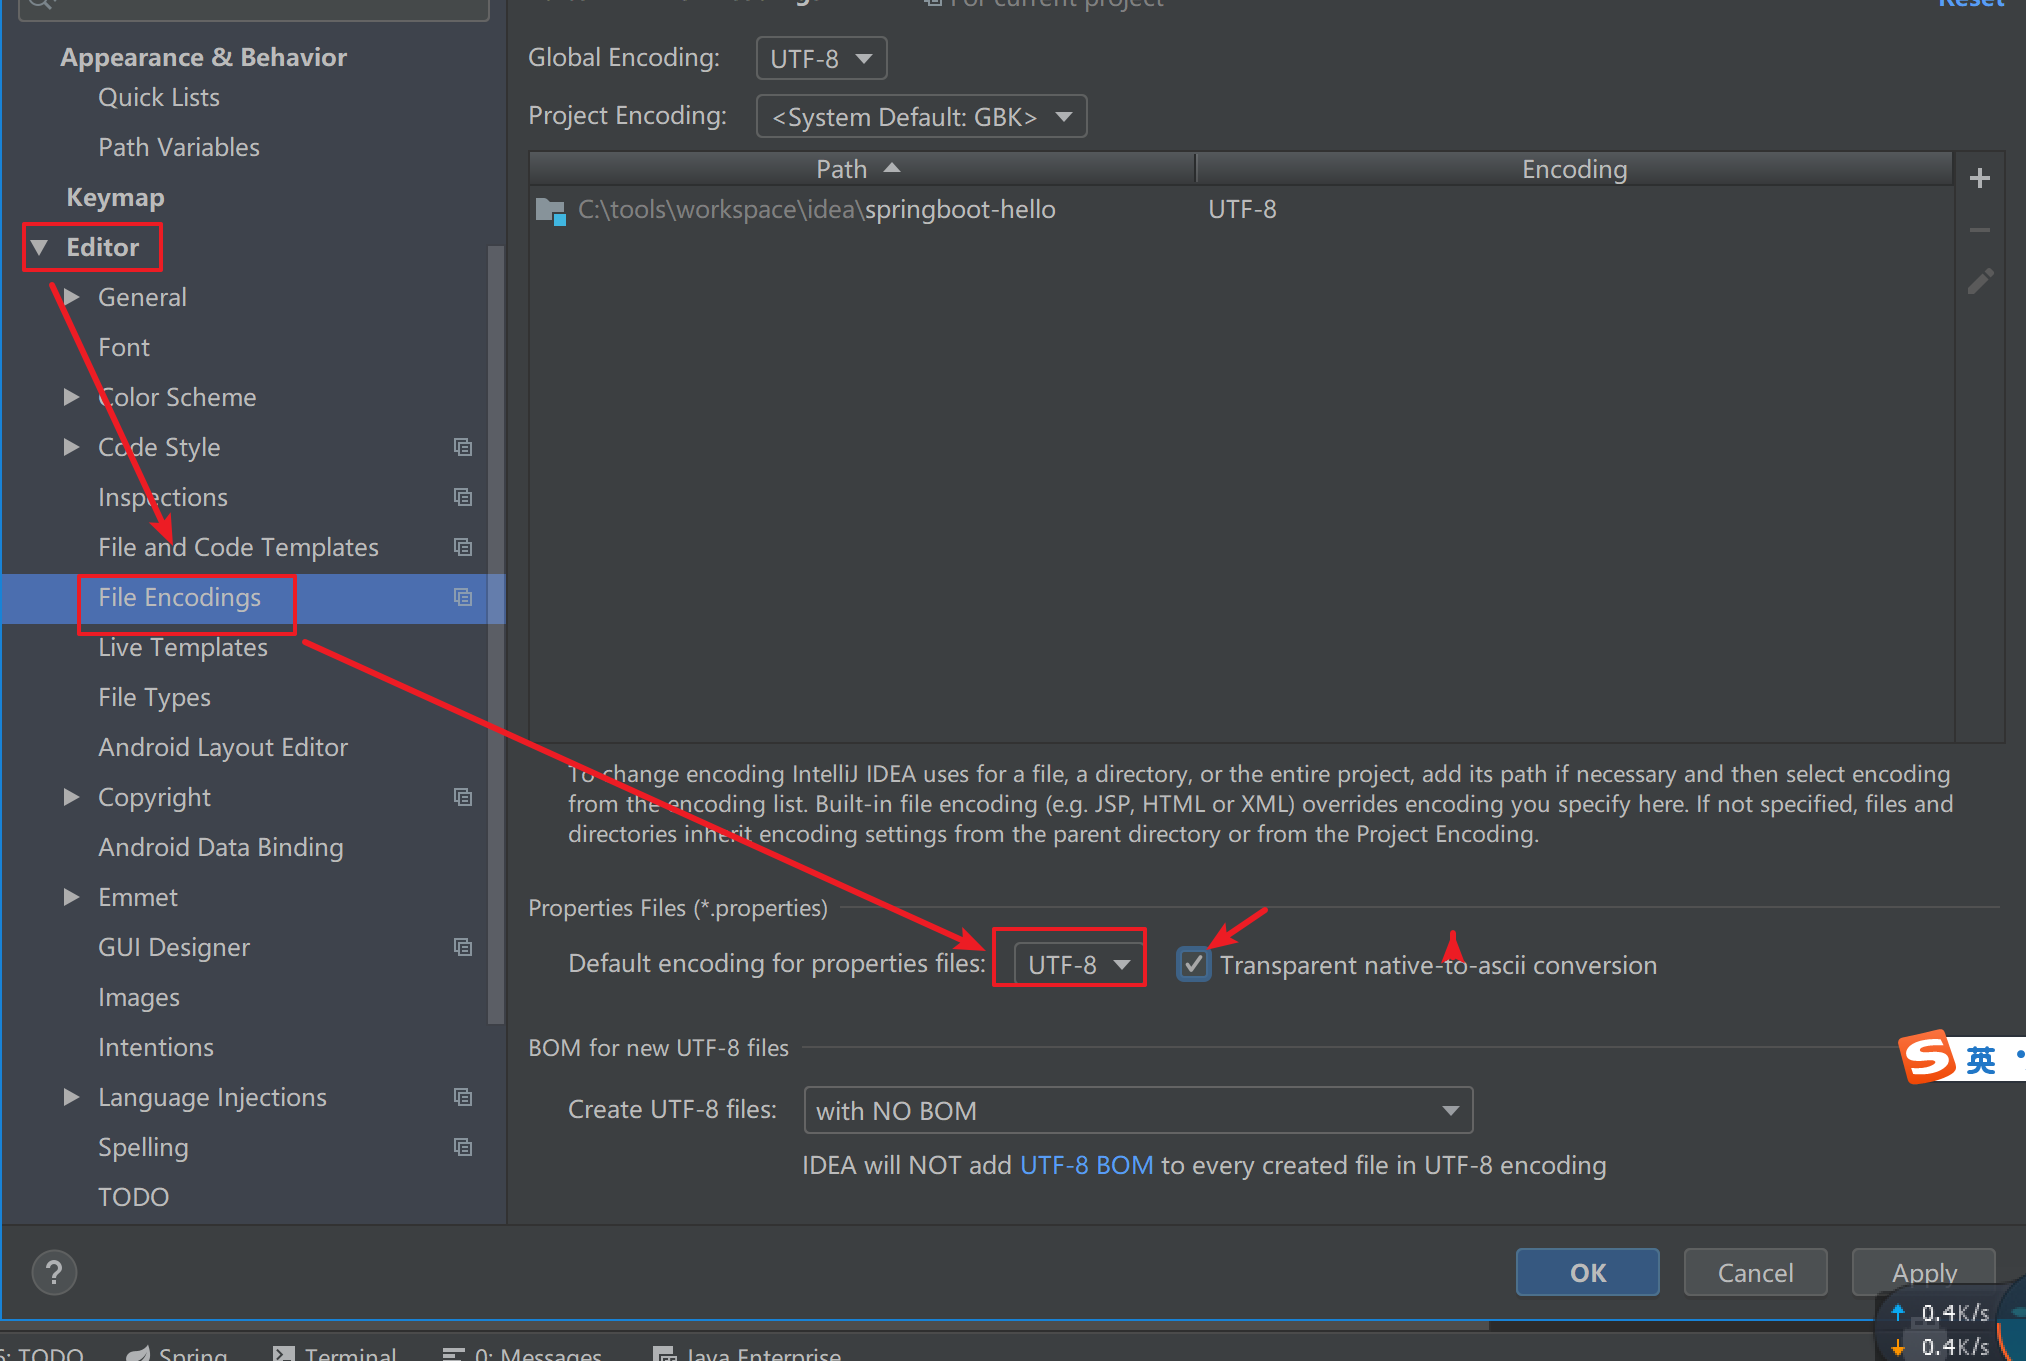
file – > setting – > Editor – > File Encodings – >然后按照如下图设置
再测试
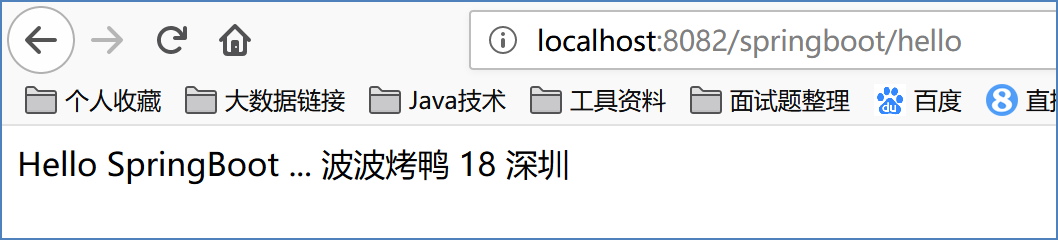
搞定~
3.3 类型安全的配置
上面将的属性配置在实际的开发过程中有点复杂,因为我们需要设置的属性太多了,这时我看可以使用类型安全的配置方式来实现,这样使用起来会更加方便,具体如下:
1.application.properties中配置
users.name=波波烤鸭users.age=18users.address=深圳
2.创建bean对象
@ConfigurationProperties注解需要加入如下依赖:
<dependency><groupId>org.springframework.boot</groupId><artifactId>spring-boot-configuration-processor</artifactId><optional>true</optional></dependency>
不然会有错误提示,而且该注解的locations属性在2.x版本中已经移除了!!!
要解决参考此文 //blog.csdn.net/baidu_19760977/article/details/71206108
/** * @program: springboot-hello * @description: 用户 * @author: 波波烤鸭 * @create: 2019-05-09 17:15 */@Component@ConfigurationProperties(prefix = "users")public class User {private String name;private String age;private String address;public String getName() {return name;}public void setName(String name) {this.name = name;}public String getAge() {return age;}public void setAge(String age) {this.age = age;}public String getAddress() {return address;}public void setAddress(String address) {this.address = address;}}
3.业务代码
/** * @program: springboot-hello * @description: Hello 案例 * @author: 波波烤鸭 * @create: 2019-05-08 21:10 */@RestControllerpublic class HelloController {@Autowiredprivate User user;@RequestMapping("/hello")public String hello(){return "Hello SpringBoot ... "+user.getName()+" "+user.getAge()+" "+user.getAddress();}}
4.测试
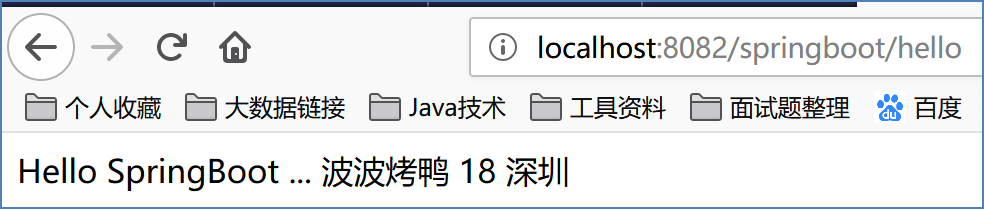
搞定~


(sink端)")
")

使用 Kibana 操作 ES")


还没有评论,来说两句吧...