Spring:事件发布机制
起因是在看Spring Security时,看到如下代码
protected void successfulAuthentication(HttpServletRequest request, HttpServletResponse response, FilterChain chain,Authentication authResult) throws IOException, ServletException {...if (this.eventPublisher != null) {this.eventPublisher.publishEvent(new InteractiveAuthenticationSuccessEvent(authResult, this.getClass()));}...}
这让我想起的第一个念头就是观察者模式,我尝试写了下案例,如下
public class Subject {int state ;List<Observer> observerList = new ArrayList<Observer>();public void change(){state = 0;if(state==0){observerList.forEach((k)->{ k.update();});}}public void register(Observer observer){observerList.add(observer);}public static void main(String[] args) {Subject subject = new Subject();Observer1 observer1 = new Observer1();Observer2 observer2 = new Observer2();subject.register(observer1);subject.register(observer2);subject.change();}}public interface Observer {void update();}public class Observer1 implements Observer {@Overridepublic void update() {System.out.println("Observer1发生改变");}}public class Observer2 implements Observer {@Overridepublic void update() {System.out.println("Observer2发生改变");}}
观察者模式就是典型的就是发布-订阅模式,通过维护一个观察者队列,长期、持续地监听某个参数、数值的变化,来决定是否会通过观察者们,很简单的一个模式。
在Spring中,它又是怎样的呢,来看下面
好家伙链接
Spring对事件驱动模型提供了支持,一样分为3块:
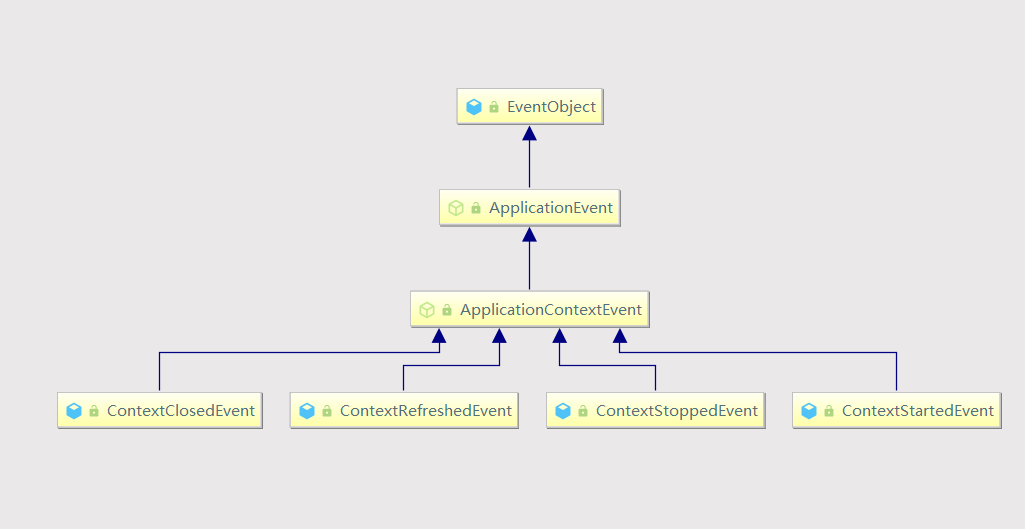
1、事件
从继承结构来看,一共有4个实现类,从类名来看就能很容易明白其作用,平时我们使用的时候只要实现ApplicationEvent抽象类即可。
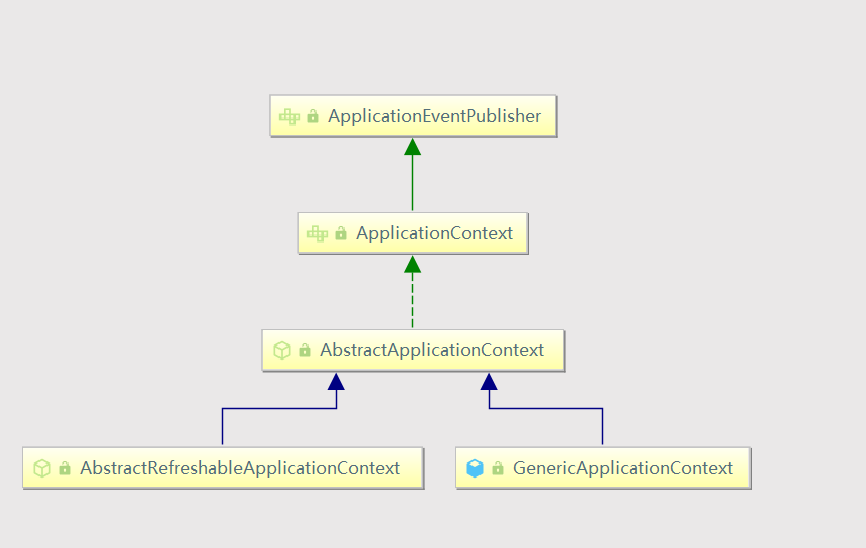
2、发布者
从下面的继承结构来看,我们可以通过继承ApplicationEventPublisher接口,重写publishEvent()方法来实现自定义或者实现ApplicationContextAware接口也也是看主意,通过注入ApplicationContext,再重写publishEvent()方法。
我发现在AbstractApplicationContext类中添加了对监听者的注册、获取等方法。保存监听者们是一个set集合,他们最后都会给注册到 ApplicationEventMulticaster 的set中。
// 暂时保存在set中public void addApplicationListener(ApplicationListener<?> listener) {if (this.applicationEventMulticaster != null) {this.applicationEventMulticaster.addApplicationListener(listener);}this.applicationListeners.add(listener);}
注册到ApplicationEventMulticaster
protected void registerListeners() {// 遍历集合,注册监听者for (ApplicationListener<?> listener : getApplicationListeners()) {getApplicationEventMulticaster().addApplicationListener(listener);}// Do not initialize FactoryBeans here: We need to leave all regular beans// uninitialized to let post-processors apply to them!String[] listenerBeanNames = getBeanNamesForType(ApplicationListener.class, true, false);for (String listenerBeanName : listenerBeanNames) {getApplicationEventMulticaster().addApplicationListenerBean(listenerBeanName);}// Publish early application events now that we finally have a multicaster...Set<ApplicationEvent> earlyEventsToProcess = this.earlyApplicationEvents;this.earlyApplicationEvents = null;if (!CollectionUtils.isEmpty(earlyEventsToProcess)) {for (ApplicationEvent earlyEvent : earlyEventsToProcess) {getApplicationEventMulticaster().multicastEvent(earlyEvent);}}}
发布事假,发现它需要获取一个ApplicationEventMulticaster
protected void publishEvent(Object event, @Nullable ResolvableType eventType) {...if (this.earlyApplicationEvents != null) {this.earlyApplicationEvents.add(applicationEvent);}else {getApplicationEventMulticaster().multicastEvent(applicationEvent, eventType);}...}
ApplicationEventMulticaster 的初始化,查看配置中有没有进行配置,没有则创建SimpleApplicationEventMulticaster实例并进行赋值。
protected void initApplicationEventMulticaster() {ConfigurableListableBeanFactory beanFactory = getBeanFactory();if (beanFactory.containsLocalBean(APPLICATION_EVENT_MULTICASTER_BEAN_NAME)) {this.applicationEventMulticaster =beanFactory.getBean(APPLICATION_EVENT_MULTICASTER_BEAN_NAME, ApplicationEventMulticaster.class);}else {this.applicationEventMulticaster = new SimpleApplicationEventMulticaster(beanFactory);beanFactory.registerSingleton(APPLICATION_EVENT_MULTICASTER_BEAN_NAME, this.applicationEventMulticaster);}}
我们将发布的方法点到,最后,发现它仅仅只是调用Listener的onApplicationEvent
private void doInvokeListener(ApplicationListener listener, ApplicationEvent event) {try {listener.onApplicationEvent(event);}catch (ClassCastException ex) {...}}
3、监听者
我们通过实现ApplicationListener接口,重写ApplicationListener()方法就可以进行使用

从上面看来,Spring对事件驱动模型就是装饰器模式,不过放监听者的地方是ApplicationEventMulticaster。


")


还没有评论,来说两句吧...