Android 六大布局之 LinearLayout( 线性布局)
目录
LinearLayout( 线性布局) 检索
weight( 权重)属性详解
最简单方式
wrap_content 方式
LinearLayout 设置分割线
图片分隔
LinearLayout( 线性布局) 检索
1、Android 中有六大布局: LinearLayout(线性布局),RelativeLayout(相对布局),TableLayout(表格布局) FrameLayout(帧布局),AbsoluteLayout(绝对布局),GridLayout(网格布局)
2、屏幕适配使用的比较多的就是 LinearLayout 的 weight(权重属性),本文详细地解析 LinearLayout,包括一些基本的属性,Weight 属性的使用,以及比例如何计算,还有使用 android:divider 绘制下划线!

本文使用的是 Android Studion 3.1.2
weight( 权重)属性详解
最简单方式
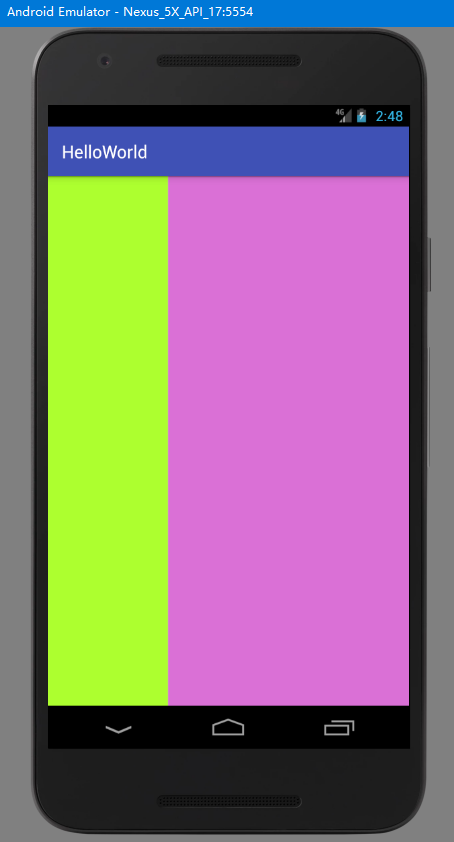 图 1.1
图 1.1
实现 图1.1 效果的代码如下:
<LinearLayout xmlns:android="http://schemas.android.com/apk/res/android"xmlns:tools="http://schemas.android.com/tools"android:id="@+id/LinearLayout1"android:layout_width="match_parent"android:layout_height="match_parent"android:orientation="horizontal"tools:context=".MainActivity"><LinearLayoutandroid:layout_width="0dp"android:layout_height="fill_parent"android:layout_weight="1"android:background="#ADFF2F" /><LinearLayoutandroid:layout_width="0dp"android:layout_height="fill_parent"android:layout_weight="2"android:background="#DA70D6" /></LinearLayout>
android:id=”@+id/LinearLayout1” :为该资源控件设置一个资源 id,在 Java 代码中可以通过 findViewById(id) 找到该控件
android:layout_width=”match_parent”:布局的宽度设置为填满父容器
android:layout_height=”match_parent”:布局的高度设置为填满父容器
android:orientation=”horizontal”:布局中控件的排列方式设置为水平方向
android:layout_height=”fill_parent:布局高度设置为充满父容器
tools:context=”.MainActivity”:声明当前布局提供给 activity 使用
android:layout_weight:设置权重,按比例划分水平方向,将涉及到的 View 的 android:layout_width 属性设置为 0dp,然后使用 android:layout_weight 属性设置比例即可,如上所示,第二个 LinearLayout 是第一个的两倍。
以此类推,竖直方向,只需设 android:layout_height 为 0dp,然后设置 layout_weight 属性即可,如果要达到 1:1 等分效果,则显然只需要分别把两个 LinearLayout 的 weight 改成1和1就可以了。
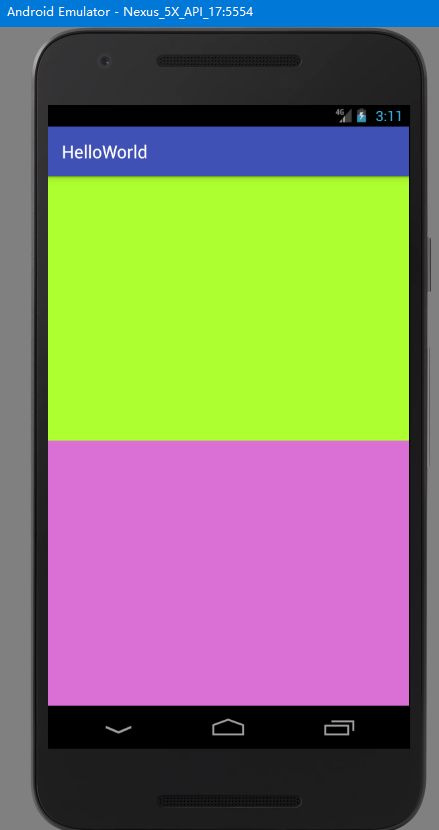 图 1.2
图 1.2
上图 1.2 效果代码如下:
<LinearLayout xmlns:android="http://schemas.android.com/apk/res/android"xmlns:tools="http://schemas.android.com/tools"android:id="@+id/LinearLayout1"android:layout_width="match_parent"android:layout_height="match_parent"android:orientation="vertical"tools:context=".MainActivity"><LinearLayoutandroid:layout_width="fill_parent"android:layout_height="0dp"android:layout_weight="1"android:background="#ADFF2F" /><LinearLayoutandroid:layout_width="fill_parent"android:layout_height="0dp"android:layout_weight="1"android:background="#DA70D6" /></LinearLayout>
wrap_content 方式
1、如果不用上述最简单的那种设置为 0dp 的方式,直接用 wrap_content 也是可以的——内容包裹
2、LinearLayout 的 orientation 属性决定向哪个方向等比例划分,horizontal(水平)或是 vertical(竖直)
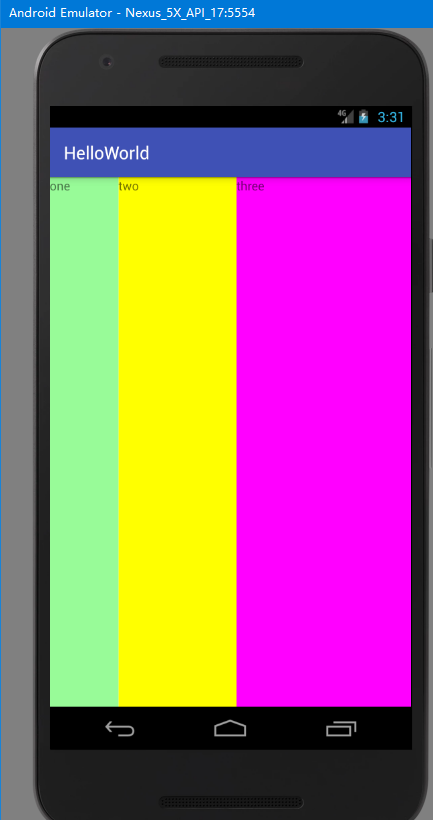 图 1.3
图 1.3
实现上图 1.3 效果代码如下:
<LinearLayout xmlns:android="http://schemas.android.com/apk/res/android"xmlns:tools="http://schemas.android.com/tools"android:id="@+id/LinearLayout1"android:layout_width="match_parent"android:layout_height="match_parent"android:orientation="horizontal"tools:context=".MainActivity"><TextViewandroid:layout_width="wrap_content"android:layout_height="fill_parent"android:layout_weight="1"android:background="#98FB98"android:text="one" /><TextViewandroid:layout_width="wrap_content"android:layout_height="fill_parent"android:layout_weight="2"android:background="#FFFF00"android:text="two" /><TextViewandroid:layout_width="wrap_content"android:layout_height="fill_parent"android:layout_weight="3"android:background="#FF00FF"android:text="three" /></LinearLayout>
LinearLayout 设置分割线
很多界面开发中都会设置一些下划线,或者分割线,从而使得界面更加整洁美观:

<view 分隔
对于这种线,做法 ① 直接在布局中添加一个view,作用仅仅是显示出一条线,代码也很简单:
 图 1.5
图 1.5
实现上图 1.5 效果代码如下,这个是水平方向上的红色线,当然也可以改成其他颜色,或者使用图片:
<LinearLayout xmlns:android="http://schemas.android.com/apk/res/android"xmlns:tools="http://schemas.android.com/tools"android:id="@+id/LinearLayout1"android:layout_width="match_parent"android:layout_height="match_parent"android:orientation="vertical"tools:context=".MainActivity"><Buttonandroid:layout_width="wrap_content"android:layout_height="wrap_content"android:text="按钮1" /><Viewandroid:layout_width="match_parent"android:layout_height="1px"android:background="#f00" /><Buttonandroid:layout_width="wrap_content"android:layout_height="wrap_content"android:text="按钮2" /><Viewandroid:layout_width="match_parent"android:layout_height="1px"android:background="#f00" /><Buttonandroid:layout_width="wrap_content"android:layout_height="wrap_content"android:text="按钮3" /></LinearLayout>
图片分隔
使用 LinearLayout 的一个 divider 属性,直接为 LinearLayout 设置分割线
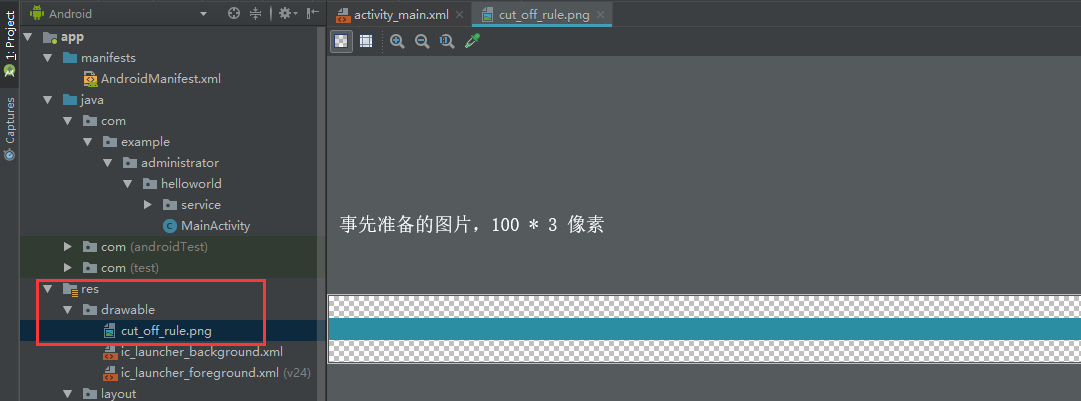
1)自己先准备一张分割线的图片
2)android:divider 设置作为分割线的图片
3)android:showDividers 设置分割线的位置,none(无)、begining(开始)、end(结束)、middle(每两个组件之间)
4)android:dividerPadding 设置分割线的Padding
<LinearLayout xmlns:android="http://schemas.android.com/apk/res/android"xmlns:tools="http://schemas.android.com/tools"android:id="@+id/LinearLayout1"android:layout_width="match_parent"android:layout_height="match_parent"android:orientation="vertical"android:divider="@drawable/cut_off_rule"android:showDividers="middle"android:dividerPadding="5dp"tools:context=".MainActivity"><Buttonandroid:layout_width="wrap_content"android:layout_height="wrap_content"android:text="Button 1" /><Buttonandroid:layout_width="wrap_content"android:layout_height="wrap_content"android:text="Button 2" /><Buttonandroid:layout_width="wrap_content"android:layout_height="wrap_content"android:text="Button 3" /></LinearLayout>
上述代码效果如下:
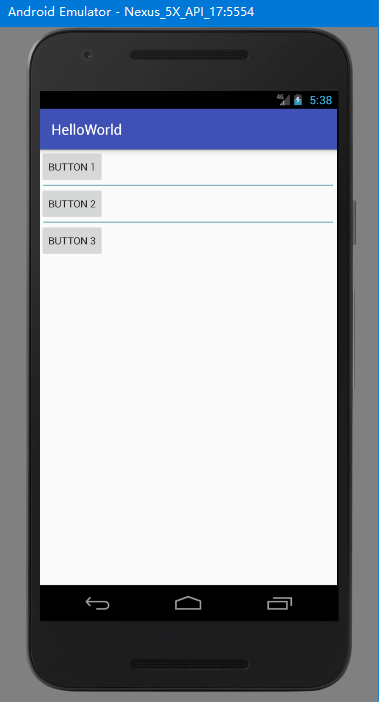 图 1.6
图 1.6


")


还没有评论,来说两句吧...