Android学习随笔(10)------碎片Fragement
学习流程来自《第一行代码》(第二版)
不仅仅是手机在使用Android系统,Android系统也被许多的平板使用着,这就出现了一个问题,两种设备的屏幕大小,比例都是有着巨大差别的,难道要为一个应用写两套代码来适配一个应用吗?
这是一件十分耗费时间的事情。所以这里引入了碎片的概念。
碎片(Fragment)是一种可以嵌入在活动当中的UI片段,可包含布局,有自己的生命周期,是一个迷你型的活动。
碎片的使用
新建两个布局文件。
left_fragment.xml :
<?xml version="1.0" encoding="utf-8"?><LinearLayout xmlns:android="http://schemas.android.com/apk/res/android" android:orientation="vertical" android:layout_width="match_parent" android:layout_height="match_parent"><Button android:id="@+id/button" android:layout_width="wrap_content" android:layout_height="wrap_content" android:layout_gravity="center_horizontal" android:text="Button"/></LinearLayout>
一个线性布局中包含了一个button。
right_fragment.xml :
<?xml version="1.0" encoding="utf-8"?><LinearLayout xmlns:android="http://schemas.android.com/apk/res/android" android:orientation="vertical" android:layout_width="match_parent" android:layout_height="match_parent" android:background="#00ff00"><TextView android:layout_width="wrap_content" android:layout_height="wrap_content" android:layout_gravity="center_horizontal" android:textSize="20sp" android:text="This is right fragment" /></LinearLayout>
一个背景色为绿的线性布局,头部中间显示一段文字。
再新建两个类都继承Fragment(import android.support.v4.app.Fragment;继承这个包下的Fragment类,不需要导入)。
LeftFragment.java :
public class left_fragment extends Fragment {@Overridepublic View onCreateView(LayoutInflater inflater, ViewGroup container, Bundle savedInstanceState) {View view = inflater.inflate(R.layout.left_fragment,container,false);return view;}}
通过LayoutInflater.inflate()方法动态加载left_fragment布局。
RightFragment.java
public class right_fragment extends Fragment {@Overridepublic View onCreateView(LayoutInflater inflater, ViewGroup container, Bundle savedInstanceState) {View view = inflater.inflate(R.layout.right_fragment,container,false);return view;}}
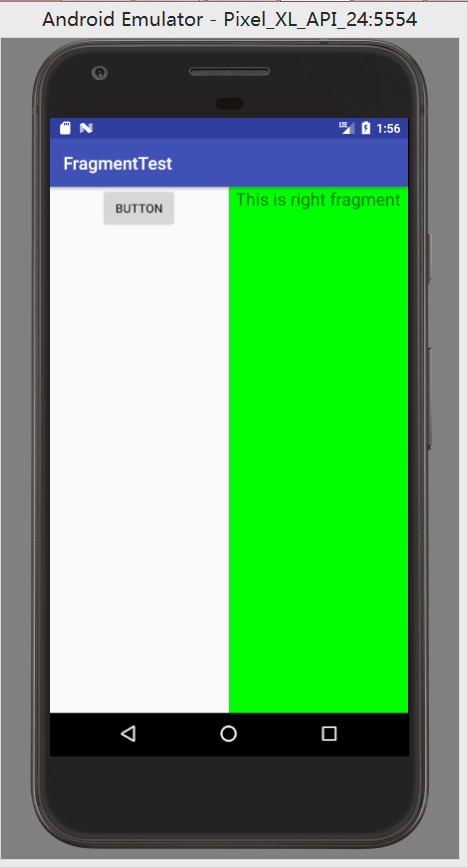
主页面的布局文件 :
<?xml version="1.0" encoding="utf-8"?><LinearLayout xmlns:android="http://schemas.android.com/apk/res/android" android:orientation="horizontal" android:layout_width="match_parent" android:layout_height="match_parent" ><fragment android:id="@+id/left_fragment" android:name="com.example.yezhou.com.fragmenttest.left_fragment" android:layout_width="0dp" android:layout_height="match_parent" android:layout_weight="1"/><fragment android:id="@+id/right_fragment" android:name="com.example.yezhou.com.fragmenttest.right_fragment" android:layout_width="0dp" android:layout_weight="1" android:layout_height="match_parent" /></LinearLayout>
需要通过android:name属性来显示指明要添加的碎片类名,将类的包名也带上。
不需要再MainActivity.java中添加代码。
动态添加碎片
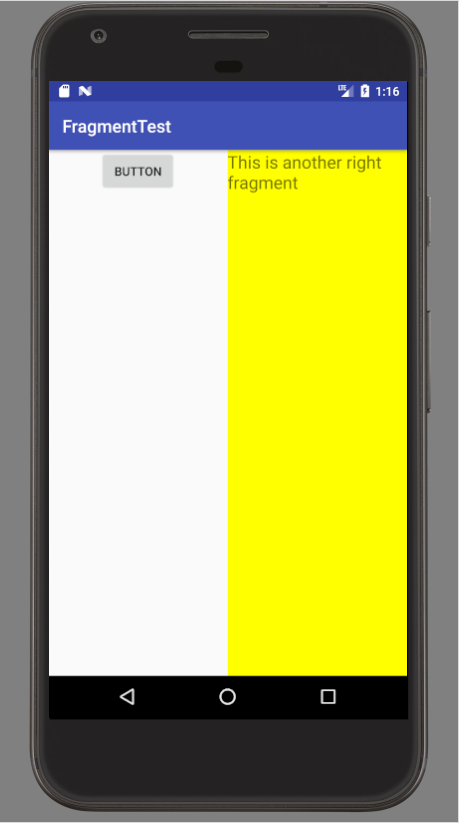
新建一个another_right_fragment.xml
<?xml version="1.0" encoding="utf-8"?><LinearLayout xmlns:android="http://schemas.android.com/apk/res/android" android:orientation="vertical" android:background="#ffff00" android:layout_width="match_parent" android:layout_height="match_parent" ><TextView android:layout_width="wrap_content" android:layout_height="match_parent" android:layout_gravity="center_horizontal" android:textSize="20sp" android:text="This is another right fragment"/></LinearLayout>
布局基本与right_fragment.xml相同,背景色改为黄色。
并写AnotherRightFragment类与新添加的碎片绑定。
public class AnotherRightFragment extends Fragment {@Overridepublic View onCreateView(LayoutInflater inflater, ViewGroup container, Bundle savedInstanceState) {View view = inflater.inflate(R.layout.another_right_fragment,container,false);return view;}}
并对activity_main.java 右侧的Layout进行编辑 :
<?xml version="1.0" encoding="utf-8"?><LinearLayout xmlns:android="http://schemas.android.com/apk/res/android" android:orientation="horizontal" android:layout_width="match_parent" android:layout_height="match_parent" ><fragment android:id="@+id/left_fragment" android:name="com.example.yezhou.com.fragmenttest.left_fragment" android:layout_width="0dp" android:layout_height="match_parent" android:layout_weight="1"/><FrameLayout android:id="@+id/right_layout" android:layout_width="0dp" android:layout_height="match_parent" android:layout_weight="1"></FrameLayout></LinearLayout>public class MainActivity extends AppCompatActivity implements View.OnClickListener{int id = 1;@Overrideprotected void onCreate(Bundle savedInstanceState) {super.onCreate(savedInstanceState);setContentView(R.layout.activity_main);Button button = (Button) findViewById(R.id.button);button.setOnClickListener(this);replaceFragment(); // new right_fragment // 1.创建待添加碎片实例}@Overridepublic void onClick(View v) {switch (v.getId()) {case R.id.button:replaceFragment();break;default:break;}}private void replaceFragment() { // Fragment fragment 实现点击button就可以在两个fragmentview里面切换FragmentManager fragmentManager = getSupportFragmentManager(); // 2.获取fragmentManager,在活动中可以直接通过调用getSupportFragmentManager()方法得到FragmentTransaction transaction = fragmentManager.beginTransaction(); // 3.开启一个事务,通过beginTransaction()方法开启switch (id) {case 1:transaction.replace(R.id.right_layout,new right_fragment()); // 4.向容器内添加或替换碎片,一般使用replace()方法实现,需要传入容器的id和待添加碎片的实例id --;break;case 0:transaction.replace(R.id.right_layout,new AnotherRightFragment());id ++;break;}transaction.commit(); // 提交事务,调用commit()方法来完成}}
代码动态添加碎片的大致流程为 :
- 创建待添加碎片的实例
- 靠getSupportFragmentManager()获取FargmentManager的实例
- 开启事务beginTransaction()
- 向内容器内添加或替换碎片replace(容器的id, 待添加碎片的实例)
- 提交事务commit()
此代码实现点击Button之后可以进行两个碎片之间的来回切换。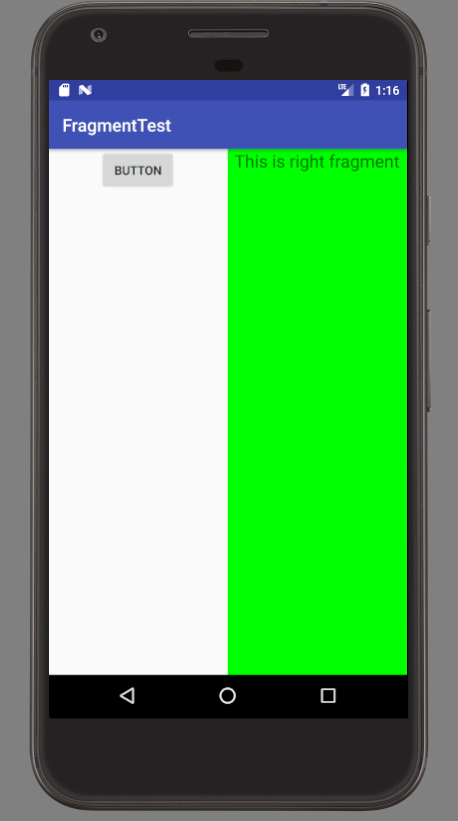
当按下返回键时,会发现我们会直接退出app,并不能返回上一个碎片。这里利用FragmentTransaction中的addToBackStack()方法。
修改MainActivity.java :
package com.example.yezhou.com.fragmenttest;import android.support.v4.app.Fragment;import android.support.v4.app.FragmentManager;import android.support.v4.app.FragmentTransaction;import android.support.v7.app.AppCompatActivity;import android.os.Bundle;import android.view.View;import android.widget.Button;public class MainActivity extends AppCompatActivity implements View.OnClickListener{int id = 1;@Overrideprotected void onCreate(Bundle savedInstanceState) {super.onCreate(savedInstanceState);setContentView(R.layout.activity_main);Button button = (Button) findViewById(R.id.button);button.setOnClickListener(this);replaceFragment(new right_fragment()); // new right_fragment // 1.创建待添加碎片实例}@Overridepublic void onClick(View v) {switch (v.getId()) {case R.id.button:replaceFragment(new AnotherRightFragment());break;default:break;}}private void replaceFragment(Fragment fragment) { // 模拟返回栈 按下back返回到上一个碎片FragmentManager fragmentManager = getSupportFragmentManager();FragmentTransaction fragmentTransaction = fragmentManager.beginTransaction();fragmentTransaction.replace(R.id.right_layout, fragment);fragmentTransaction.addToBackStack(null); // 接收一个名字用于描述返回栈的状态fragmentTransaction.commit();}}
此代码没有实现点击button两碎片之间来回切换,但是按下返回键时会返回上一个碎片。实现碎片中模拟返回栈。
碎片的生命周期
既然碎片是一个迷你型的活动,那么跟活动定是有相同的地方,除了上面基础中的一些东西之外,碎片也有自己的生命周期。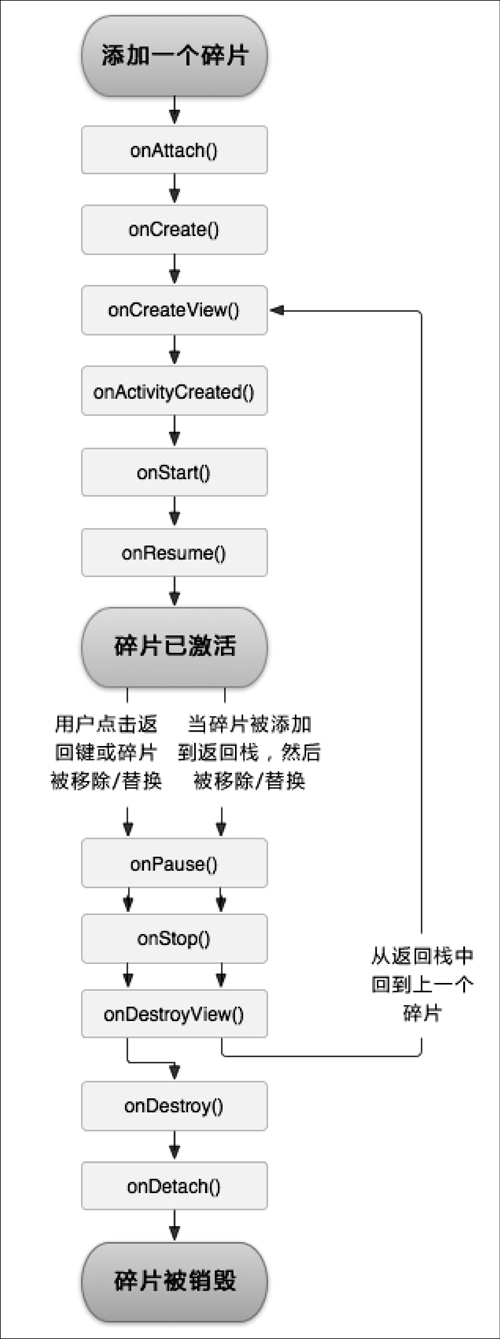
用代码运行程序来理解一下 :
public class right_fragment extends Fragment {public static final String TAG = "admin";@Overridepublic View onCreateView(LayoutInflater inflater, ViewGroup container, Bundle savedInstanceState) {Log.d(TAG, "onCreateView");View view = inflater.inflate(R.layout.right_fragment,container,false);return view;}@Overridepublic void onAttach(Context context) {super.onAttach(context);Log.d(TAG, "onAttach()");}@Overridepublic void onCreate(@Nullable Bundle savedInstanceState) {super.onCreate(savedInstanceState);Log.d(TAG, "onCreate()");}@Overridepublic void onActivityCreated(@Nullable Bundle savedInstanceState) {super.onActivityCreated(savedInstanceState);Log.d(TAG, "onActivityCreated()");}@Overridepublic void onStart() {super.onStart();Log.d(TAG, "onStart()");}@Overridepublic void onResume() {super.onResume();Log.d(TAG, "onResume()");}@Overridepublic void onPause() {super.onPause();Log.d(TAG, "onPause()");}@Overridepublic void onStop() {super.onStop();Log.d(TAG, "onStop()");}@Overridepublic void onDestroyView() {super.onDestroyView();Log.d(TAG, "onDestroyView()");}@Overridepublic void onDestroy() {super.onDestroy();Log.d(TAG, "onDestroy()");}@Overridepublic void onDetach() {super.onDetach();Log.d(TAG, "onDetach()");}}
这是刚运行时的Log输出信息 :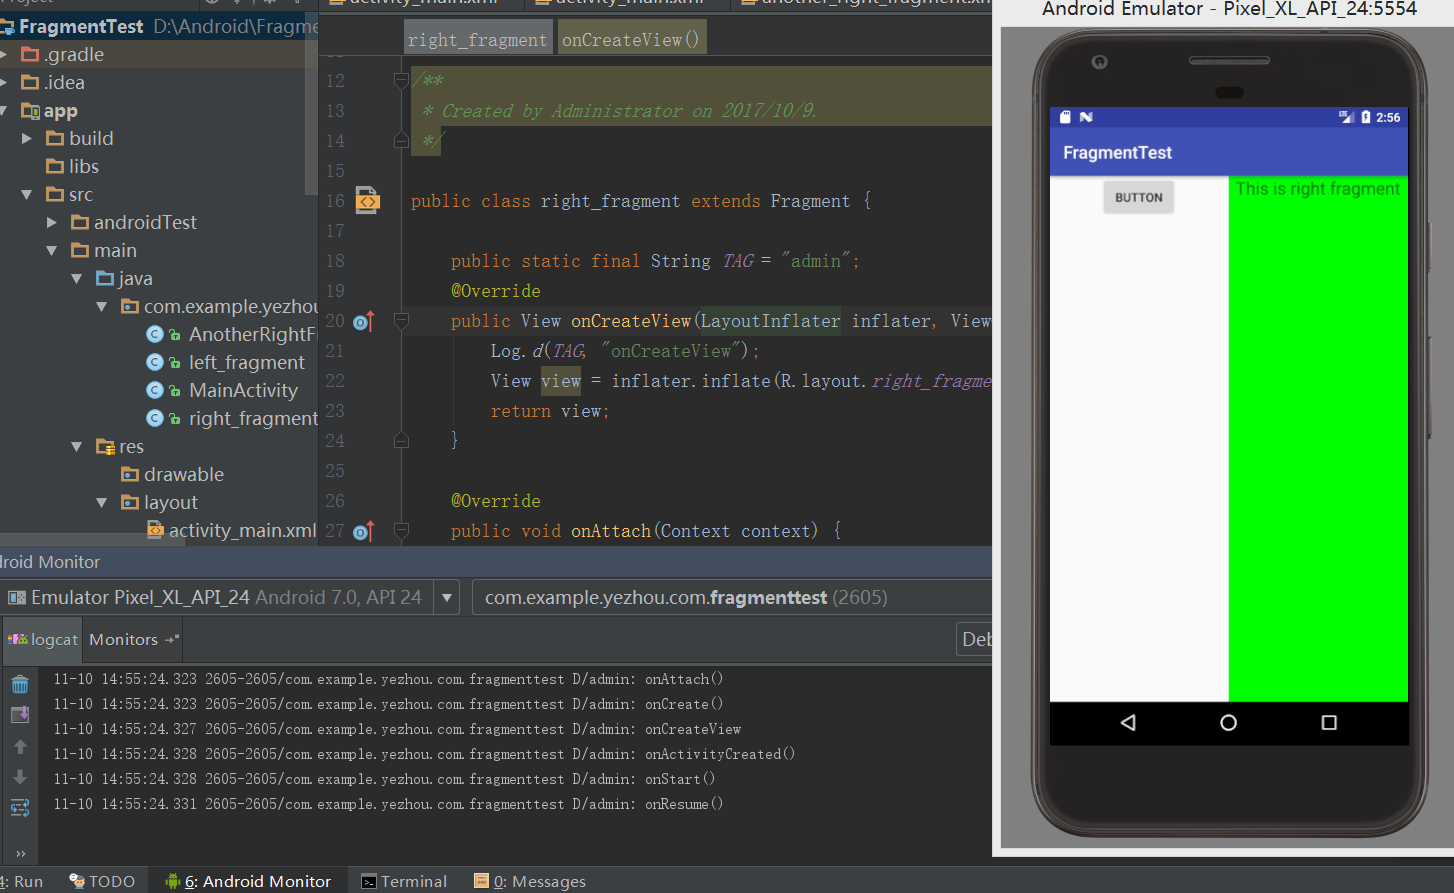
依次执行onAttach()、onCreate()、onCreateView()、onActivityCreated()、
onStart()、onResume()
点击button :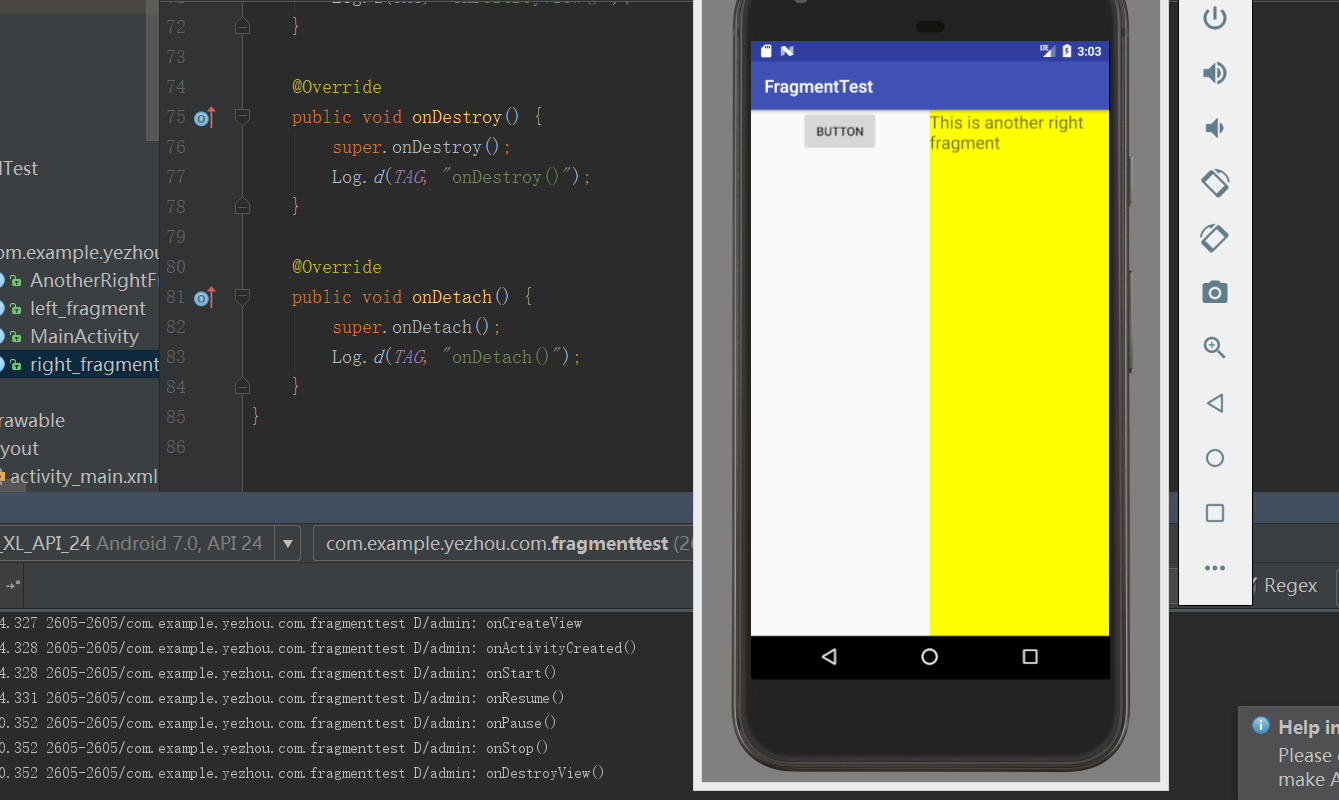
AnotherRightFragment替代掉了RightFragment,RightFragment进入了停止状态,onPause()、onStop()、onDestroyView() 依次得到执行。
点击back键 :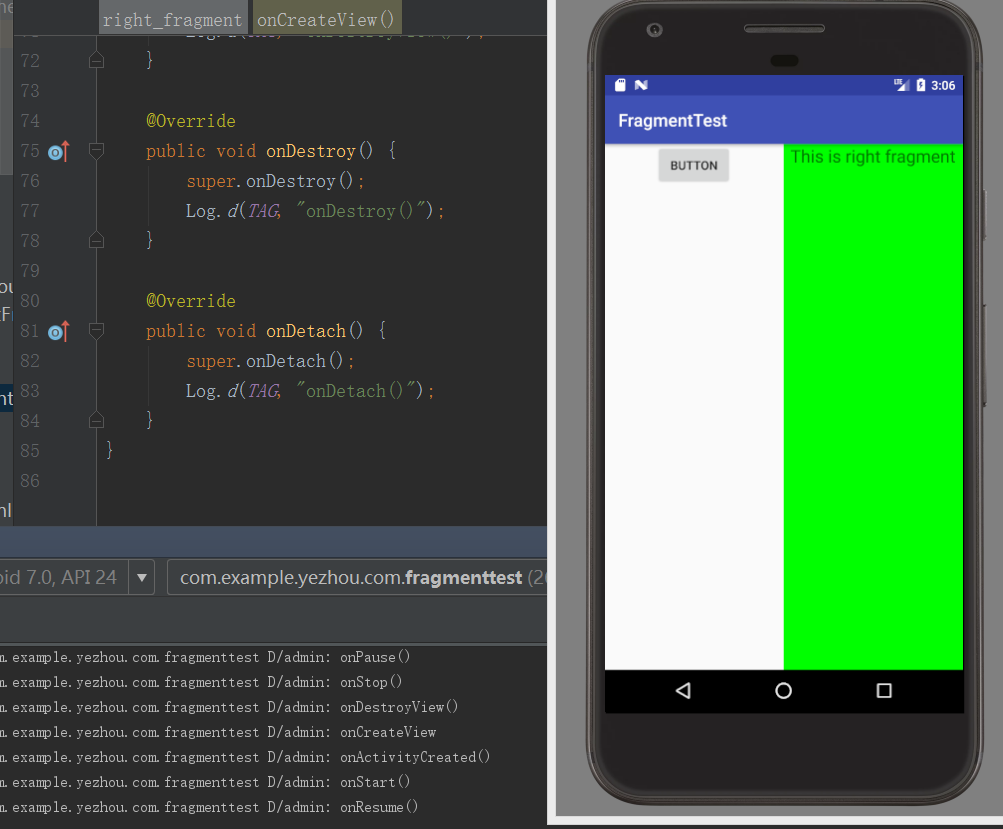
可以看到onCreateView()、onActivityCreated()、onStart()、onResume()依次得到调用,RightFragment重新回到运行状态。
再次点击back键 :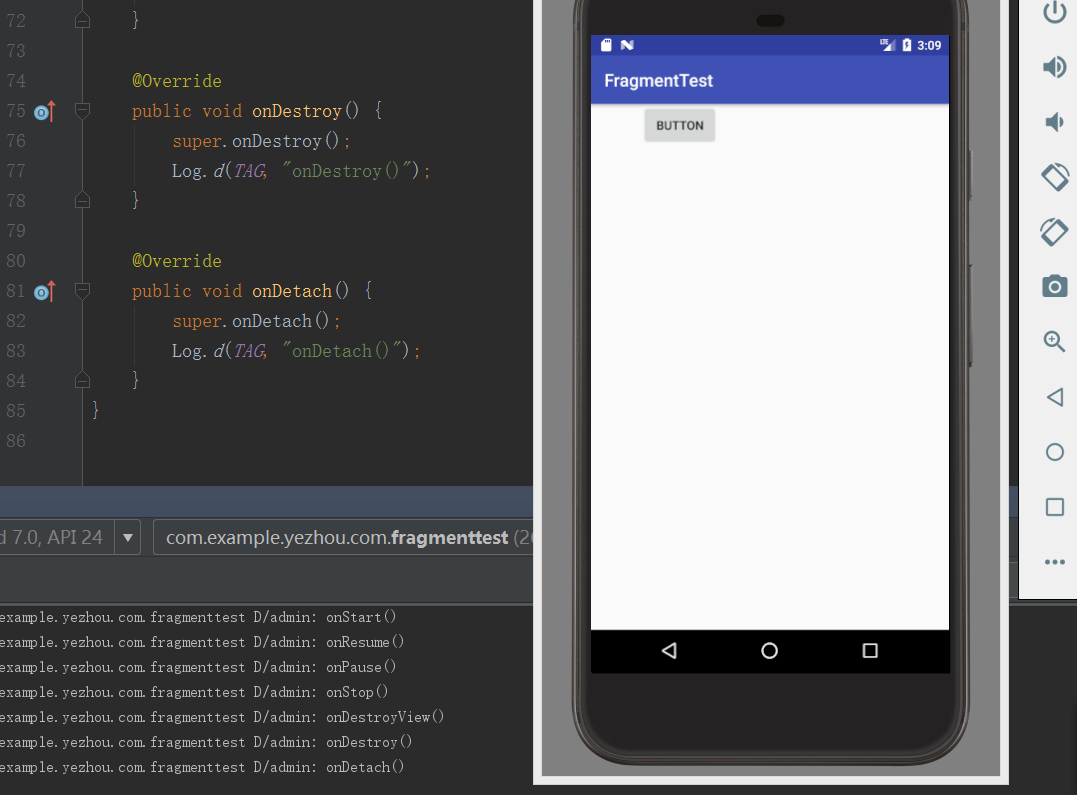
可以看到RightFragment被销毁,onpause()、onStop()、onDestroyView()、onDestroy()、onDetach()依次被调用。
动态加载布局的技巧
利用限定符来实现根据不同设备分辨率或屏幕大小在运行时来决定加载哪个布局。
很多时候相同的App在平板和手机上显示的内容布局是不一样的,利用限定符就可以来判断程序应该使用哪个显示模式。
更改activity_main布局文件
<?xml version="1.0" encoding="utf-8"?><LinearLayout xmlns:android="http://schemas.android.com/apk/res/android" android:orientation="horizontal" android:layout_width="match_parent" android:layout_height="match_parent" ><fragment android:id="@+id/left_fragment" android:name="com.example.yezhou.com.fragmenttest.left_fragment" android:layout_width="match_parent" android:layout_height="match_parent" /></LinearLayout>
只留下左边的碎片,并充满整个布局。 为单页模式下的布局。
在res下新建layout-large文件夹,在此目录下新建一个actvity_main.xml
<?xml version="1.0" encoding="utf-8"?><LinearLayout xmlns:android="http://schemas.android.com/apk/res/android" android:orientation="horizontal" android:layout_width="match_parent" android:layout_height="match_parent"><fragment android:id="@+id/left_fragment" android:name="com.example.yezhou.com.fragmenttest.left_fragment" android:layout_width="0dp" android:layout_weight="1" android:layout_height="match_parent"/><fragment android:id="@+id/right_fragment" android:name="com.example.yezhou.com.fragmenttest.right_fragment" android:layout_width="0dp" android:layout_height="match_parent" android:layout_weight="3" /> <!--android:name显示指明要添加的碎片类名一定要将类的包名也加上--></LinearLayout>
此布局文件中包含了两个碎片,即双页模式。
其中large为限定符,屏幕被认为是large的设备就会自动加载layout-large下的布局文件。
注释掉主页面java文件中的fragmentTransaction.replace(R.id.right_layout, fragment);
运行
可以看到手机的结果为 :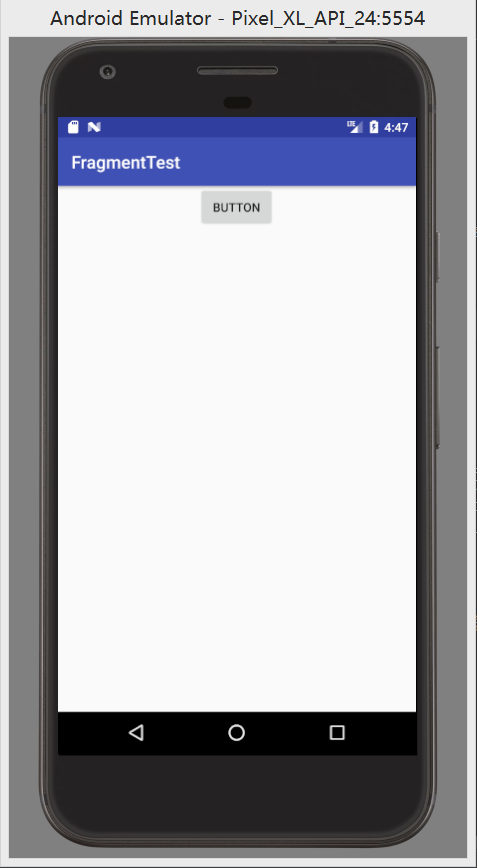
在平板下的运行结果 :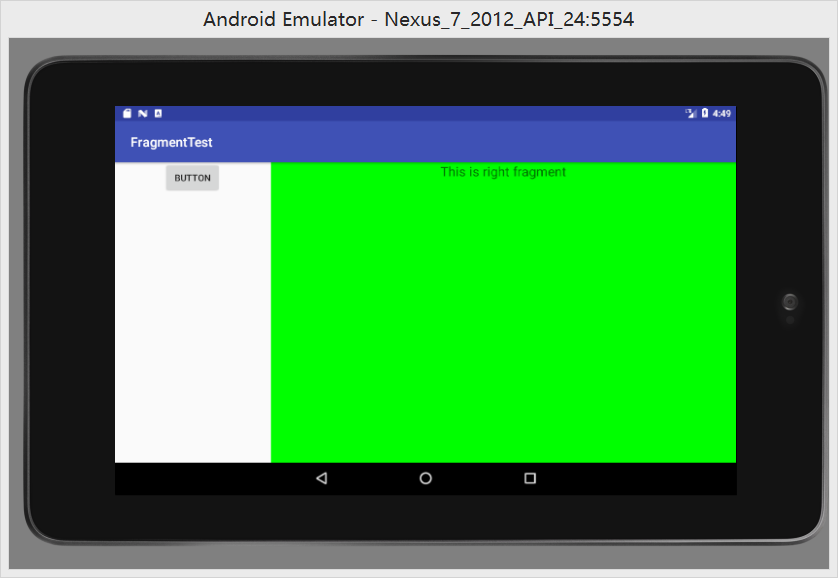
利用layout-large虽然可以在大屏幕上进行分页显示,但是怎样的屏幕会被定义为大,我们难以知晓。
最小宽度限定符(Smallest-width Qualifier)
layout-sw600dp 指屏幕宽度小于这个值的设备就加载另一个布局。
利用碎片的实践
实现一个简单的新闻应用。利用RecyclerView来显示所有新闻的标题
导包
compile 'com.android.support:recyclerview-v7:26.0.0-alpha1'
定义一个新闻类 :
public class News {private String title;private String content;public String getTitle() {return title;}public String getContent() {return content;}public void setTitle(String title) {this.title = title;}public void setContent(String content) {this.content = content;}}
新建布局news_content_frag.xml 用于显示新闻内容的碎片
<?xml version="1.0" encoding="utf-8"?> <RelativeLayout xmlns:android="http://schemas.android.com/apk/res/android" android:layout_width="match_parent" android:layout_height="match_parent"> <LinearLayout android:id="@+id/visibility_layout" android:layout_width="match_parent" android:layout_height="match_parent" android:orientation="vertical" android:visibility="invisible"><!--不可见--> <TextView android:id="@+id/news_title" android:layout_width="match_parent" android:layout_height="wrap_content" android:gravity="center" android:padding="10dp" android:textSize="20sp" /> <View android:layout_width="match_parent" android:layout_height="1dp" android:background="#000" /> <TextView android:id="@+id/news_content" android:layout_width="match_parent" android:layout_height="0dp" android:layout_weight="1" android:padding="15dp" </LinearLayout><!--头部分显示新闻标题,正文部分显示新闻内容中间用一条细线隔开--> <View android:layout_width="1dp" android:layout_height="match_parent" android:layout_alignParentLeft="true" android:background="#000" /> </RelativeLayout>
利用view height设为1dp来实现显示一条黑线,
新建一个类来控制新闻内容布局 :
public class NewsContentFragment extends Fragment {private View view;@Overridepublic View onCreateView(LayoutInflater inflater, ViewGroup container, Bundle savedInstanceState) {view = inflater.inflate(R.layout.news_content_frag,container,false);return view;}public void refresh(String newsTitle, String newsContent) {View visibilityLayout = view.findViewById(R.id.visibility_layout);visibilityLayout.setVisibility(View.VISIBLE);TextView newsTitleText = (TextView) view.findViewById(R.id.news_title);TextView newsContentText = (TextView) view.findViewById(R.id.news_content);newsTitleText.setText(newsTitle);newsContentText.setText(newsContent);}}
onCreateView()方法中把类与布局绑定,在refresh()中将新闻标题内容显示在界面上。
再创建一个Empty Activity,新建NewContentActivity,布局名改为news_content,更改布局 :
<?xml version="1.0" encoding="utf-8"?><LinearLayout xmlns:android="http://schemas.android.com/apk/res/android" android:orientation="vertical" android:layout_width="match_parent" android:layout_height="match_parent"><fragment android:id="@+id/news_content_fragment" android:name="com.example.yezhou.com.fragmentbestpractice.NewsContentFragment" android:layout_width="match_parent" android:layout_height="match_parent" /><!--直接在布局中引入来NewsContentFragment,相当于把news_contentfrag布局内容自动加来进来--></LinearLayout>
修改NewContentActivity :
public class NewsContentActivity extends AppCompatActivity {@Overrideprotected void onCreate(Bundle savedInstanceState) {super.onCreate(savedInstanceState);setContentView(R.layout.news_content);String newsTitle = getIntent().getStringExtra("news_title");String newsContent = getIntent().getStringExtra("news_content");NewsContentFragment newsContentFragment = (NewsContentFragment) getSupportFragmentManager().findFragmentById(R.id.news_content_fragment);newsContentFragment.refresh(newsTitle,newsContent);}public static void actionStart(Context context, String newsTitle, String newsContent) { // 由上一个活动调用,传入要传给这个活动的值Intent intent = new Intent(context,NewsContentActivity.class);intent.putExtra("news_title",newsTitle);intent.putExtra("news_content",newsContent);context.startActivity(intent);}}
利用上一个活动的Intent把对应的值传入到此碎片,再在碎片中显示出来。
创建一个显示新闻列表的布局
<?xml version="1.0" encoding="utf-8"?><LinearLayout xmlns:android="http://schemas.android.com/apk/res/android" android:orientation="vertical" android:layout_width="match_parent" android:layout_height="match_parent"><android.support.v7.widget.RecyclerView android:id="@+id/news_title_recycler_view" android:layout_width="match_parent" android:layout_height="match_parent" /></LinearLayout>
item :
<?xml version="1.0" encoding="utf-8"?><TextView xmlns:android="http://schemas.android.com/apk/res/android" android:id="@+id/news_title" android:layout_width="match_parent" android:layout_height="wrap_content" android:singleLine="true" android:ellipsize="end" android:textSize="18sp" android:paddingLeft="10dp" android:paddingRight="10dp" android:paddingTop="15dp" android:paddingBottom="15dp" />
activity_main.xml
显示单页模式下的内容
<?xml version="1.0" encoding="utf-8"?><FrameLayout xmlns:android="http://schemas.android.com/apk/res/android" android:id="@+id/news_title_layout" android:layout_width="match_parent" android:layout_height="match_parent" ><fragment android:id="@+id/news_title_fragment" android:name="com.example.yezhou.com.fragmentbestpractice.NewsTitleFragment" android:layout_width="match_parent" android:layout_height="match_parent"/></FrameLayout>
新建layout-sw600dp文件夹,再创建一个activity_main.xml :
<?xml version="1.0" encoding="utf-8"?><LinearLayout xmlns:android="http://schemas.android.com/apk/res/android" android:orientation="horizontal" android:layout_width="match_parent" android:layout_height="match_parent"><fragment android:id="@+id/news_title_fragment" android:name="com.example.yezhou.com.fragmentbestpractice.NewsTitleFragment" android:layout_width="0dp" android:layout_height="match_parent" android:layout_weight="1"/><FrameLayout android:id="@+id/news_content_layout" android:layout_width="0dp" android:layout_height="match_parent" android:layout_weight="3" ><fragment android:id="@+id/news_content_fragment" android:name="com.example.yezhou.com.fragmentbestpractice.NewsContentFragment" android:layout_width="match_parent" android:layout_height="match_parent" /></FrameLayout></LinearLayout>
此布局为双页显示下的布局,左边显示的是新闻的标题(NewsTitleFragment此类与RecyclerView相绑定news_title_frag、news_itme),右边显示的是新闻的具体内容。
创建NewsTitleFragment用于显示新闻列表的碎片
public class NewsTitleFragment extends Fragment {private boolean isTwoPane;@Overridepublic View onCreateView(LayoutInflater inflater, ViewGroup container, Bundle savedInstanceState) {View view = inflater.inflate(R.layout.news_title_frag,container,false); // this errorRecyclerView newsTitleRecyclerView = (RecyclerView) view.findViewById(R.id.news_title_recycler_view);LinearLayoutManager layoutManager = new LinearLayoutManager(getContext());newsTitleRecyclerView.setLayoutManager(layoutManager);NewsAdapter adapter = new NewsAdapter(getNews());newsTitleRecyclerView.setAdapter(adapter);return view;}@Overridepublic void onActivityCreated(Bundle savedInstanceState) {super.onActivityCreated(savedInstanceState);if (getActivity().findViewById(R.id.news_content_layout) != null) { // this errorisTwoPane = true;} else {isTwoPane =false;}}private List<News> getNews() {List<News> newsList = new ArrayList<>();for (int i = 1; i <= 50; i++) {News news = new News();news.setTitle("This is news title " + i);news.setContent(getRandomLengthContent("This is news content " + i + "."));newsList.add(news);}return newsList;}private String getRandomLengthContent(String content) {Random random = new Random();int length = random.nextInt(20) + 1;StringBuilder builder = new StringBuilder();for (int i = 0; i < length; i++) {builder.append(content);}return builder.toString();}class NewsAdapter extends RecyclerView.Adapter<NewsAdapter.ViewHolder> { // 可以直接访问NewsTitleFragment的变量private List<News> mNewsList;class ViewHolder extends RecyclerView.ViewHolder {TextView newsTitleText;public ViewHolder(View view) {super(view);newsTitleText = (TextView) view.findViewById(R.id.news_title);}}public NewsAdapter(List<News> newsList) {mNewsList = newsList;}@Overridepublic ViewHolder onCreateViewHolder(ViewGroup parent, int viewType) {View view = LayoutInflater.from(parent.getContext()).inflate(R.layout.news_item, parent, false);final ViewHolder holder = new ViewHolder(view);view.setOnClickListener(new View.OnClickListener() {@Overridepublic void onClick(View v) {News news = mNewsList.get(holder.getAdapterPosition());int a = holder.getAdapterPosition();Log.d("admin","Position:"+a);if (isTwoPane) { // 如果是双页模式,则刷新NewsContentFragment中的内容NewsContentFragment newsContentFragment = (NewsContentFragment) getFragmentManager().findFragmentById(R.id.news_content_fragment);newsContentFragment.refresh(news.getTitle(),news.getContent());} else {Log.d("admin", "title:"+news.getTitle() + "content:" + news.getContent());NewsContentActivity.actionStart(getActivity(), news.getTitle(), news.getContent());}}});return holder;}@Overridepublic void onBindViewHolder(ViewHolder holder, int position) {News news = mNewsList.get(position);holder.newsTitleText.setText(news.getTitle());}@Overridepublic int getItemCount() {return mNewsList.size();}}}
- 在onCreateView()方法中加载news_title_frag布局,title列表的绑定,
- 在onActivityCreated()方法通过在活动中寻找news_content_layoutd(NewsContentActivity)的View类判断单双页模式,如果系统创建的是layout-sw600dp下的主布局文件,那么会出现内容的View,而如果的是layout下的布局文件的话,其下只有一个Title碎片会显示出来。
- 建一个内部类作为标题列表的适配器,在ViewHolder中存放标题信息,判断为双页模式时点击item,显示相应item的具体内容;为单页模式,点击item时直接启动NewContentActivity。
手机端的显示效果 :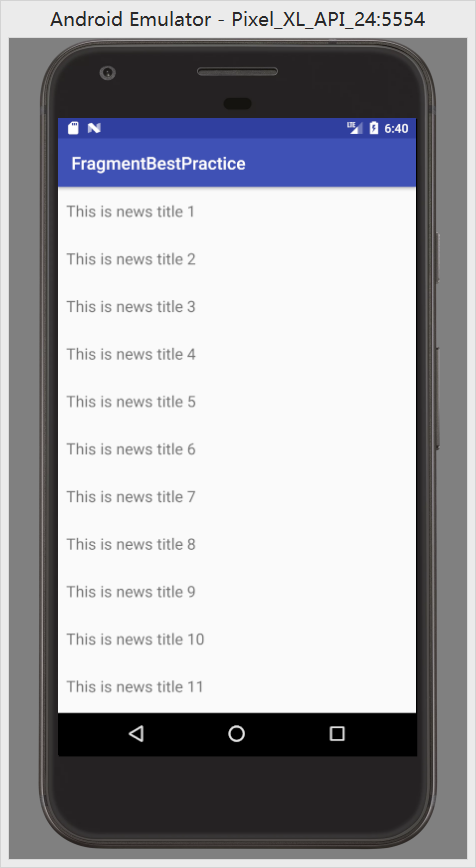
点击item :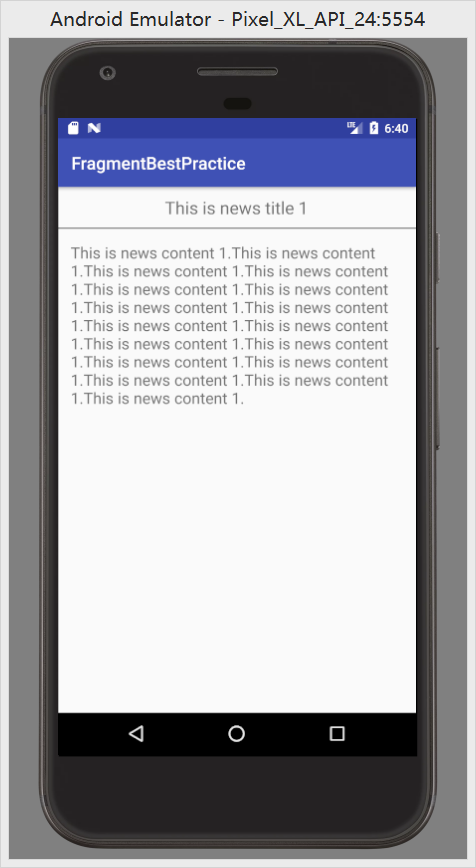
平板下的显示效果 :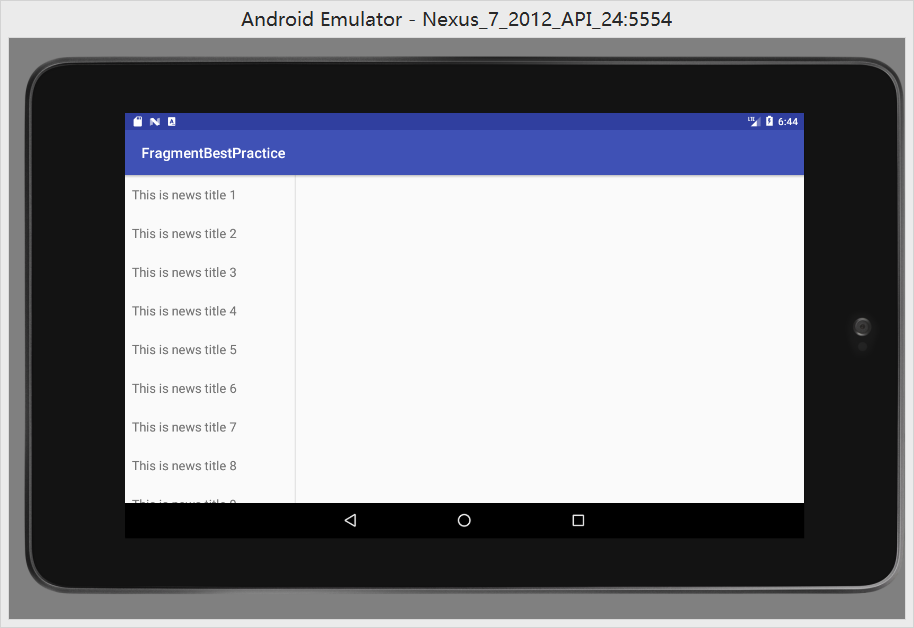

此博文为个人学习笔记,仅供个人学习使用,希望对大家有帮助。


还没有评论,来说两句吧...